Running your website
Orders, invoices and plans (Pro)
Record client orders and their progress, record payments, print invoices and receipts in the selling business's name, and keep track of service plans, rentals, leases and contracts with renewal reminders.
On this page
When a client buys something from one of your businesses, record it as an order on the client's page. The order shows its progress ("Installation booked for Thursday"), what's been paid, and a printable invoice and receipt in the selling business's name under the parent company's details. Your client sees all of this in their client area.
Things that keep running, such as a machine rental, a lease or a maintenance contract, are plans. The website emails you and the client before each renewal.
Everything in this chapter is part of Pro: features marked (Pro) need a Pro or Agency licence.
How to add an order
- Go to Group → Clients and open the client.
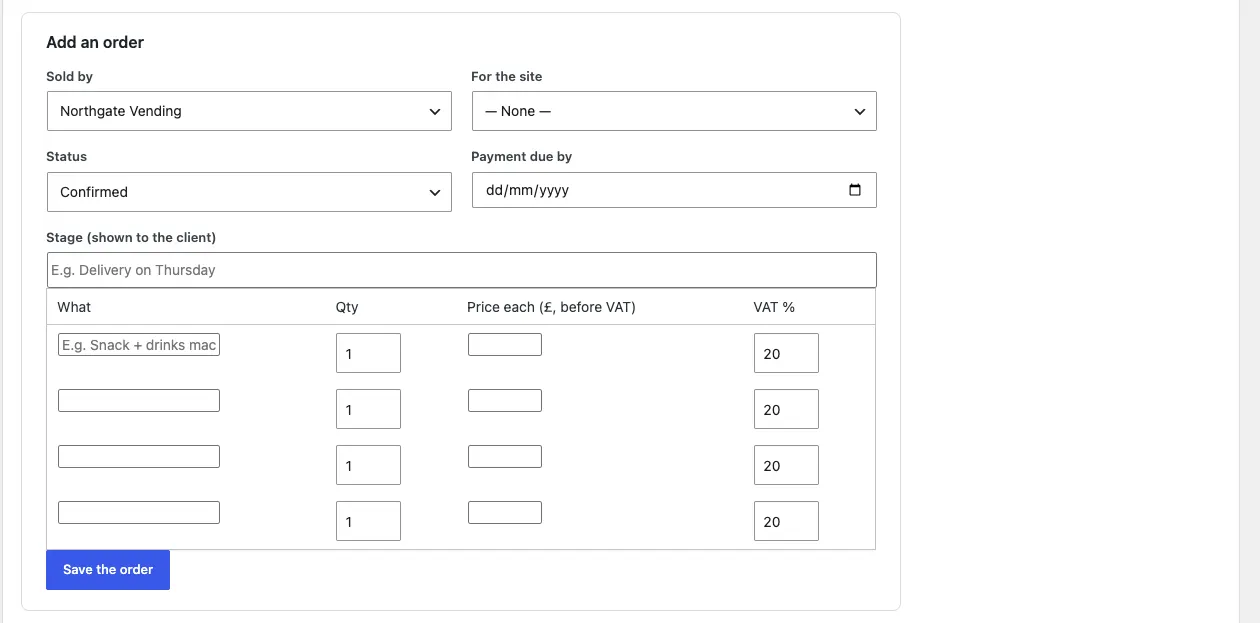
- In Orders, click Add an order.
- Choose who it's Sold by (the business) and, if it's for one place, For the site.
- Choose the Status: Quote, Confirmed, In progress or Delivered.
- Set Payment due by if there's a due date.
- Type a Stage (shown to the client), for example "Delivery on Thursday".
- Fill in a line for each thing they're buying: What, Qty, Price each (£, before VAT) and VAT %. There are four lines; leave the ones you don't need empty.
- Click Save the order.
The order gets a number such as NO-1004 and appears at the top of the client's Orders.
How to update an order's progress
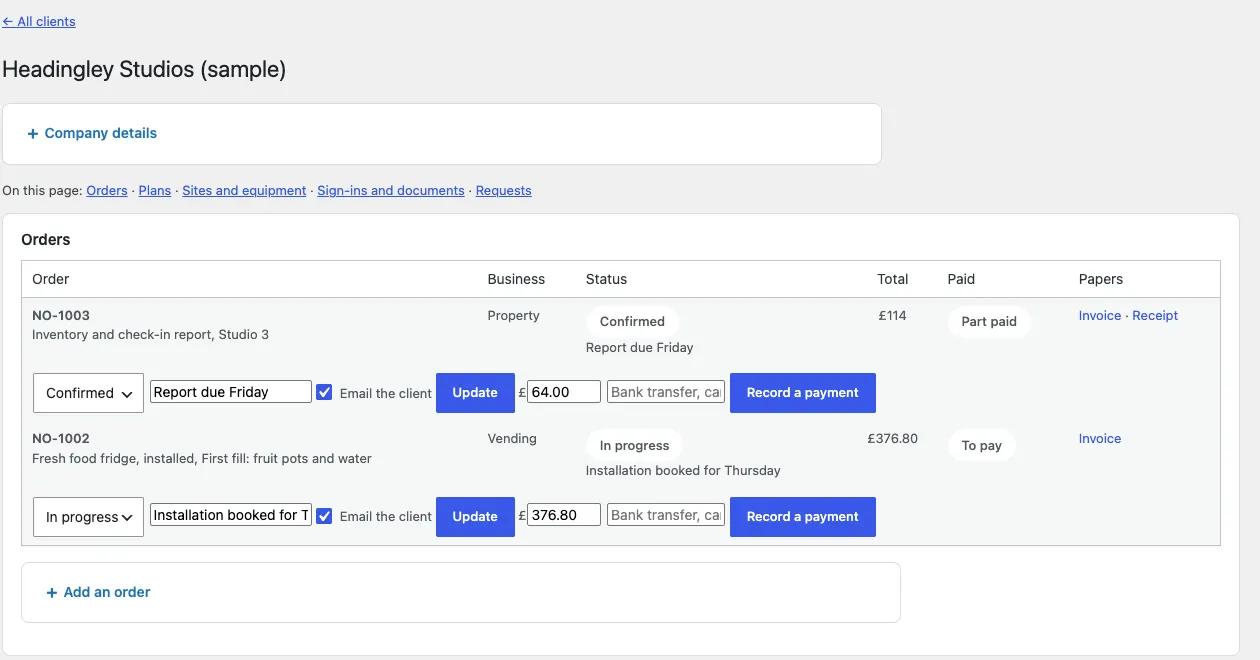
Each order on the client's page has its own controls underneath it.
- Choose the new status in the drop-down: Quote, Confirmed, In progress, Delivered or Cancelled.
- Change the stage line, for example "Installation booked for Thursday".
- Leave Email the client ticked to send the client an "Order update" email, or untick it to change it quietly.
- Click Update.
How to record a payment
For money you've taken by card, cash or bank transfer:
- Under the order, check the amount in the £ box. It starts at what's left to pay.
- Type how it was paid in the box beside it, for example "Bank transfer".
- Click Record a payment.
The Paid column changes to Part paid or Paid, and a Receipt link appears.
Invoices and receipts
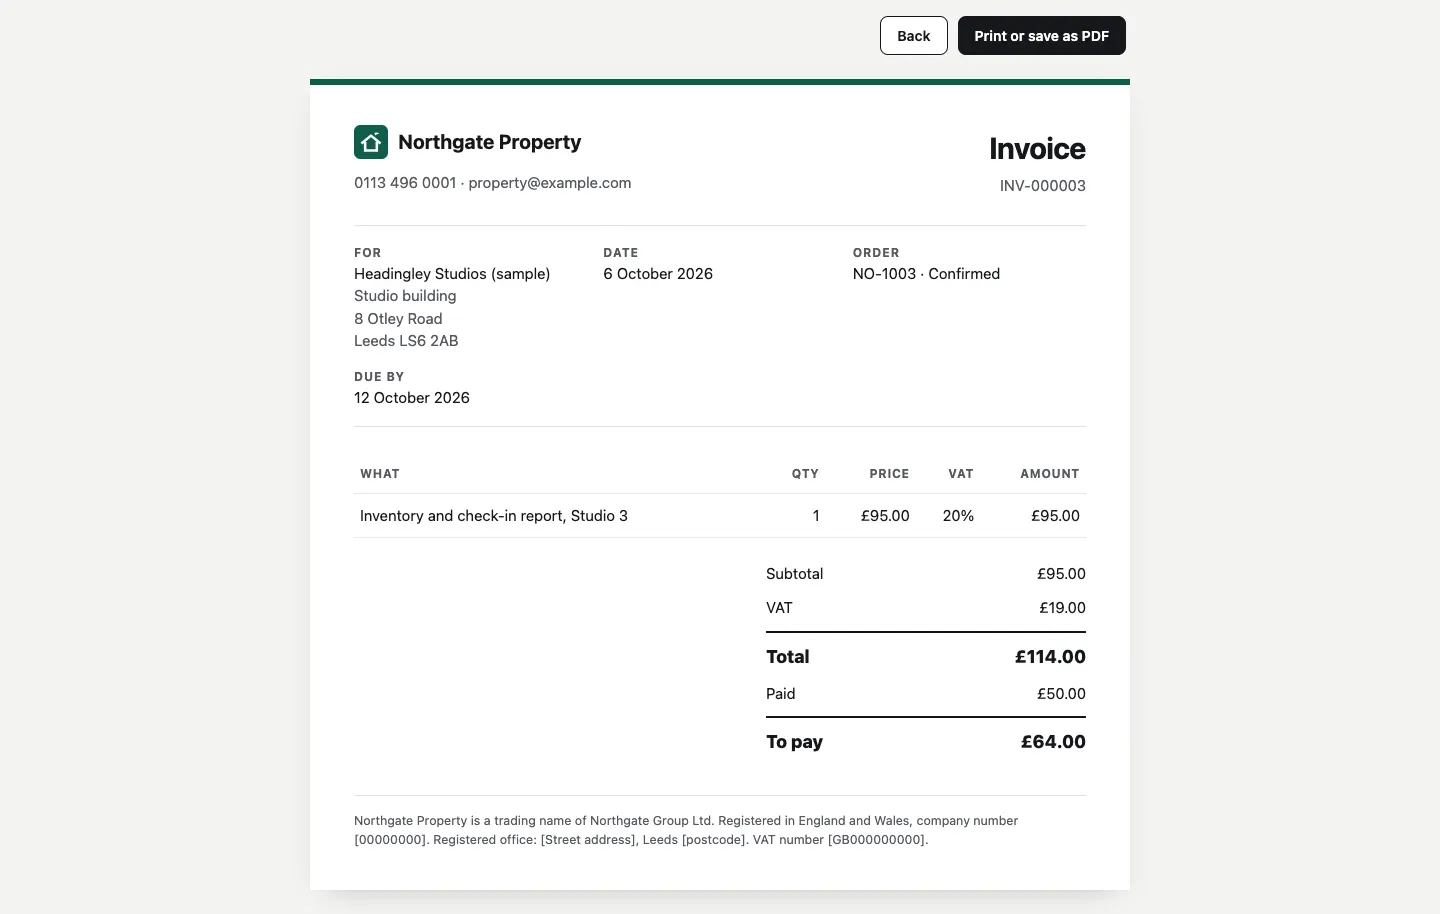
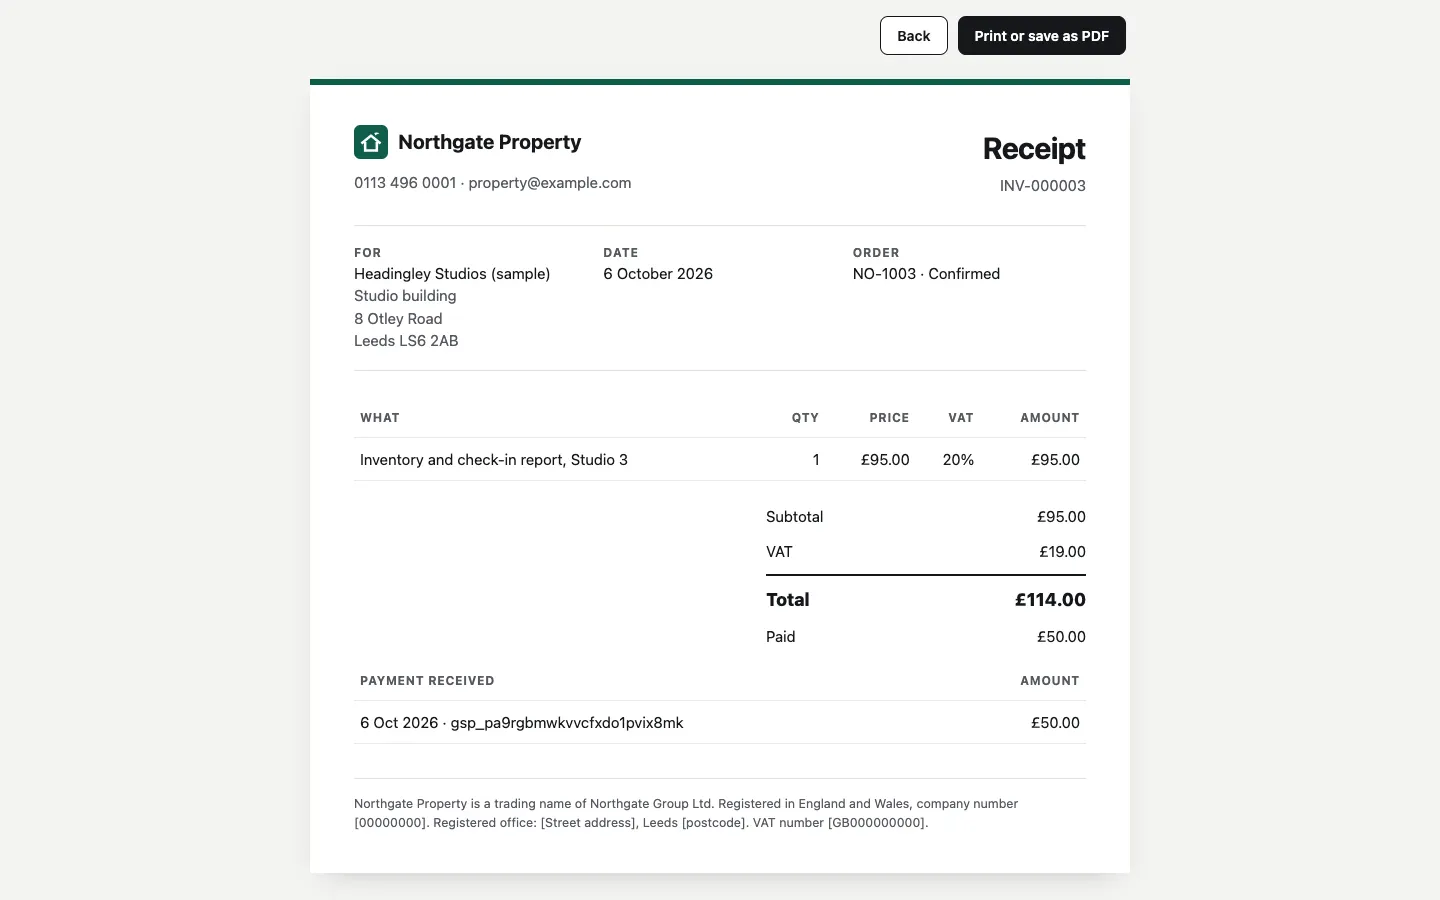
Click Invoice or Receipt next to an order. It opens as a printable page with:
- the selling business's name, phone and email at the top,
- who it's for (the client and site), the date, the order number and status, and the due date,
- each line with quantity, price, VAT and amount, the subtotal, VAT, total, what's been paid and what's left to pay,
- at the bottom, the parent company's details: "Northgate Property is a trading name of Northgate Group Ltd", the company number, registered office and VAT number.
Click Print or save as PDF to print it or save it. The client can open the same invoice from their client area.
The parent company's details come from Group → Settings → Business (registered name, company number, VAT number and registered office). Fill them in before you send your first invoice.
All orders in one place
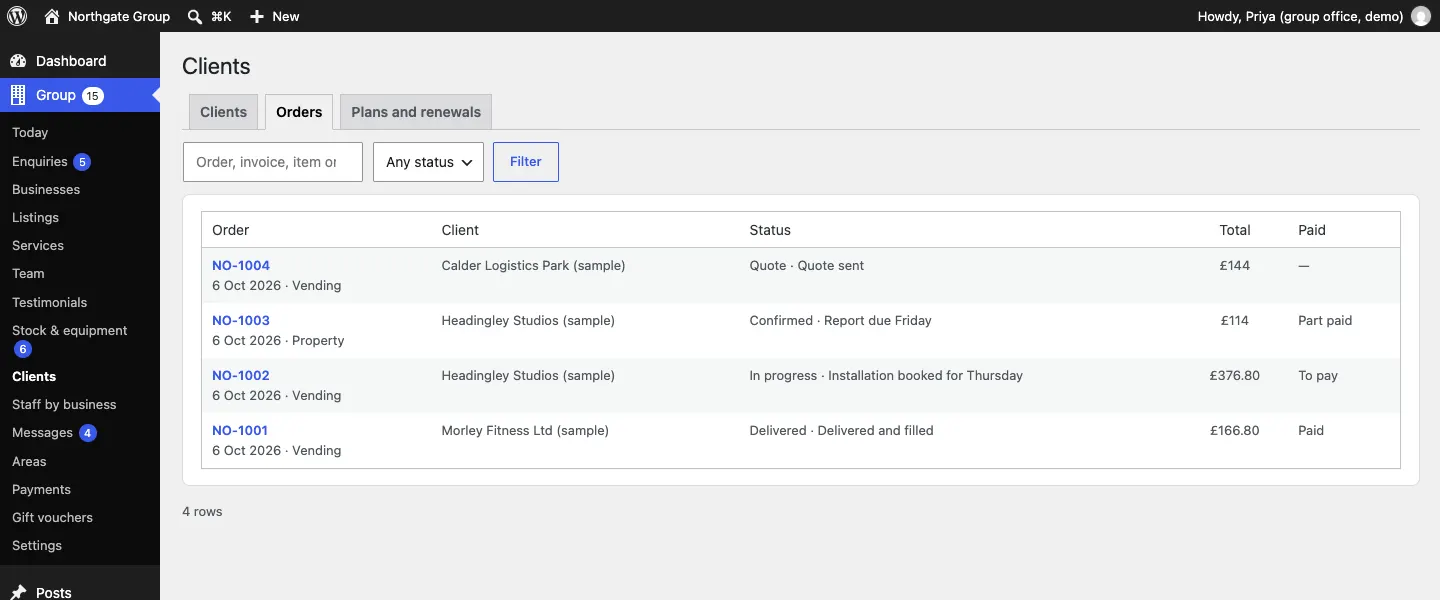
Group → Clients → Orders lists every order across all clients. Search, or filter by Status, then click an order number to go to it on the client's page.
Shop orders from WooCommerce
If you also sell through a WooCommerce shop on the same website, shop orders bought by a client's people are linked to their account automatically and show with their orders. For any other shop order, open it in WooCommerce and choose the client in its Client account box.
Plans, rentals and contracts
How to add a plan
- Open the client and go to Plans, rentals and contracts.
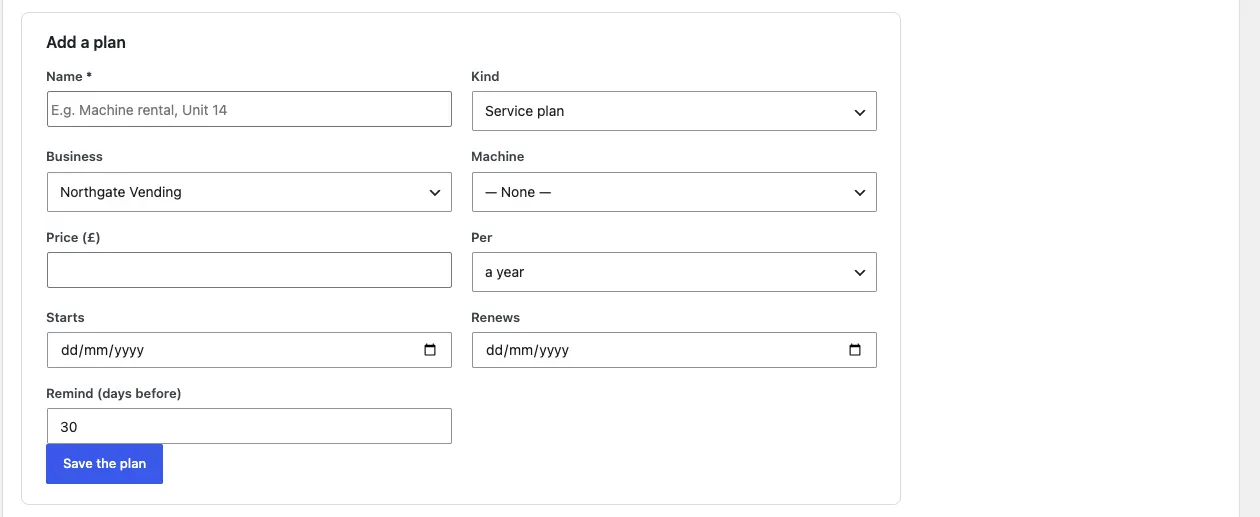
- Click Add a plan.
- Type its Name, for example "Machine rental, Unit 14".
- Choose the Kind: Service plan, Rental, Lease or Maintenance contract.
- Choose the Business and, if it's about one machine, the Machine.
- Fill in the Price (£) and Per (for example a month or a year).
- Set when it Starts and when it Renews.
- Set Remind (days before): how many days before the renewal date you and the client are emailed.
- Click Save the plan.
When a plan renews
Before each renewal date, the "Plan renewing soon" email goes to the client and the business. Once the renewal is agreed (and paid, if needed), click Renewed next to the plan. Its renewal date moves on by one period.
All plans in one place
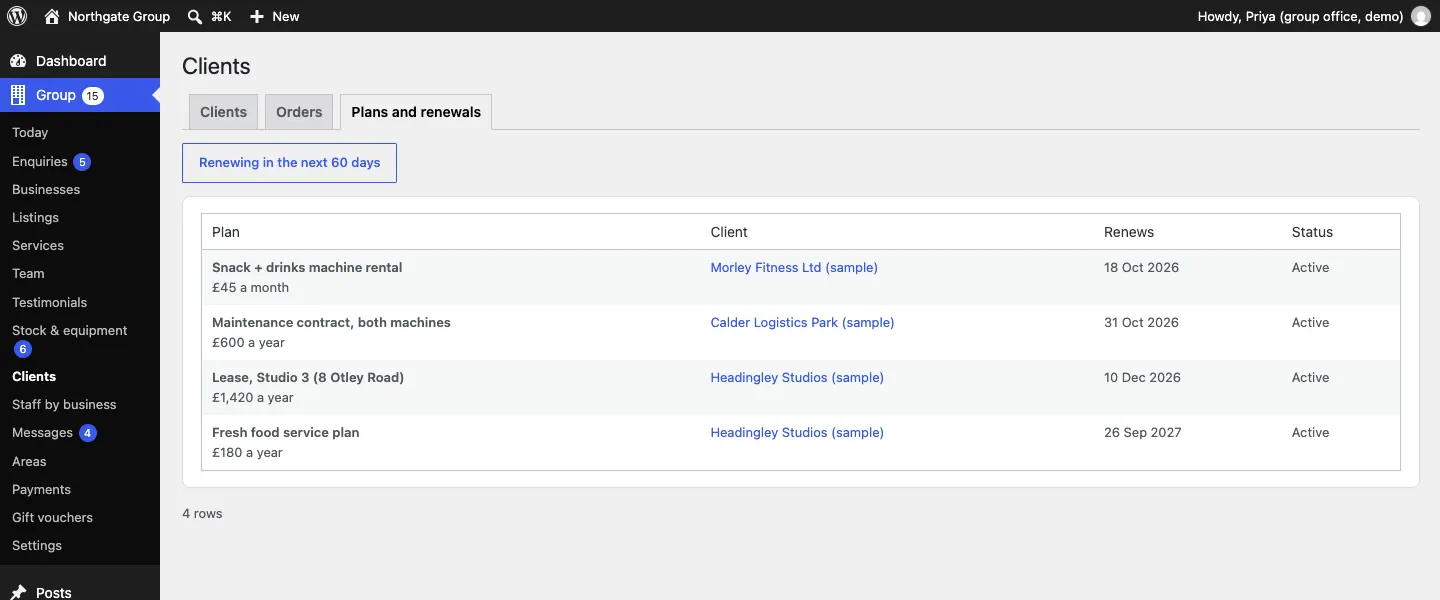
Group → Clients → Plans and renewals lists every plan with its client, renewal date and status. Click Renewing in the next 60 days to see only those coming up.
Plans renewing in the next 30 days are also counted on Group → Today (see Running the website day to day).