Running your website
Your church app (MaSym) (Pro)
Showing the events and special programmes from your church app on the website, Register and Join on Zoom buttons, matching congregations, and the Log in page.
On this page
Some churches run their events, registrations and member accounts in a church app, such as MaSym (or another app built the same way on Google Firebase). The website can show that app's events and special programmes beside your own, with Register buttons that open the app. Registrations, tickets and confirmation emails all stay in the app. The website only reads what the app makes public; it never changes anything in the app.
Everything in this chapter needs a Pro or Agency licence. If your church doesn't use a church app, you can skip it.
What you need first
Ask whoever looks after your app for:
- The app's web address (for example https://yourchurch.web.app)
- its Firebase project ID (usually the first part of that address)
- its App ID, so the website can read the app's list of churches
They are in the app's Firebase settings. None of them is a password.
How to connect the app
An administrator does this once.
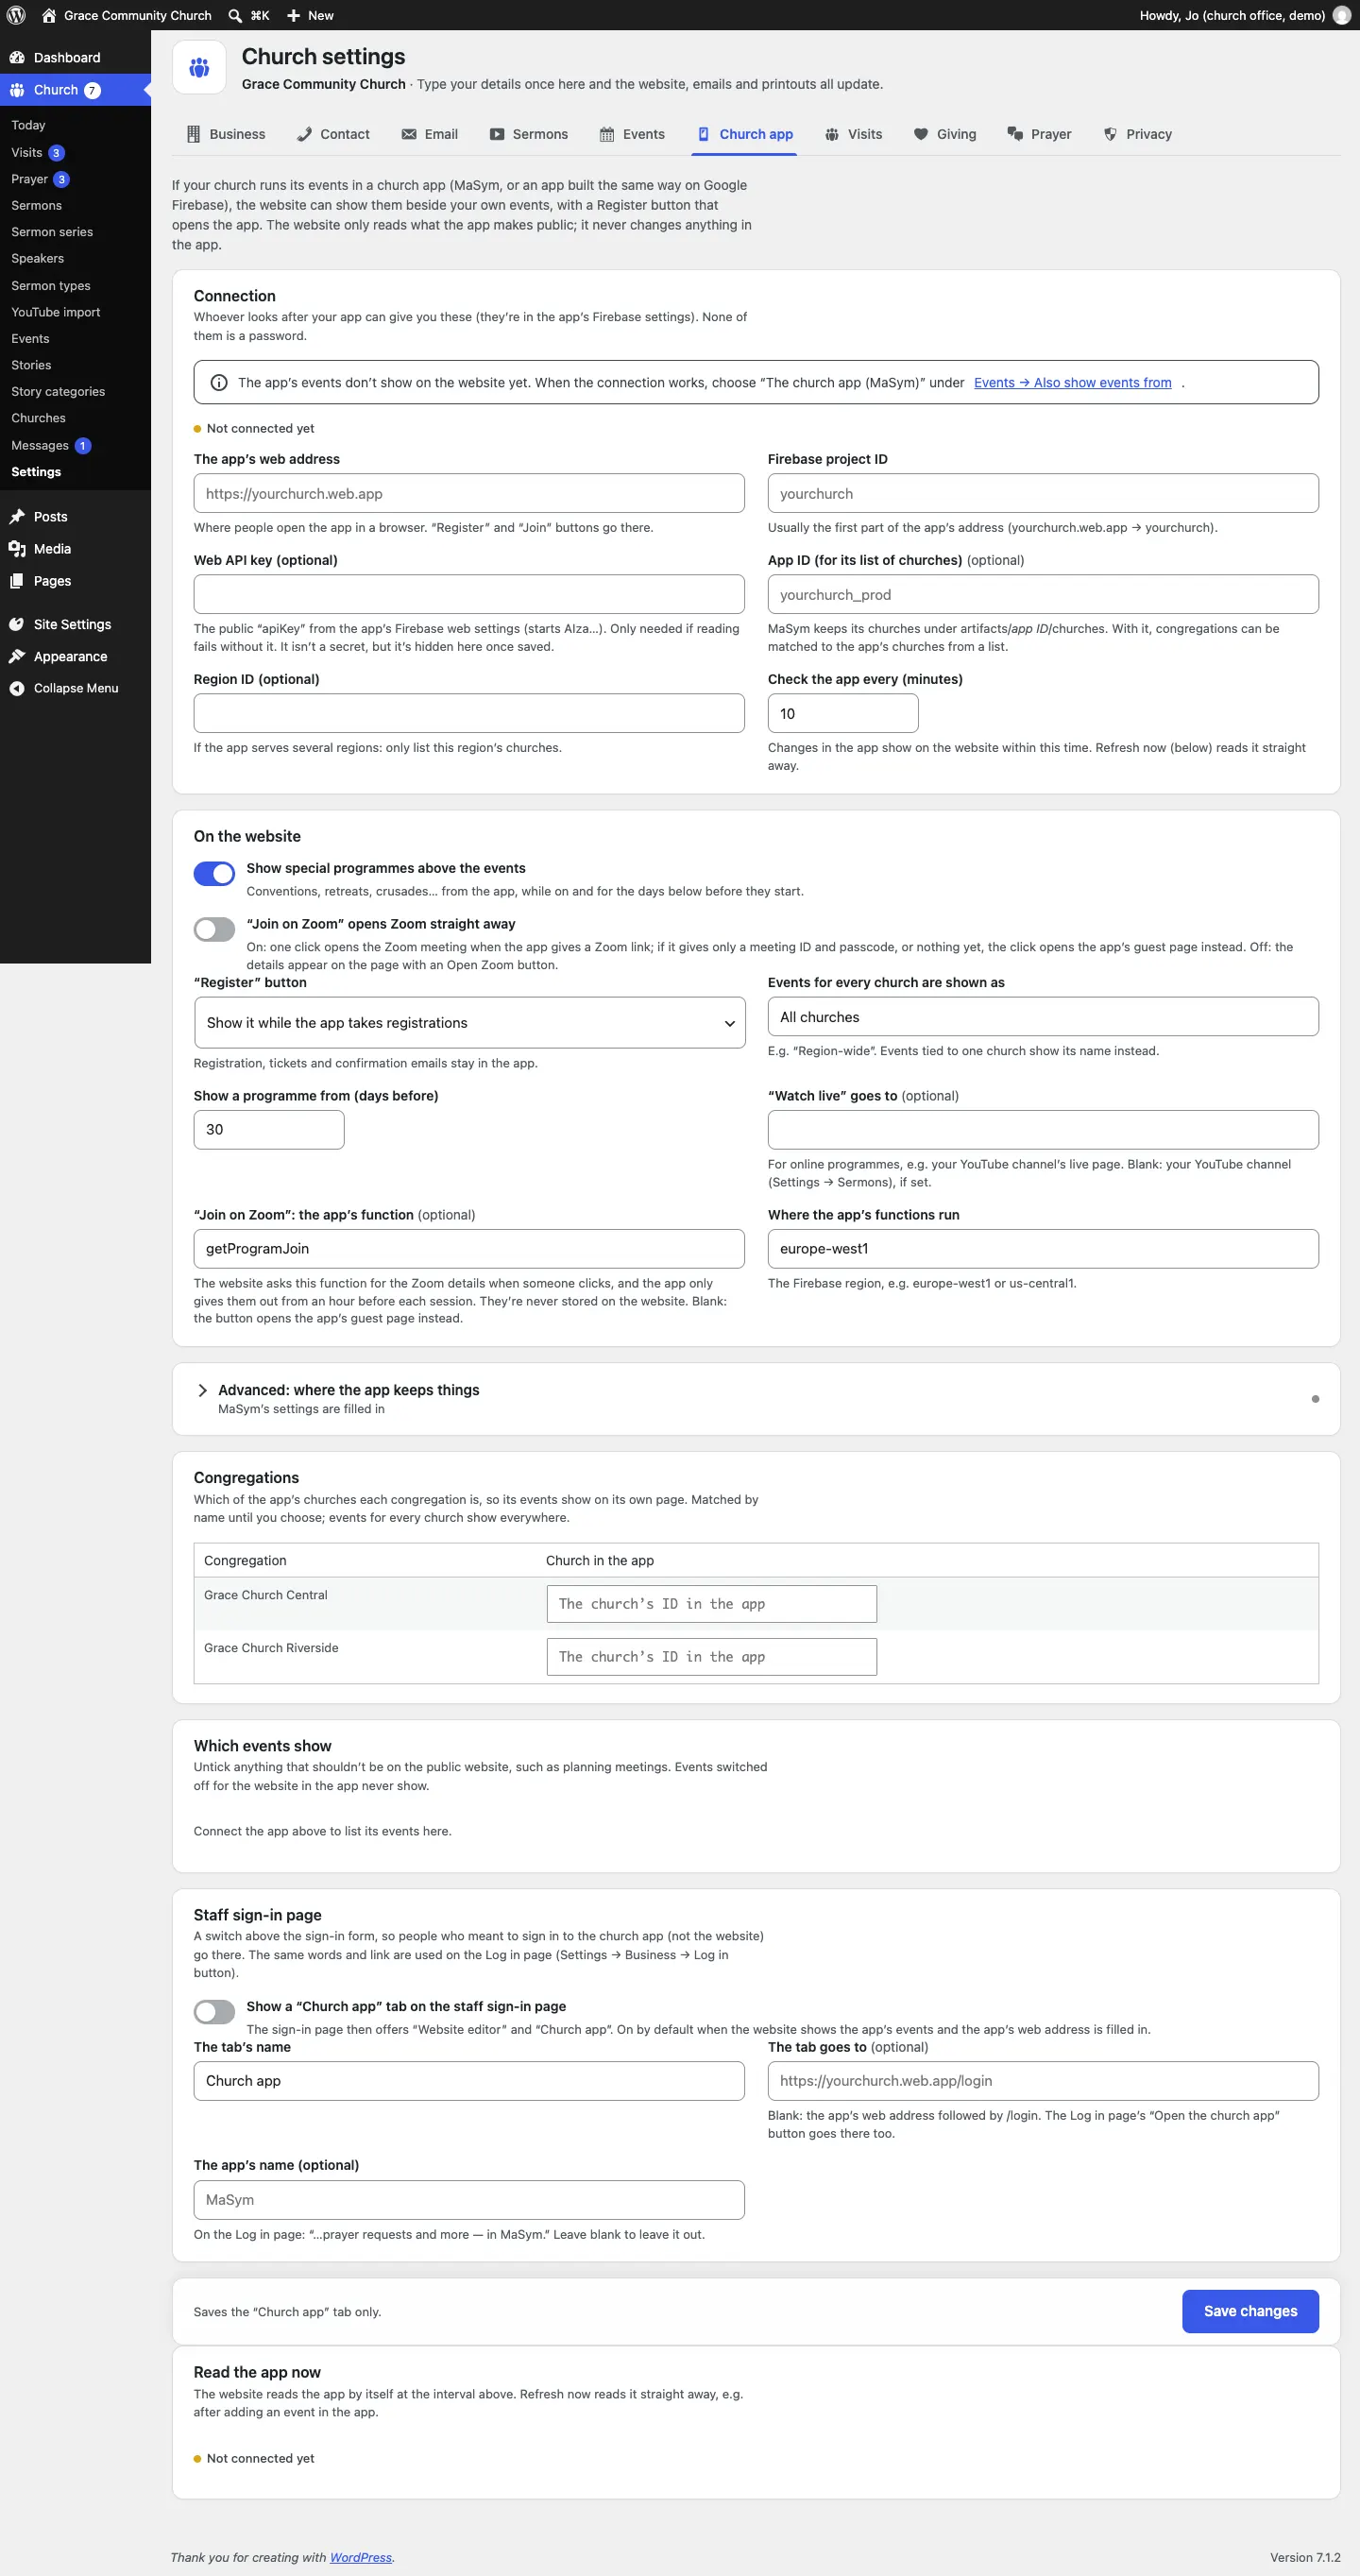
- Go to Church → Settings → Church app.
- Under Connection, fill in The app's web address and Firebase project ID.
- Add the App ID (for its list of churches) (optional). If the app serves several regions, add the Region ID (optional) to list only yours.
- Leave Web API key (optional) empty unless reading the app fails without it.
- Check the app every (minutes) is 10 by default. Changes in the app show on the website within this time.
- Click Save changes. The status line under Connection should change from Not connected yet to Connected, with how many events, churches and special programmes it read.
How to match your congregations
- Still on the Church app tab, go to Congregations.
- Check each congregation is matched to the right church in the app. They're matched by name until you choose. Choose Not in the app for any that aren't.
- Click Save changes.
Each congregation's page then shows its own events and those for every church.
How to choose which events show
- Under Which events show, untick anything that shouldn't be on the public website, such as planning meetings. Events switched off for the website in the app never show.
- Click Save changes.
How to switch the app's events on
- Go to the Events tab.
- Set Also show events from to The church app (MaSym).
- Click Save changes.
The app's events now appear on the Events page, the home page, each church's page and Today. They are added and changed in the app, not here: they don't appear in the Church → Events list, and a note at the top of that list says how many there are.
To stop showing them, set Also show events from back to Nowhere else (only the events added here). Your connection settings are kept.
The buttons on the website
Under On the website on the Church app tab:
- "Register" button: Show it while the app takes registrations, Also link other events to their page in the app, or Don't link to the app.
- Events for every church are shown as: the label for events that aren't tied to one church, for example "Region-wide".
- Show special programmes above the events: conventions, retreats and similar programmes from the app show above the events while they're on, and for the number of days in Show a programme from (days before) (30 by default).
- "Watch live" goes to (optional): for online programmes, for example your YouTube channel's live page. Blank: your YouTube channel from Settings → Sermons.
- "Join on Zoom" opens Zoom straight away: on, one click opens the Zoom meeting when the app gives a Zoom link. Off (the default), the details appear on the page with an Open Zoom button.
- "Join on Zoom": the app's function (optional) and Where the app's functions run: the website asks the app for the Zoom details only when someone clicks, and the app only gives them out from an hour before each session. They're never stored on the website. Leave the function blank and the button opens the app's guest page instead.
Keeping it up to date
- After adding an event in the app, click Refresh now under Read the app now at the bottom of the tab to see it straight away.
- If the app can't be reached, the website keeps showing the last events it read, and a red number appears on Events. Try Refresh now later, or check the address and project ID.
The Log in page and the "Church app" tab
When your church has an app, most people who look for "Log in" on the website mean the app, not the website. So the website can help them:
- A "Church app" tab on the staff sign-in page: the sign-in page then offers Website editor and Church app.
- A Log in page (at yourchurch.org/login) that asks Where would you like to go?: the Church app (for members, workers and leaders) or the Website (for the people who keep it up to date).
- A small Log in button in the website's header.
To set them up:
- On the Church app tab, under Staff sign-in page, switch on Show a "Church app" tab on the staff sign-in page. (It's on by default once the website shows the app's events and the app's web address is filled in.)
- Change The tab's name if you like (default "Church app") and The tab goes to (optional) (blank: the app's address followed by /login).
- Fill in The app's name (optional), for example "MaSym", to add "— in MaSym." to the Log in page.
- Click Save changes.
- Go to the Business tab. Under Log in button, click Create the Log in page.
- Check Show a Log in button in the header and click Save changes.
After that, Edit the Log in page opens it like any other page, and Use the kit's layout again puts the original layout back. The staff sign-in page itself stays at yourchurch.org/wp-login.php. See The staff sign-in page.