Setting up
The setup wizard
The step-by-step screen that gets a new church website ready: where you meet, your service times, your YouTube channel, and the starter pages, sample sermons, events, stories and photos.
On this page
The setup wizard is a short series of screens that asks for what your church website needs before it can welcome visitors: your church's name, how people reach you, where and when you meet, and your YouTube channel if you stream or upload sermons. At the end it can add a full set of ready-made pages, a main menu, sample photos and a few sample sermons, events and stories, so you start from a finished-looking website instead of blank pages.
It takes about five minutes. Everything you type can be changed later, and nothing you skip is lost.
This page covers the Church kit's wizard step by step. For the wizard in general (how the steps, Back and Skip for now work), see The setup wizard in the shared chapters.
When the wizard opens
The wizard opens by itself the first time you sign in to WordPress after you switch on the Church kit plugin (a plugin is an add-on for WordPress) and the Church theme. See Installing.
Until you finish it, a reminder appears at the top of the Dashboard, the Plugins and Themes screens and the Church screen. Click Continue setup to go back to where you left off.

How to run the setup wizard again
- Go to Church → Settings.
- Click Run setup again at the top right.

Running it again is safe. It never adds a church with the same name twice, the starter content step never makes copies, and pages you have edited are left alone.
The steps
The bar at the top shows all eight steps. A green tick means the step is saved. You can click any step's name to jump to it.
Step 1: Welcome
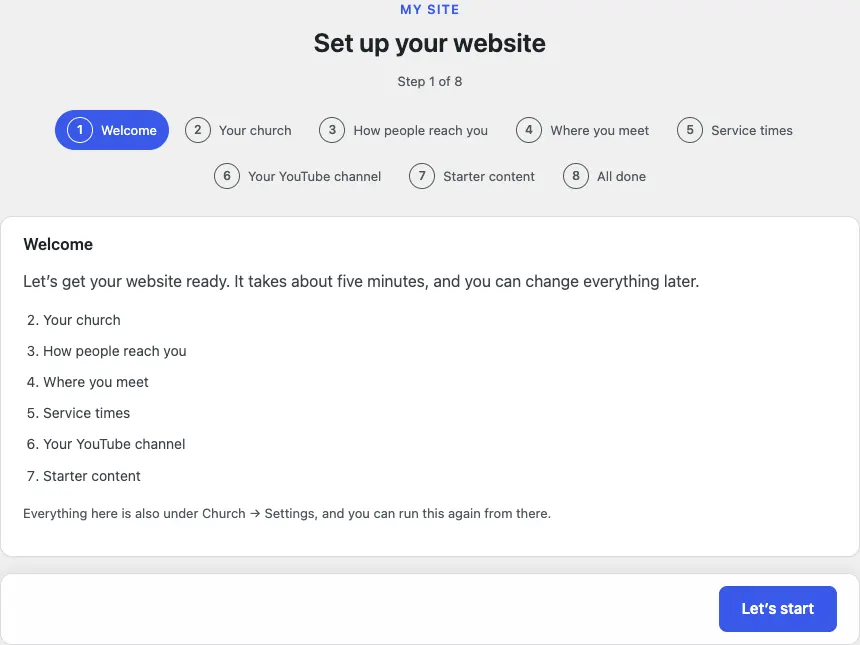
The first screen lists the steps ahead and reminds you that everything is also under Church → Settings.
- Read the list. It is numbered the same way as the steps in the bar at the top.
- Click Let's start.
Step 2: Your church
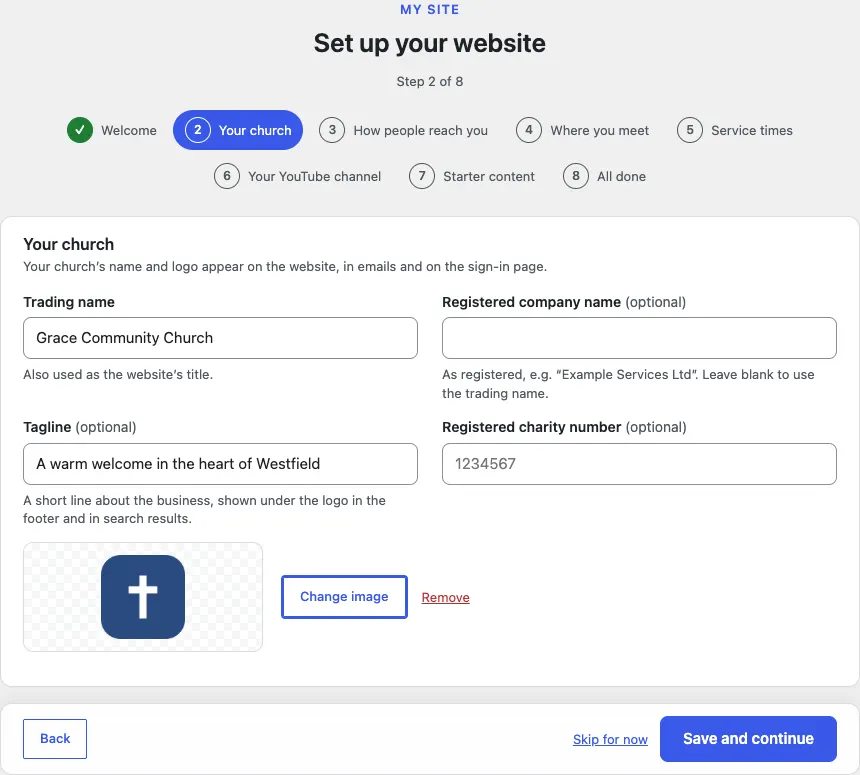
Your church's name and logo appear on the website, in emails and on the staff sign-in page.
-
In Trading name, type your church's name as people know it, for example "Grace Community Church". It is also used as the website's title.
-
In Registered company name (optional), type the name of the legal body only if your church is registered as a company. Leave it blank otherwise.
-
In Tagline (optional), type a short welcome line. It shows under the logo and in search results.
-
In Registered charity number (optional), type your charity number if you have one. It shows in the footer.
-
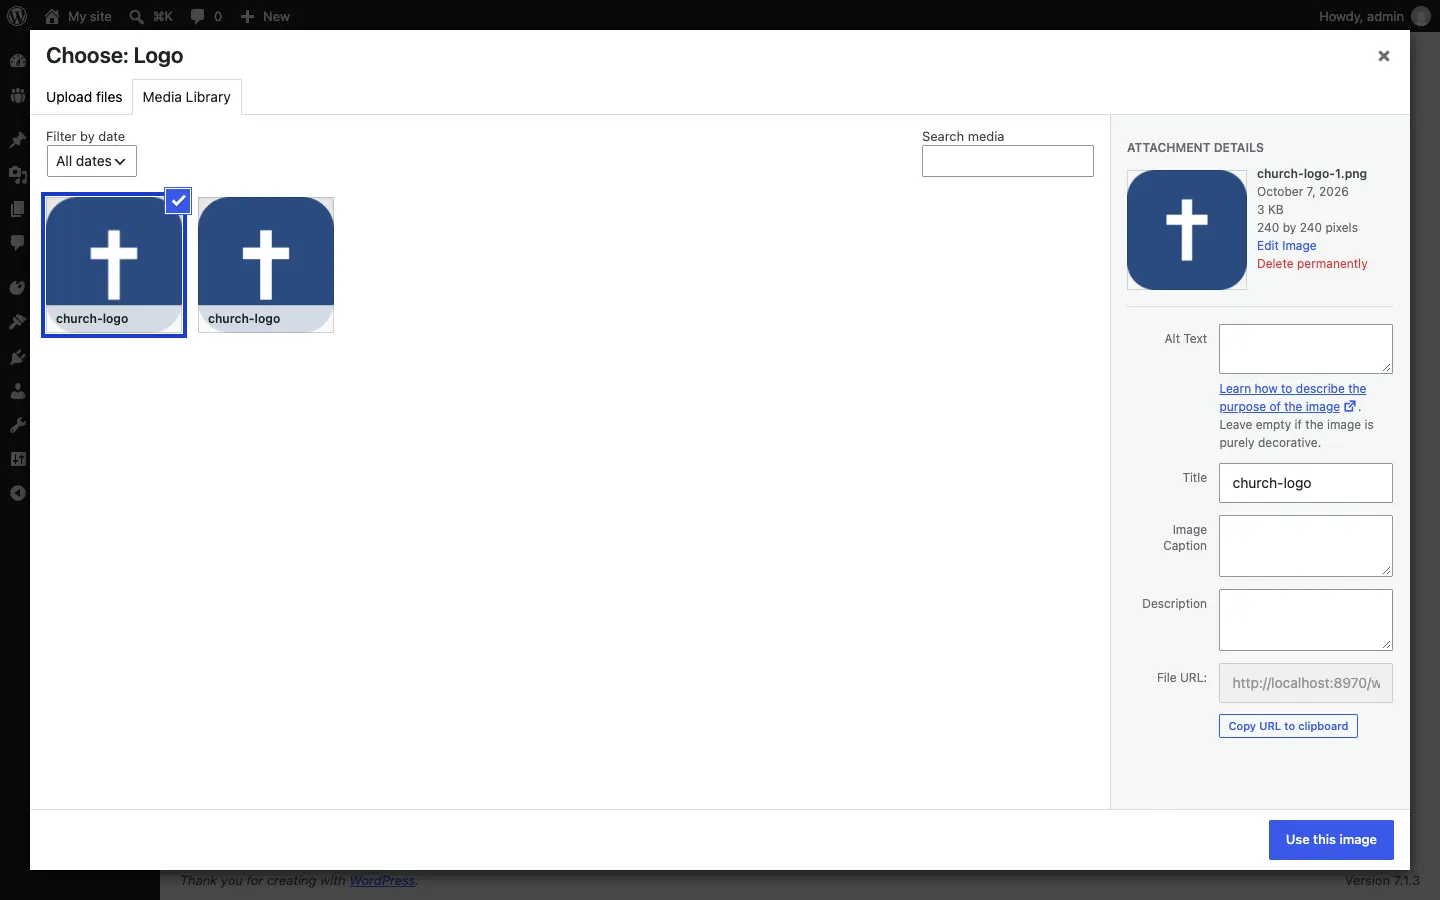
Under the boxes, click Choose image. The media library opens.
-
Click Upload files and choose your logo from your computer (or pick one you've already uploaded in Media Library), then click Use this image.
-
The logo now shows in the box, with Change image and Remove next to it. You can also leave it and add it later.
-
Click Save and continue.
Step 3: How people reach you
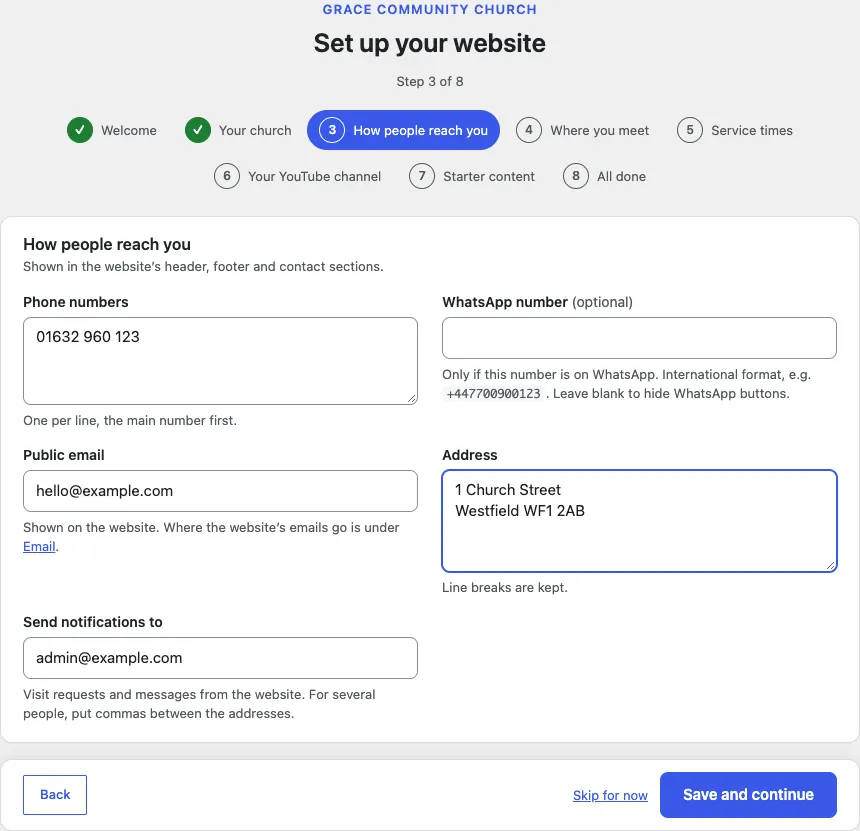
These details show in the website's header, footer and contact sections.
- In Phone numbers, type your numbers, one per line, the main number first.
- In WhatsApp number (optional), type a number only if it is on WhatsApp, in international format (for example +447700900123). Leave it blank to hide the WhatsApp buttons.
- In Public email, type the address you want people to see.
- In Address, type the church office's address. Line breaks are kept.
- In Send notifications to, type the address that should get visit requests and messages from the website. For several people, put commas between the addresses.
- Click Save and continue.
Step 4: Where you meet
This is your church's address. If you meet in more than one place (several congregations or sites), add each one. Each place gets its own page on the website, its own colour and its own "Plan a visit" emails.
The first box, Your church, starts with the name you typed in step 2.
- Check the Name.
- In Short name (optional), type a short name to use where space is tight, for example "Northside".
- In Building (optional), type the building's name if it has one, for example "Grace Hall".
- Fill in Street address, Town or city and Postcode.
- In Email for visit requests, type the address that should hear when someone plans a visit to this place. It starts with your public email.
- In Phone (optional), type this place's number.
- Under Colour, choose a colour for this place. Site colours uses your website's own colours; the others are Sky, Teal, Violet, Amber, Green, Rose and Sand.
- If you meet somewhere else too, fill in the box Another place you meet (2, optional). To add a third or fourth, click Add another place. Leave the extra boxes empty if you only meet in one place.
- Click Save and continue.
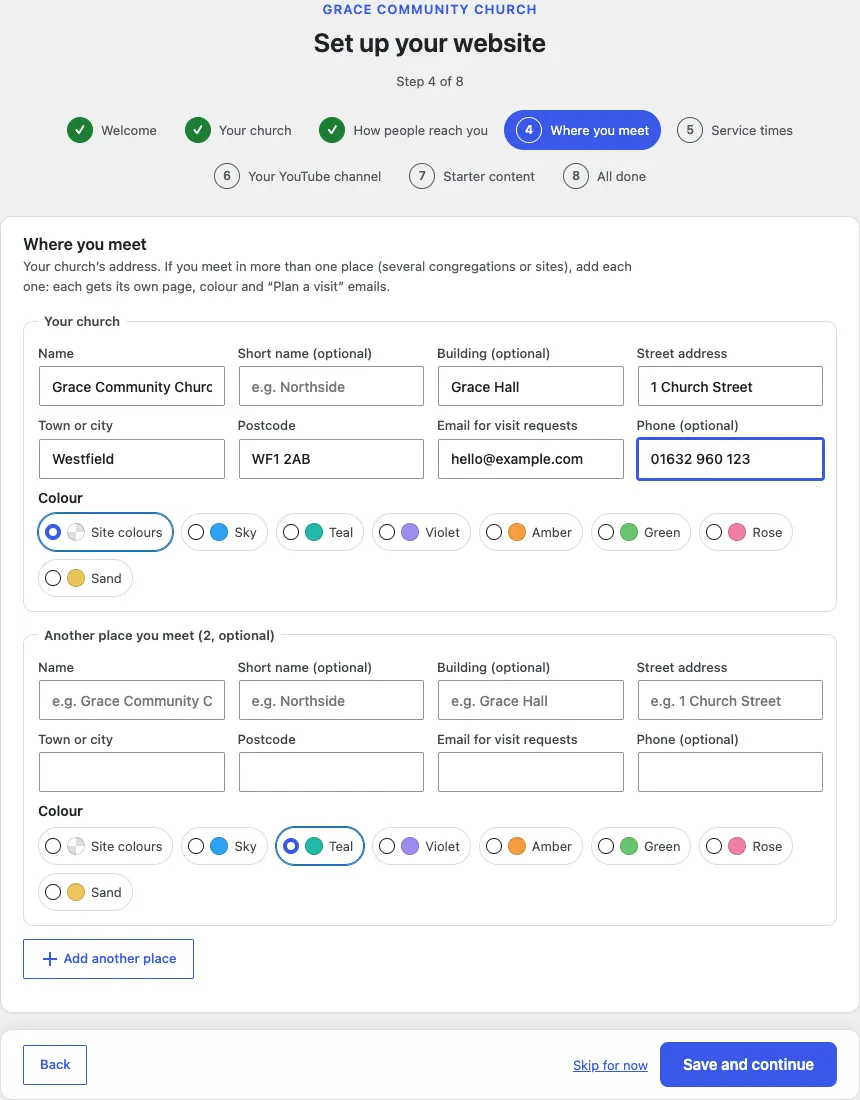
The first place becomes your main church. You can add more places later (up to four in the wizard, as many as you like afterwards) under Church → Churches.
Step 5: Service times
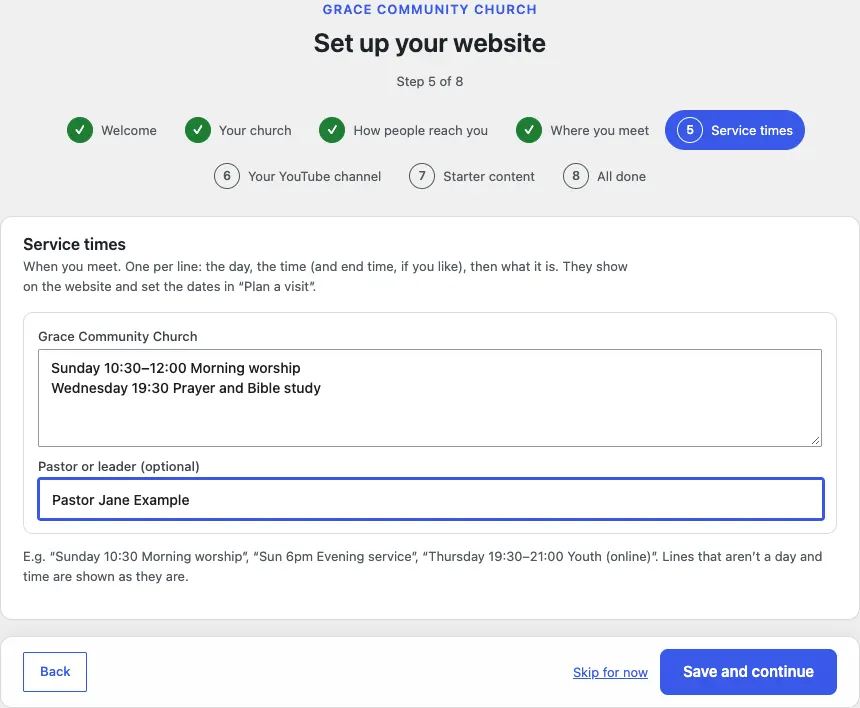
Type when you meet, one per line: the day, the time (and the end time, if you like), then what it is. Service times show on the website and set the dates people can choose in "Plan a visit".
The box for each place starts with two example lines:
- Sunday 10:30–12:00 Morning worship
- Wednesday 19:30 Prayer and Bible study
- Replace the example lines with your own times. Write them like "Sunday 10:30 Morning worship", "Sun 6pm Evening service" or "Thursday 19:30–21:00 Youth (online)". A line that isn't a day and a time is shown as it is.
- In Pastor or leader (optional), type the name of the person who leads this place.
- Click Save and continue.
Step 6: Your YouTube channel
If you put sermons or services on YouTube, new videos appear on the website by themselves every hour. No password or API key is needed. Skip this step if you don't use YouTube.
- In YouTube channel (address or @handle) (optional), type your channel's web address, its @handle (for example @gracechurch) or its channel ID (it starts with UC). Only public videos are brought in.
- Leave Add the latest videos now on to bring in the channel's latest 15 videos straight away. It takes a few seconds.
- Leave Check for new videos every hour on so new uploads arrive by themselves.
- Click Save and continue.
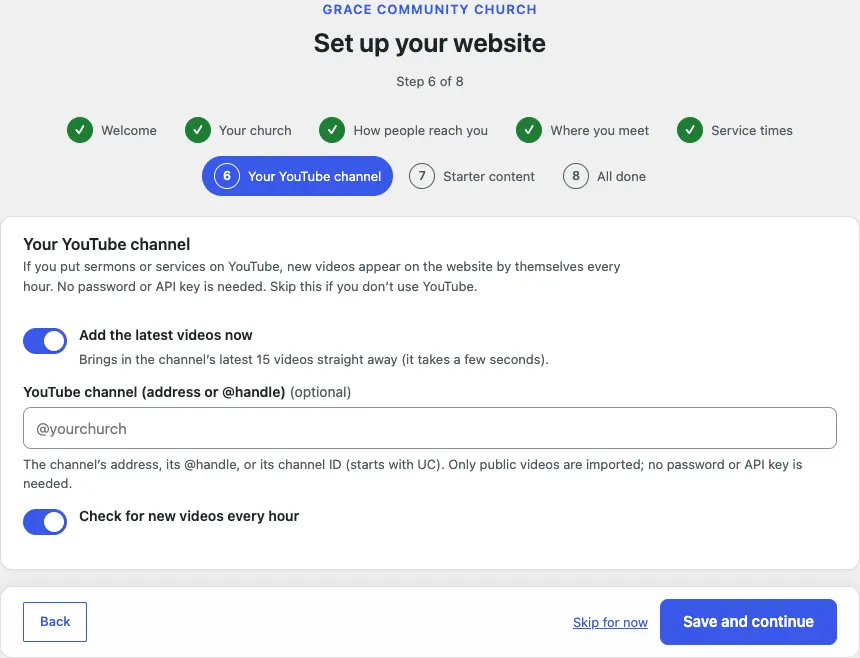
You can change the channel later under Church → Settings → Sermons. Each church can also have a channel of its own, set on its page under Church → Churches.
Step 7: Starter content
This is where the wizard builds your website. Each switch adds one kind of ready-made content. Switch on the ones you want, then click Save and continue. Running this step again never makes copies.
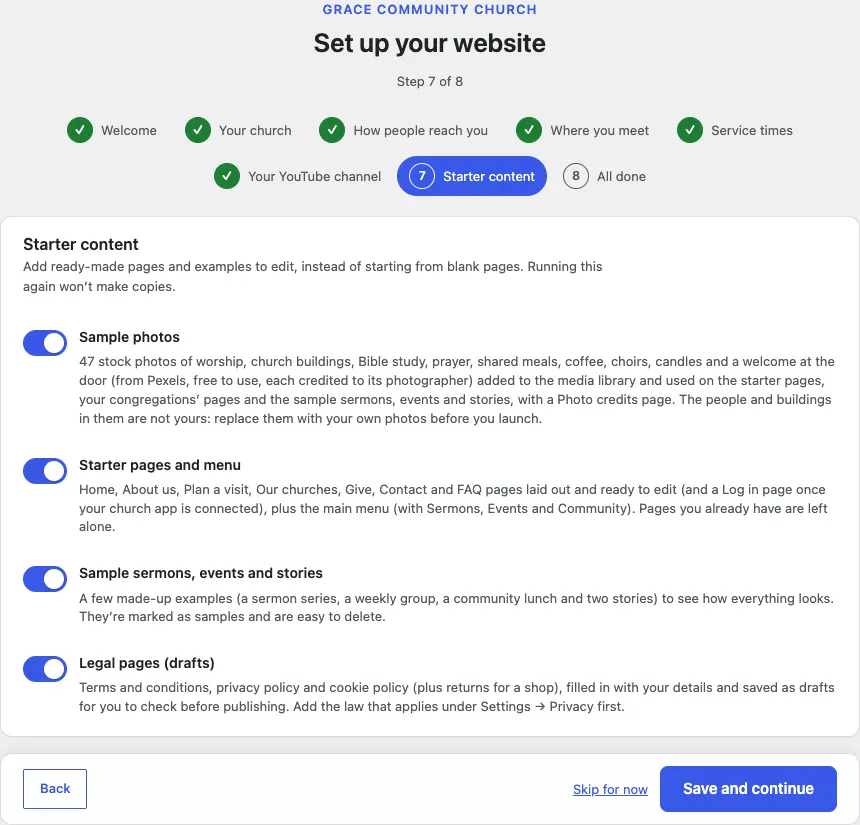
| Switch | Starts | What it adds |
|---|---|---|
| Sample photos | Off | 47 stock photos of worship, church buildings, Bible study, prayer, shared meals, coffee, choirs, candles and a welcome at the door, from Pexels (free to use). They go into the media library, onto the starter pages, your churches' pages and the sample sermons, events and stories, and onto a Photo credits page that names each photographer. |
| Starter pages and menu | On | Home, About us, Plan a visit, Our churches, Give, Contact, Questions (your FAQ) and News, laid out and ready to edit, plus the main menu. Home is set as the front page. A Log in page is added once your church app is connected. Pages you already have are left alone. |
| Sample sermons, events and stories | Off | A few made-up examples to see how everything looks (listed below). |
| Legal pages (drafts) | On | Terms and conditions, a privacy policy and a cookie policy, filled in with your details and saved as drafts for you to check before publishing. Add the law that applies under Church → Settings → Privacy first. |
While the starter content is added
When you click Save and continue, a box appears under the switches: Adding your starter content… Please keep this page open. Each part you switched on gets a line that says working… and then done. The sample photos are added a few at a time, so their line counts up, for example Sample photos: 15 of 47.
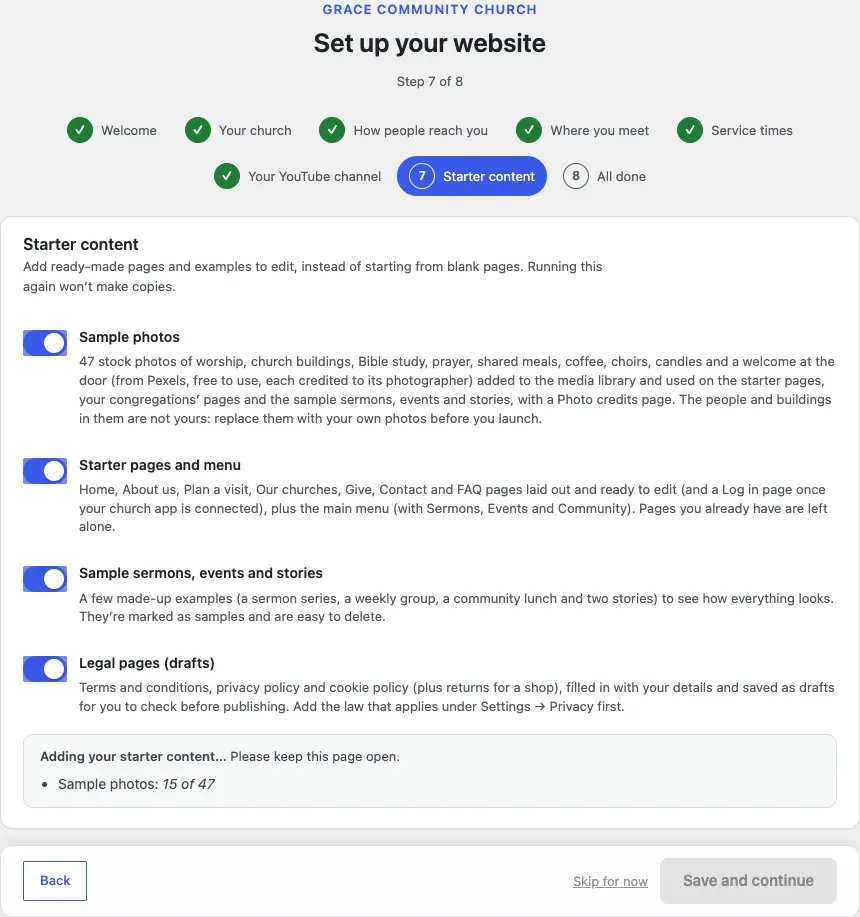
Keep the page open. It takes a minute or two, mostly for the photos. When everything is done, the next step opens by itself. If the box turns red and says This didn't finish, click Save and continue again: the wizard carries on where it stopped and never adds anything twice.
Step 8: All done
The last screen lists what this run of the wizard did (anything an earlier run added isn't listed again), then gives you four links: See the website, Open Church → Today, Review all settings and Add staff and choose what they can do.
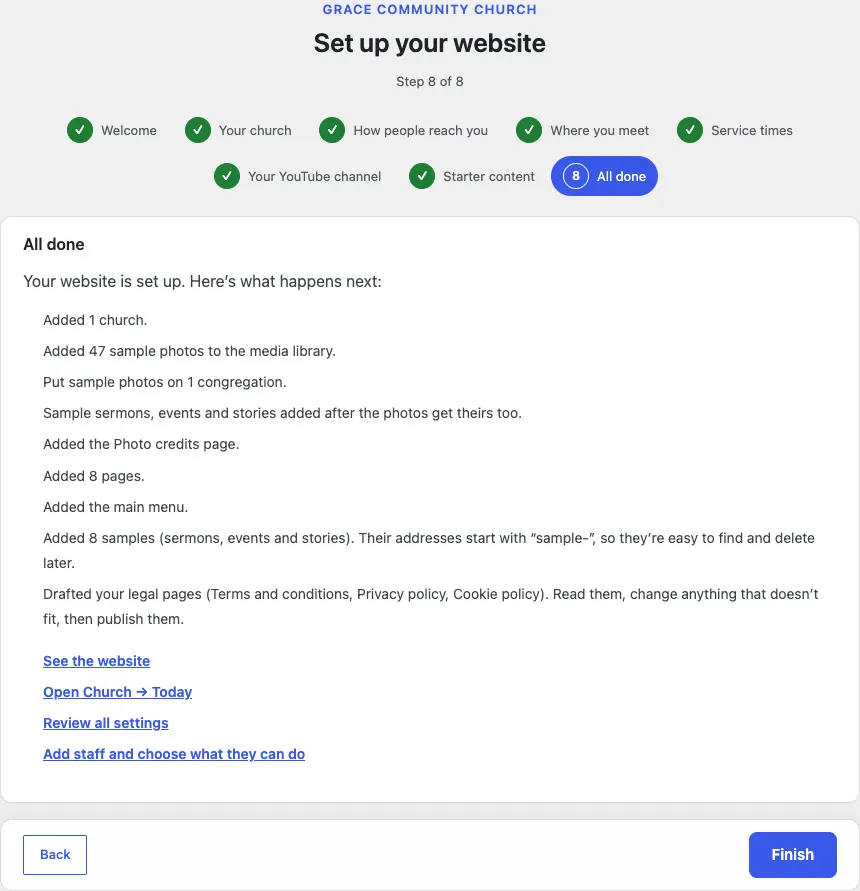
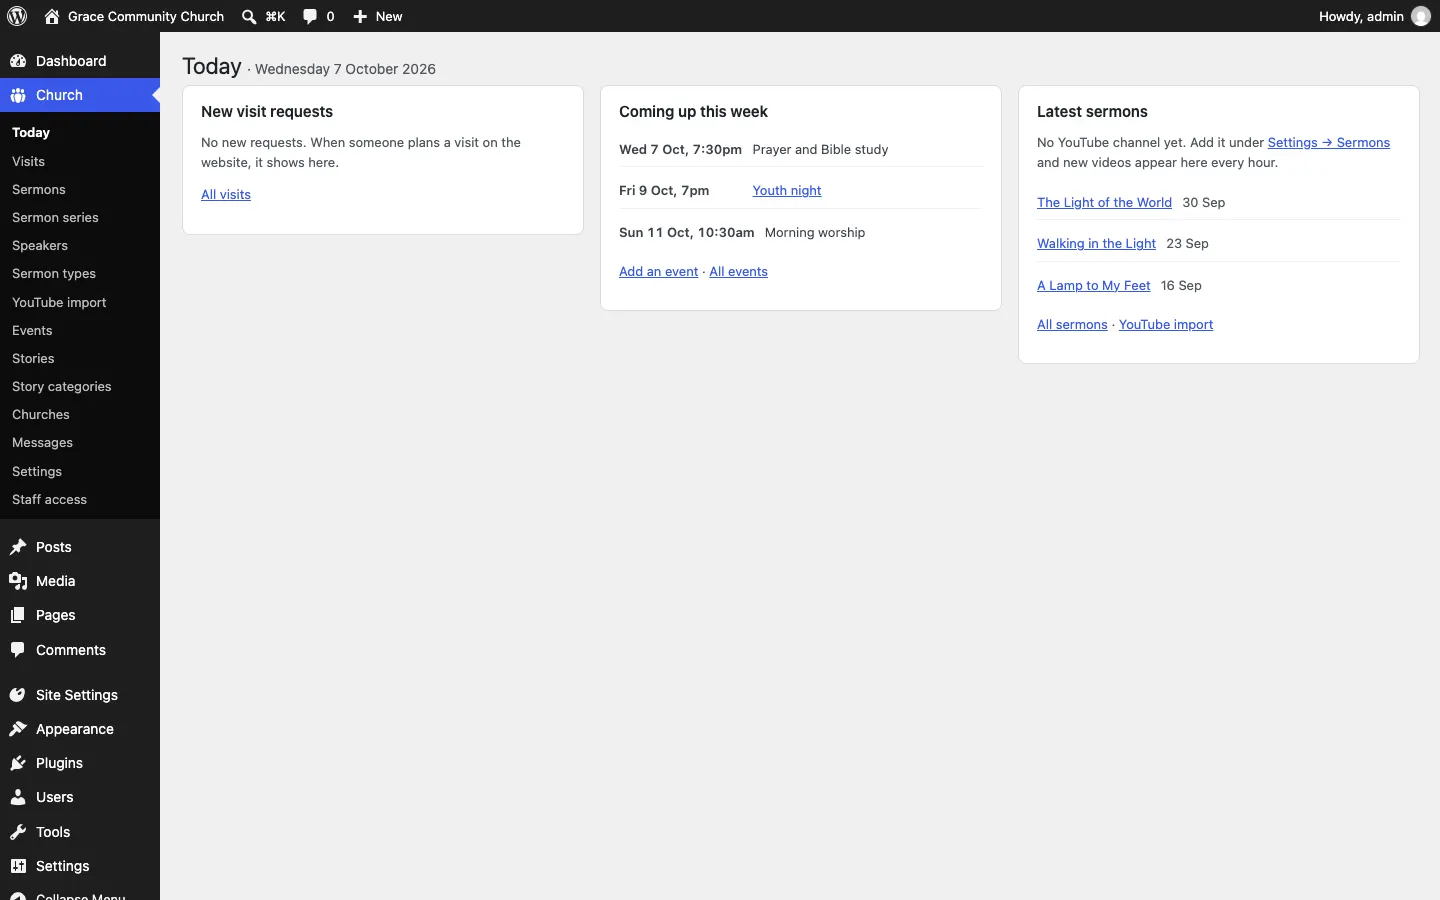
Click Finish. The wizard closes and you land on Church → Today, your weekly overview.
What you have at the end
With every switch on, the wizard leaves you with:
- Your church: the place you typed in step 4, with its own page, in Church → Churches, and its service times.
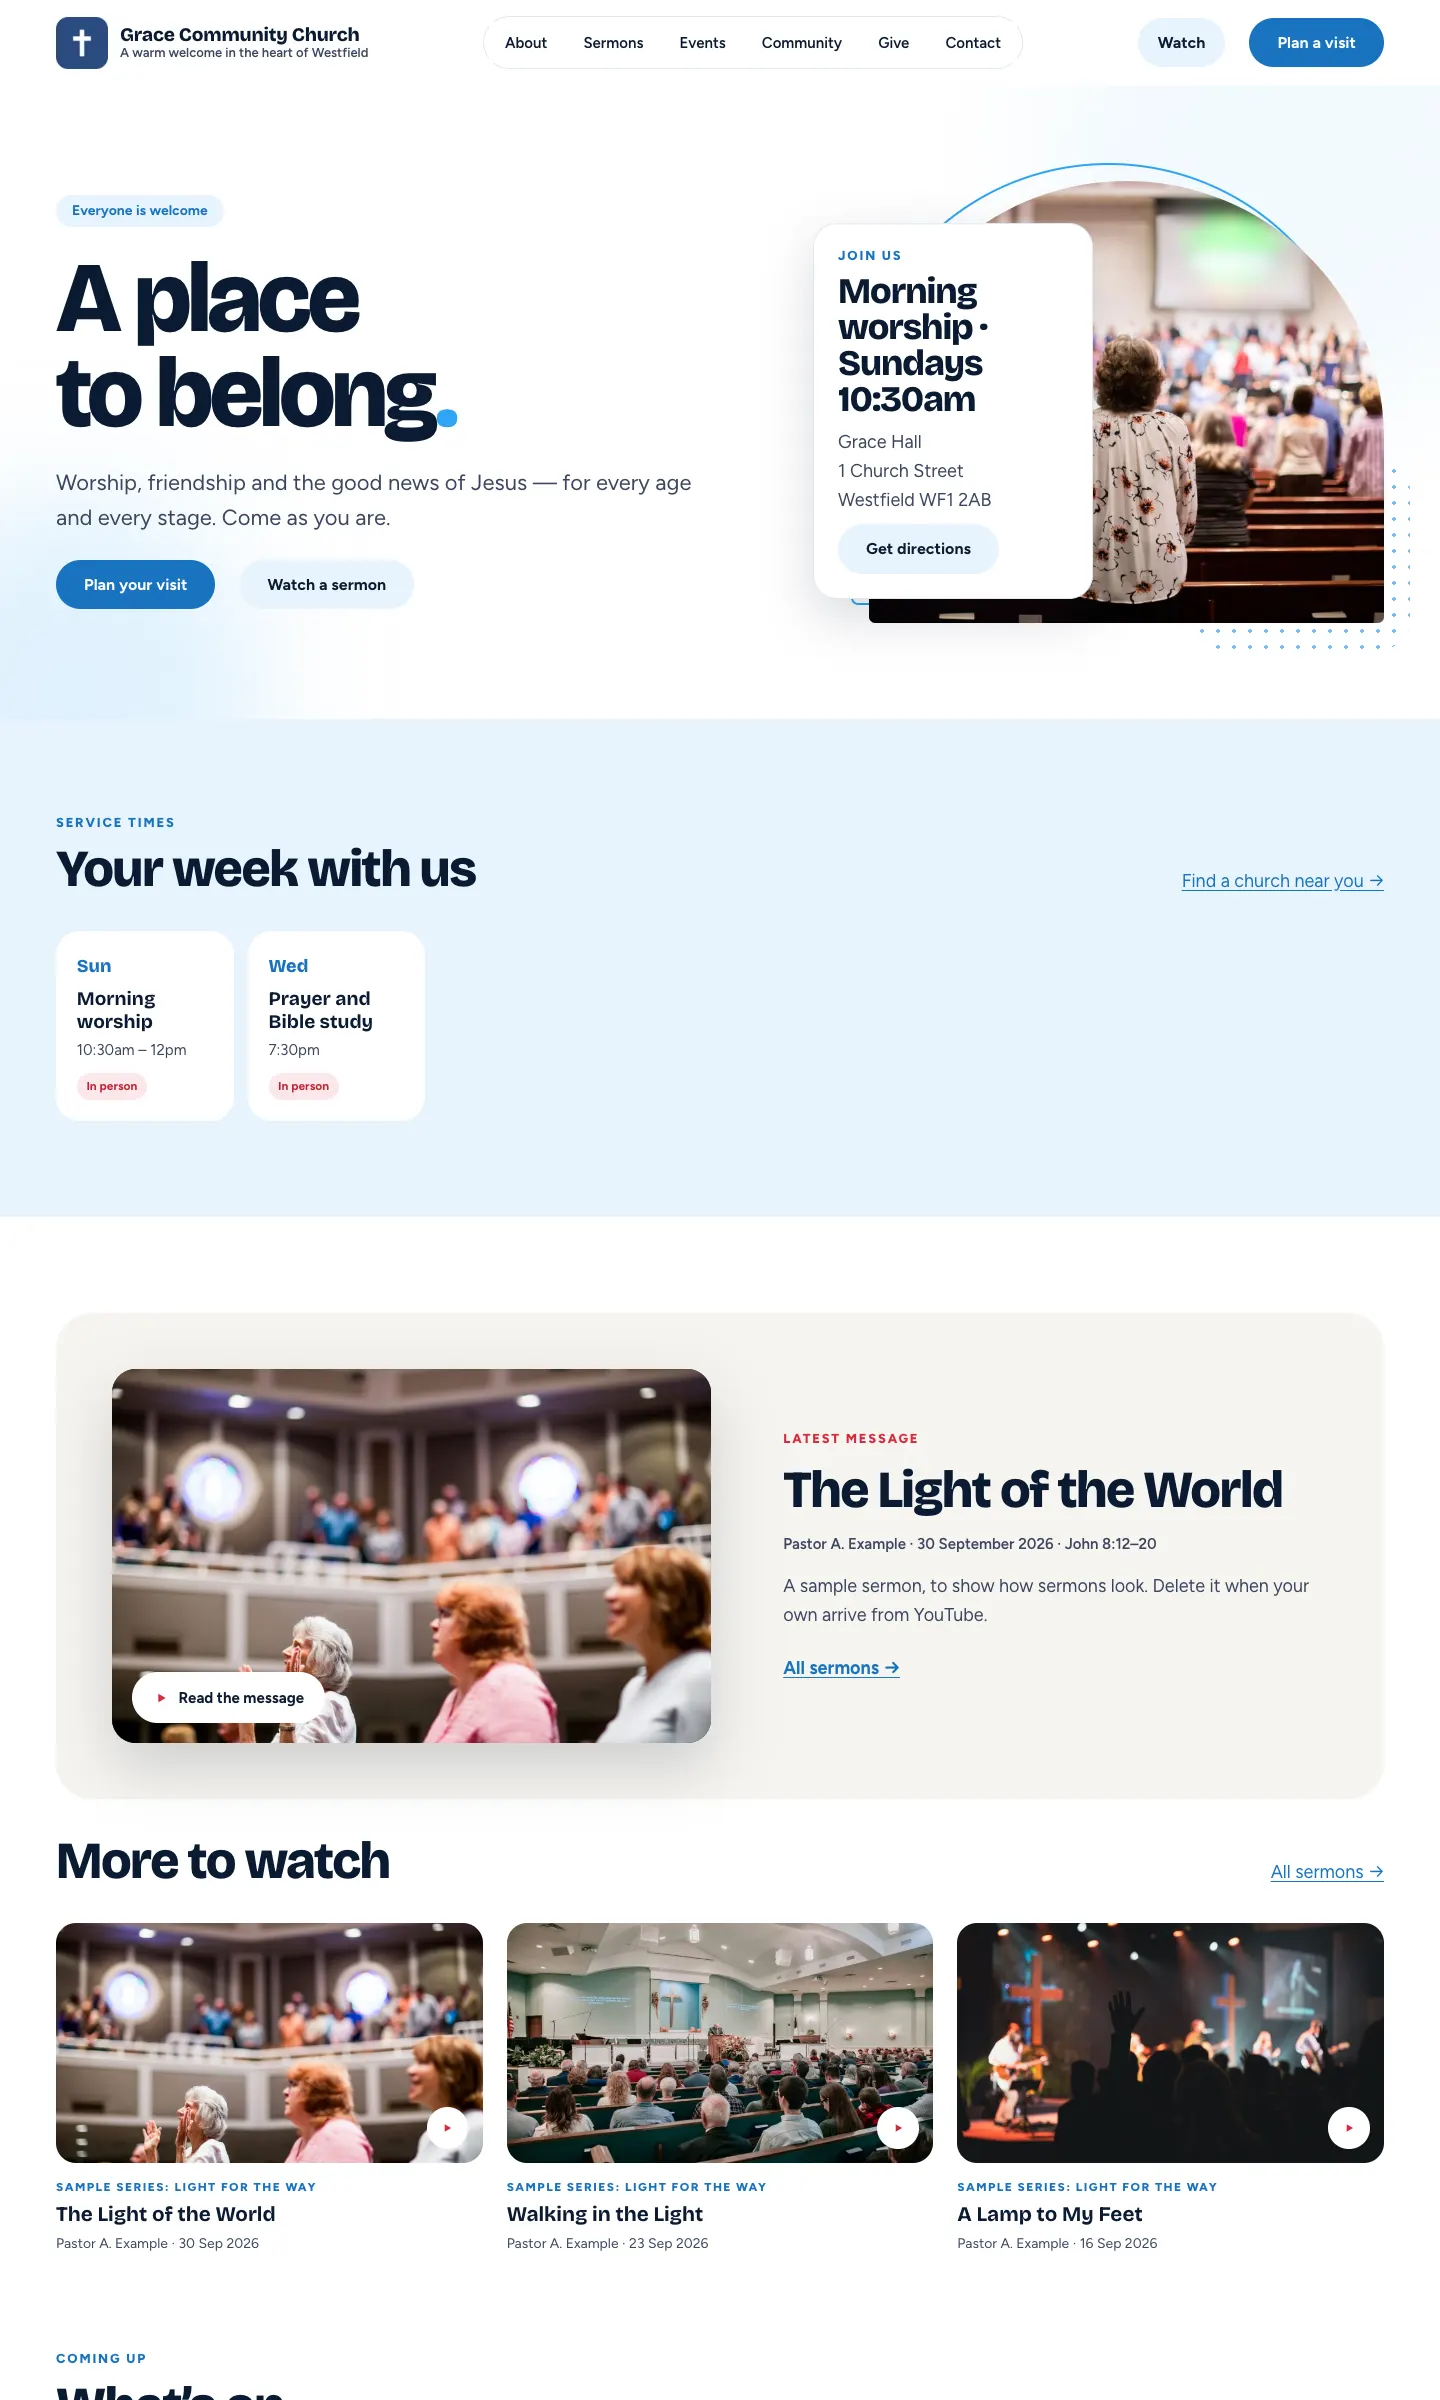
- Pages: Home (the front page), About us, Plan a visit, Our churches, Give, Contact, Questions, News and Photo credits, all published. Terms and conditions, Privacy Policy and Cookie policy are drafts.
- Main menu: About, Sermons, Events, Community, Give and Contact, with Watch and Plan a visit buttons.
- Sample content:
- three sermons in the series "Sample series: Light for the Way", by "Pastor A. Example": A Lamp to My Feet, Walking in the Light and The Light of the World
- three events: Youth night (weekly on Fridays), Community lunch and Carols by candlelight
- two stories: Forty neighbours round one table, and Winter coats for families
- Photos: 47 sample photos in the media library. Each photo's description names the photographer and its Pexels page, and the Photo credits page lists them all.
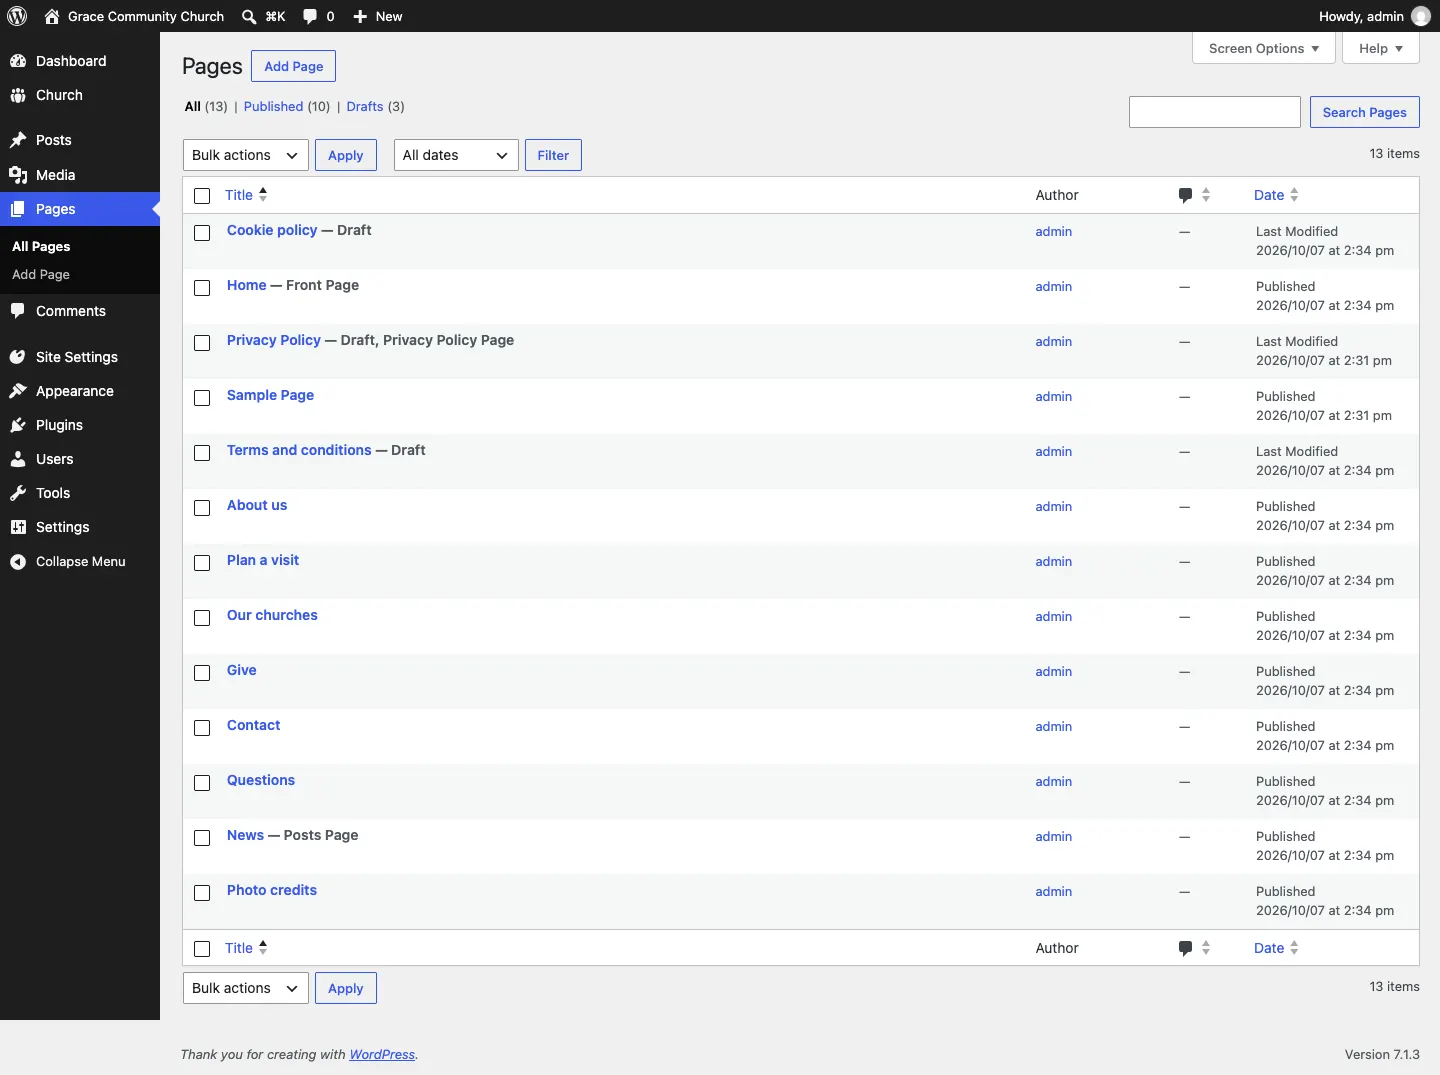
This is the home page a visitor sees straight after the wizard:
How to remove the sample content
There's no single "remove samples" button. Every sample's web address starts with "sample-", and you can see the full list above.
- Go to Church → Sermons. Tick A Lamp to My Feet, Walking in the Light and The Light of the World.
- Choose Move to Trash from Bulk actions and click Apply.
- Do the same under Church → Events (Youth night, Community lunch, Carols by candlelight) and Church → Stories (Forty neighbours round one table, Winter coats for families).
- The sample series "Sample series: Light for the Way" and the speaker "Pastor A. Example" stay behind. Once your own sermons are in, you can delete them too.
To remove the sample photos, put your own photos on the pages first, then go to Media, search for "Pexels", select the sample photos and delete them permanently. When they're gone, delete or update the Photo credits page too.
Next steps
- Designs: the Church kit's designs and colour palettes, and how to switch.
- Quick start: the checklist from here to your first visit request.
- Your look: your logo, colours, menus and footer.