Running your website
Churches and service times
Your congregations: each church's page, address, colour, pastor, meeting and service times, photos, its own YouTube channel and the congregation header.
On this page
Under Church → Churches you keep one entry for each place your church meets: a congregation, a branch or a site. Each one gets its own page on the website with its address, service times, pastor, photos, events and sermons. The website works out "next service", the Plan a visit dates and the Today list from the meeting times you enter here, so you only type them once.
Even a church that meets in one place has one entry here: it holds your address and service times.
How to see your churches
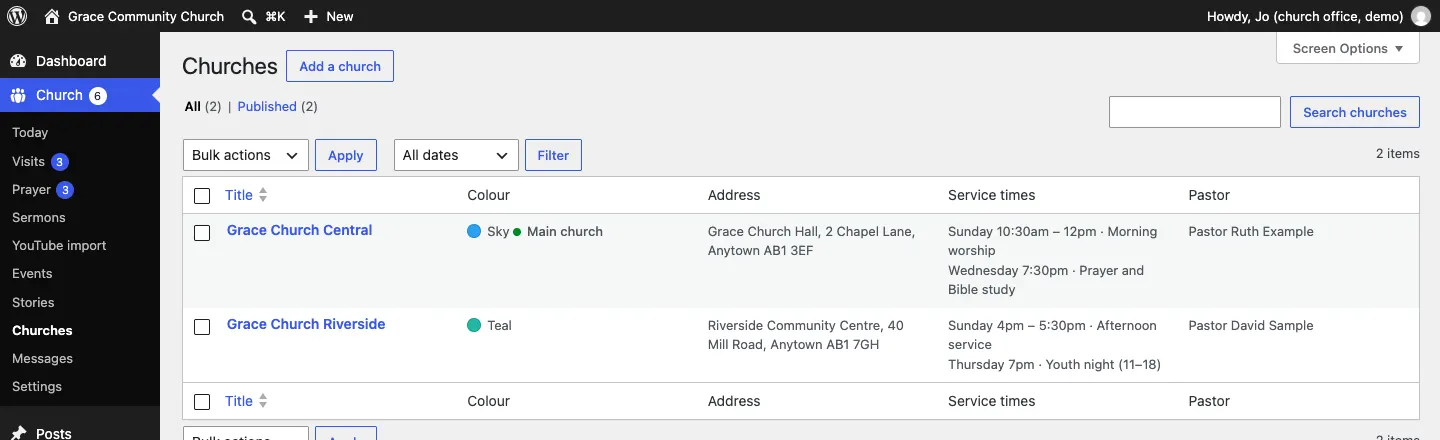
Go to Church → Churches. The list shows each church's colour, address, service times and pastor. The main church is marked Main church.
How to add a church
- Go to Church → Churches and click Add a church.
- Type the church's name as the title, for example "Grace Church Riverside".
- In the main area, write a few words in your own voice: who you are and who you'd love to welcome.
- Fill in Church details, Meeting times and Photos in the sidebar on the right (see below).
- Click Publish.
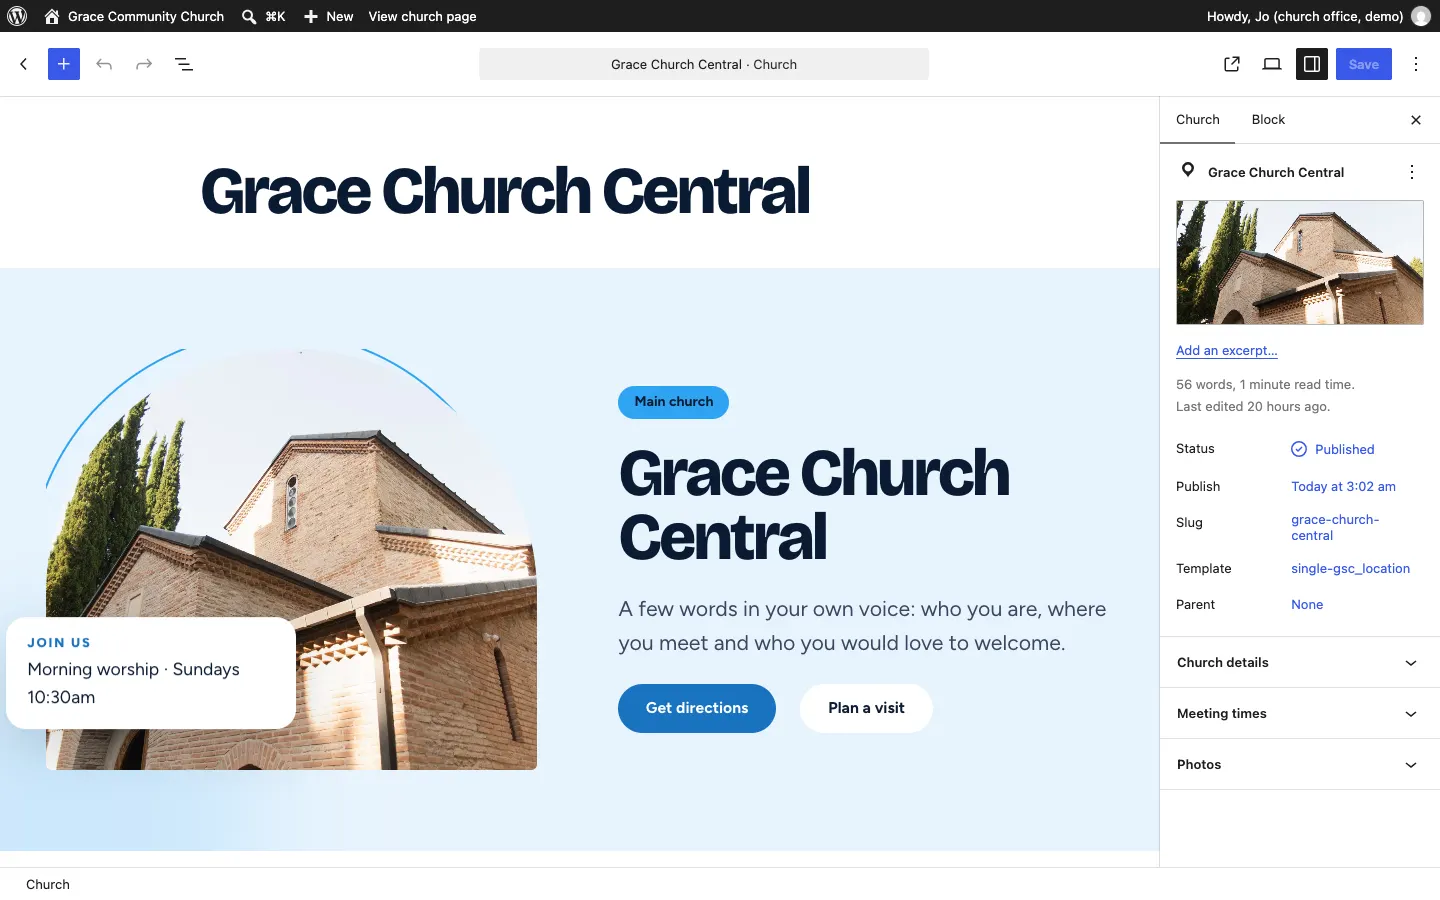
How to fill in the church's details
Open the church and click Church details in the right-hand sidebar.
- Short name: used in lists and buttons, for example "Riverside".
- Colour: the church's own colour. Its page and pages that belong to it wear it.
- Main church: switch on for your main church. Its details are shown on pages that don't belong to a particular church.
- Badge on the photo (optional): a small label on the church's photo.
- Venue (building name), Street address, Town or city and Postcode.
- Phone numbers (separate with commas) and Numbers on WhatsApp (optional).
- Email: messages for this church, such as visit requests, go here.
- Pastor or leader and Their title.
- YouTube channel (optional): only if this congregation has a channel of its own (see Sermons).
- Click Save.

How to set service and meeting times
Open the church and click Meeting times in the sidebar. Each service or regular meeting is one block.
- Click Add a meeting.
- Fill in its Name (for example "Morning worship").
- Choose the Day, and How often: Every week, or the first, second, third, fourth or last of the month.
- Set when it Starts and, if you like, Ends (optional).
- Choose Where: In person, Online or In person and online. For online meetings, paste the link in Online link (optional).
- Add a Note (optional), for example "Children's groups during the service".
- Switch on Offer it in Plan a visit for the meetings newcomers can choose on the Plan a visit form. With none ticked, the first one is offered.
- Use Move up to change the order and Remove to delete one.
- Click Save.

If a time isn't regular, choose — Not a regular time (shown as written) — as the day.
How to add photos of a church
- Open the church and click Photos in the sidebar.
- Click Choose photos (or Change photos if there are some already), then pick or upload them.
- Click Save.
The Congregation photos section on the church's page shows them. Nothing shows until there are some. Remove all clears them.

What visitors see
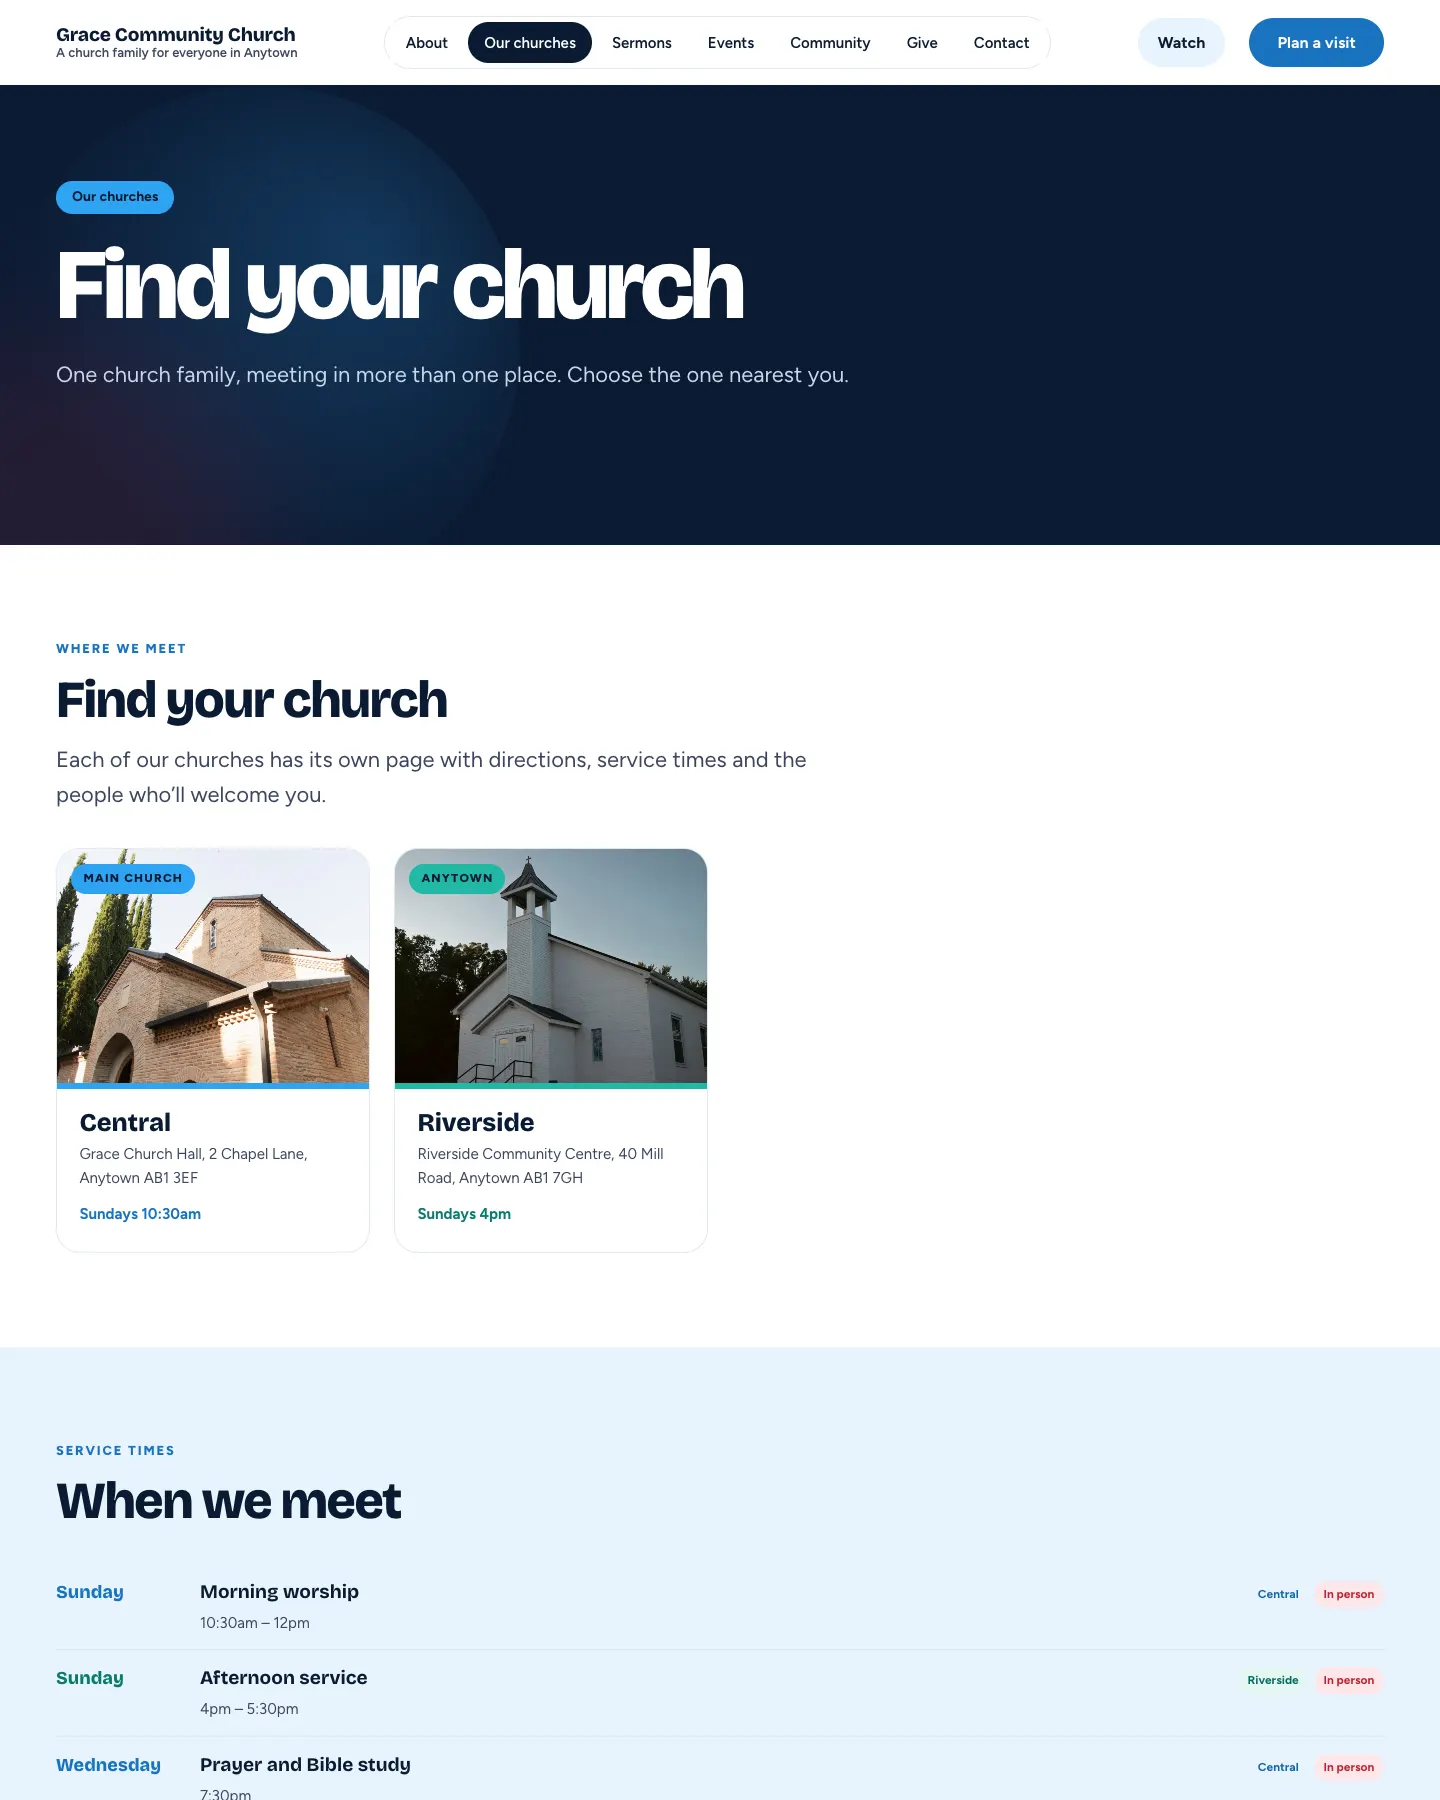
The Our churches page lists every church as a card, with its address and main service, then every service time.
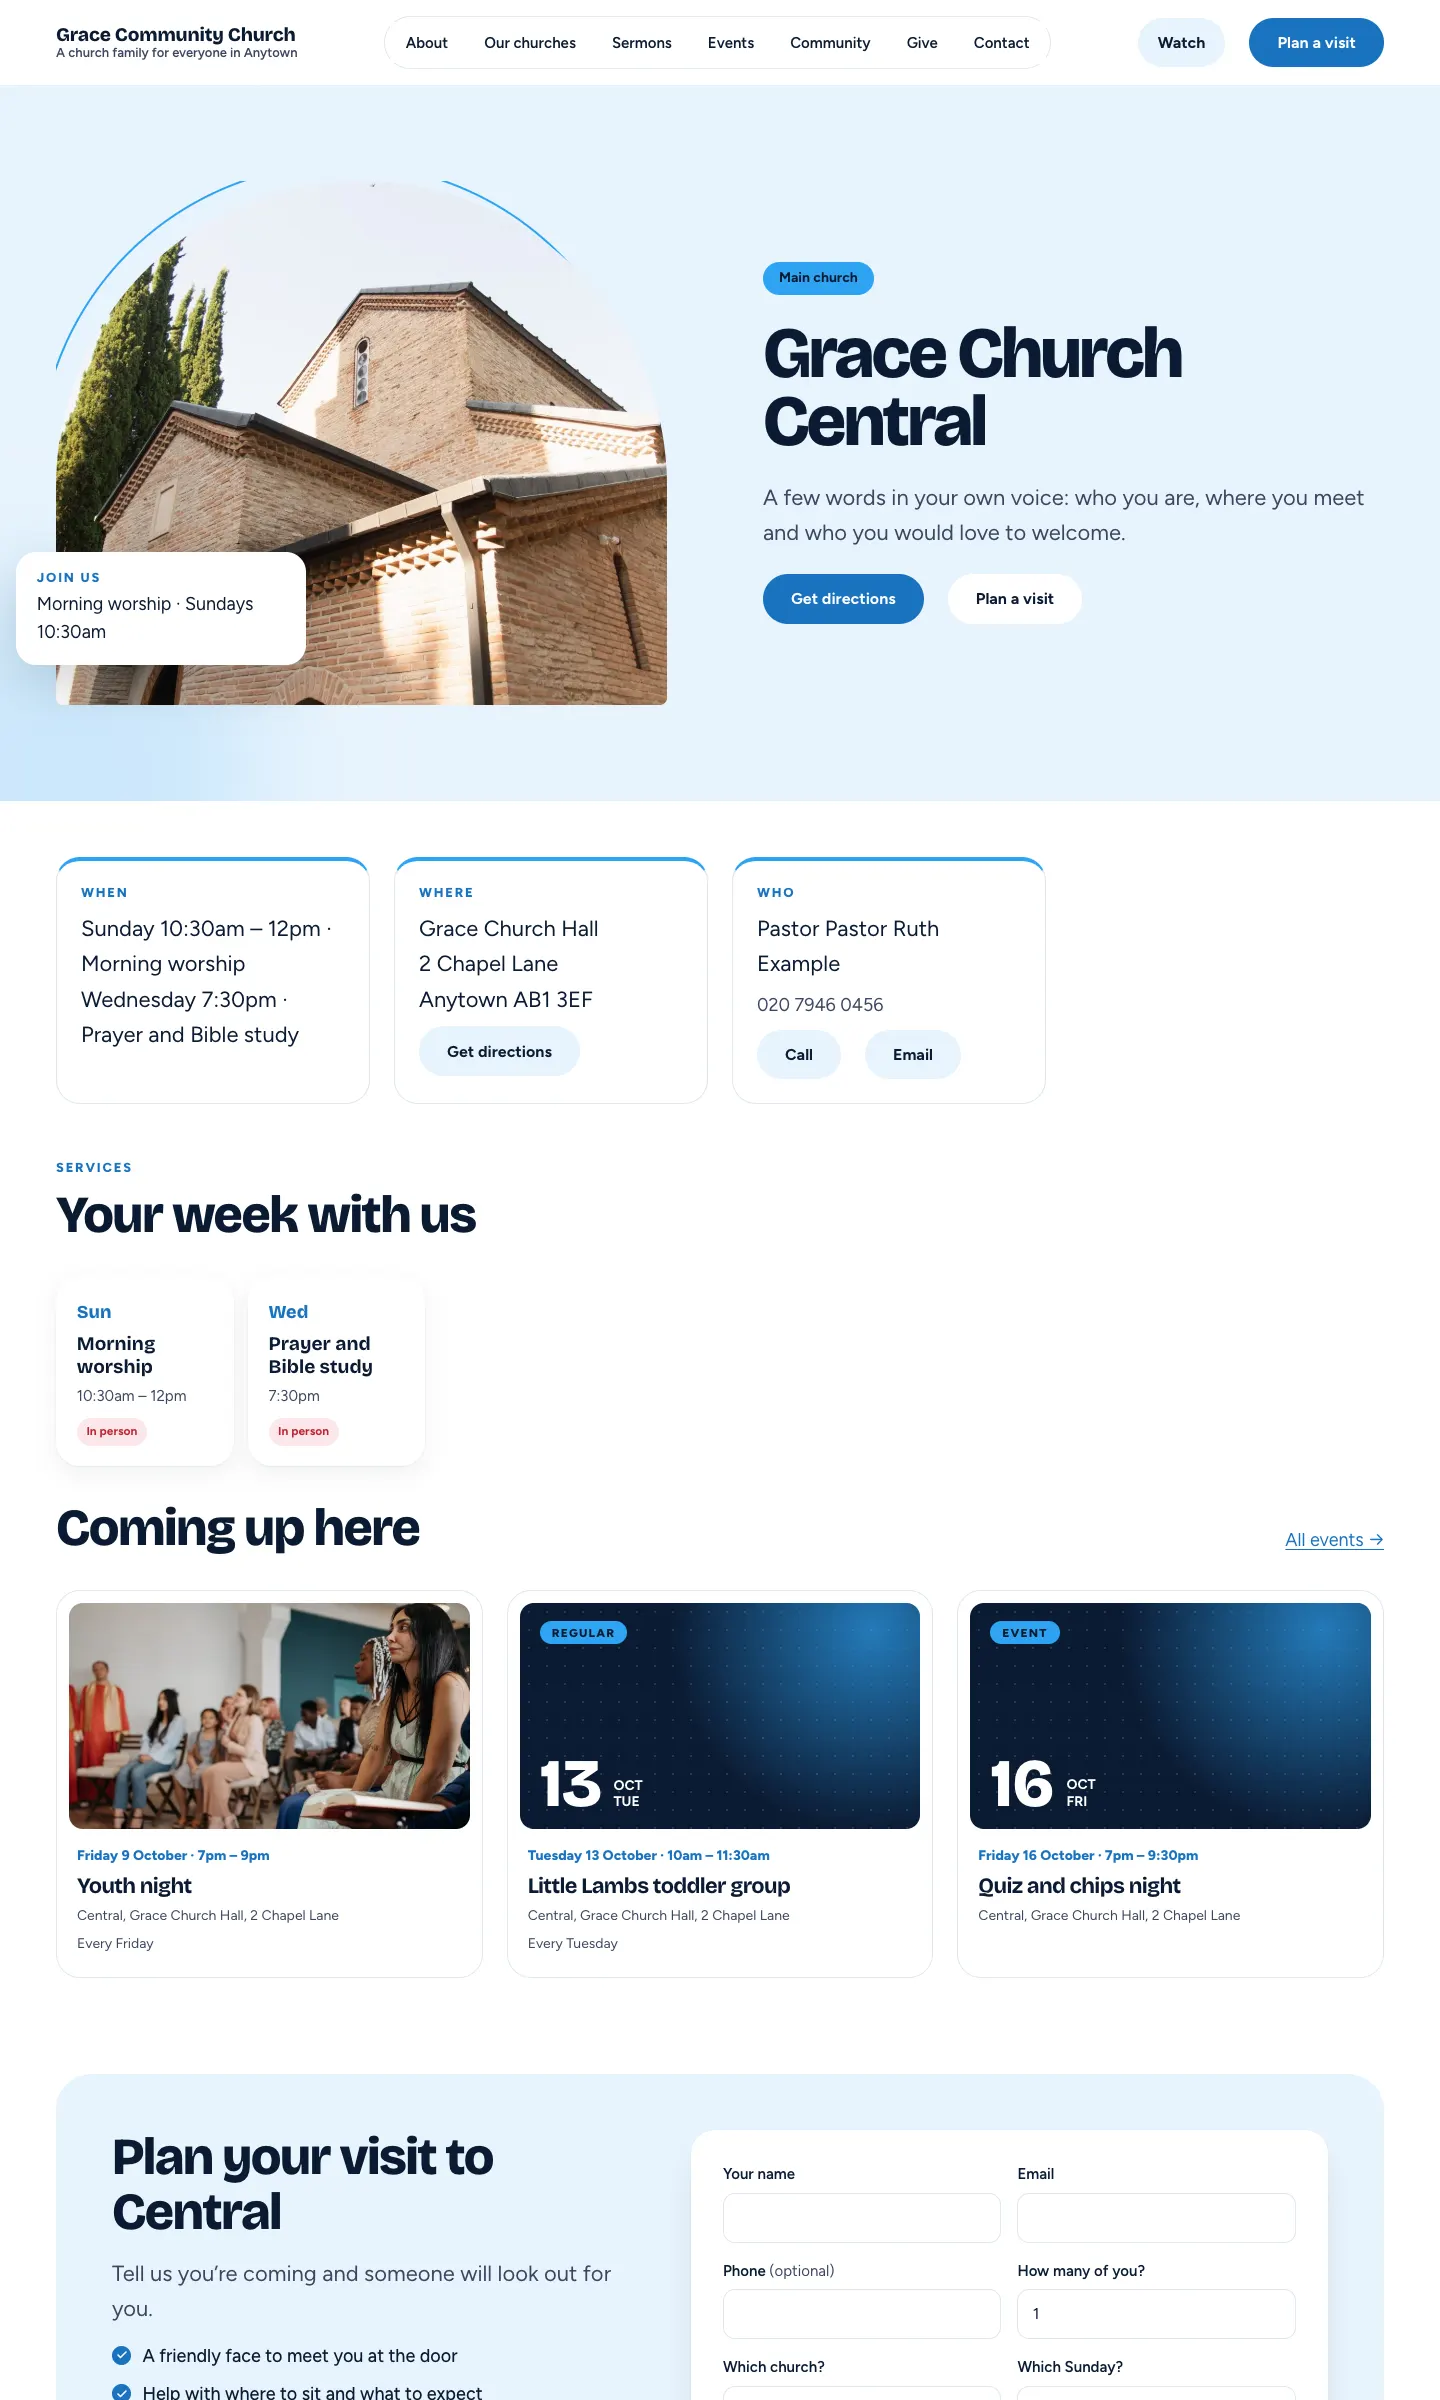
Each church's own page shows its next service, address with Get directions, pastor, the week's meetings, events coming up there, its own Plan a visit form, its photos and its recent sermons.
Things that belong to one church
Pages, sermons, events and stories can belong to one church. Open the item and choose the church in its Church panel in the sidebar, under This page belongs to this church. It then takes on the church's colour and shows its details. Leave it on — None (Main church's details) — for things that belong to everyone.

A header for each congregation
With two or more churches, each church's page can have a header of its own: a strip back to the whole church ("‹ name · All our churches"), the congregation's name beside the logo, and Plan a visit in its colour.
- Go to Church → Settings → Business.
- Under Congregation pages, switch on Use the congregation header on their pages.
- In Name in the strip (optional) type the name people go back to, such as a region or network name. Leave it blank to use the church's name.
- Click Save changes.
For a new page that belongs to a congregation, choose the congregation in the page's Church panel and pick the template Congregation sub-page. Pages using that template always have the header.