Buying and installing · shared chapter
Installing your kit
Installing Gradespace Core, then your kit's plugin, then your kit's theme from their .zip files, adding your licence key, and how updates arrive.
On this page
A kit comes as three files, and you install them in this order:
- Gradespace Core (gradespace-core-….zip): the free plugin every kit runs on. A plugin is an add-on for WordPress.
- Your kit's plugin (gradespace-trades-….zip): your kit's features.
- Your kit's theme (gradespace-trades-theme-….zip): the design.
Then you run the setup wizard and add your licence key. It takes about fifteen minutes in all. You do it all in your WordPress admin: your website's address followed by /wp-admin, signed in as an administrator.
Before you start, check Before you install and download the three files from your licences page (see Buying and your licence). Leave them as .zip files. Don't unzip them.
Step 1: Install Gradespace Core
-
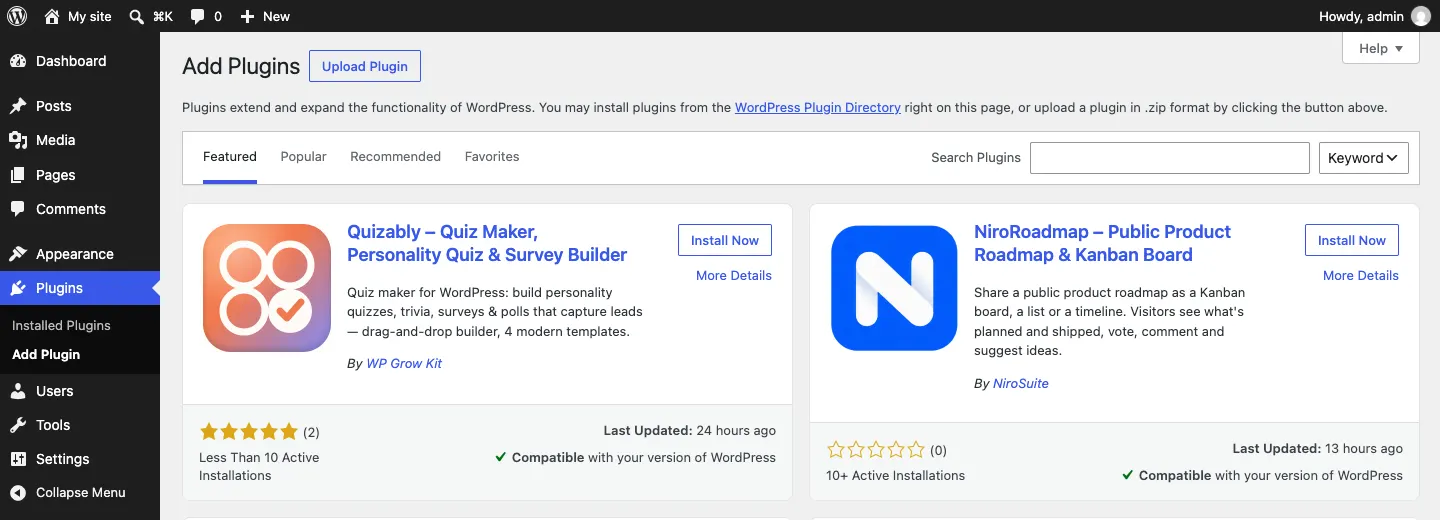
Go to Plugins → Add Plugin.
-
Click Upload Plugin at the top of the screen.
-
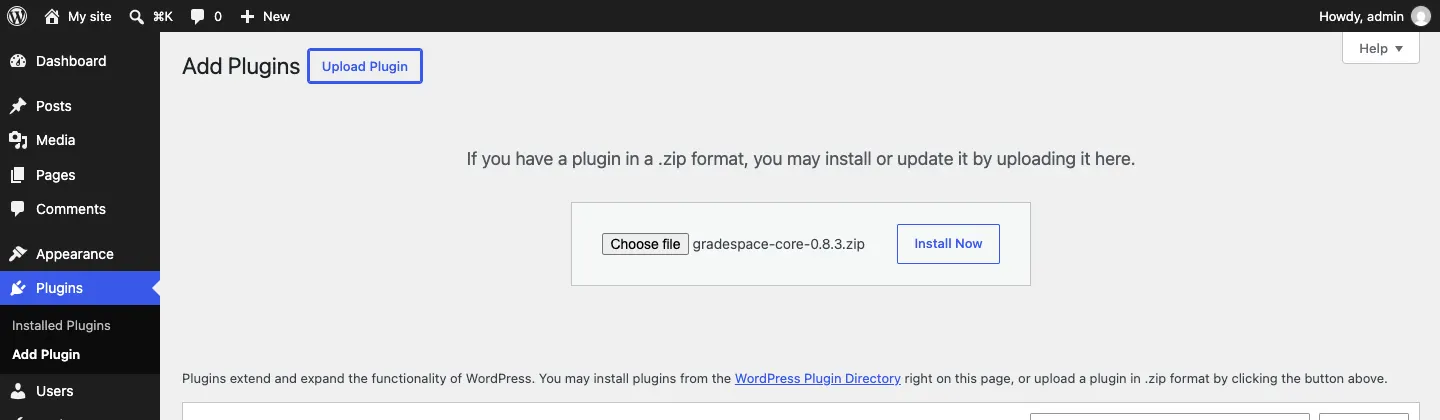
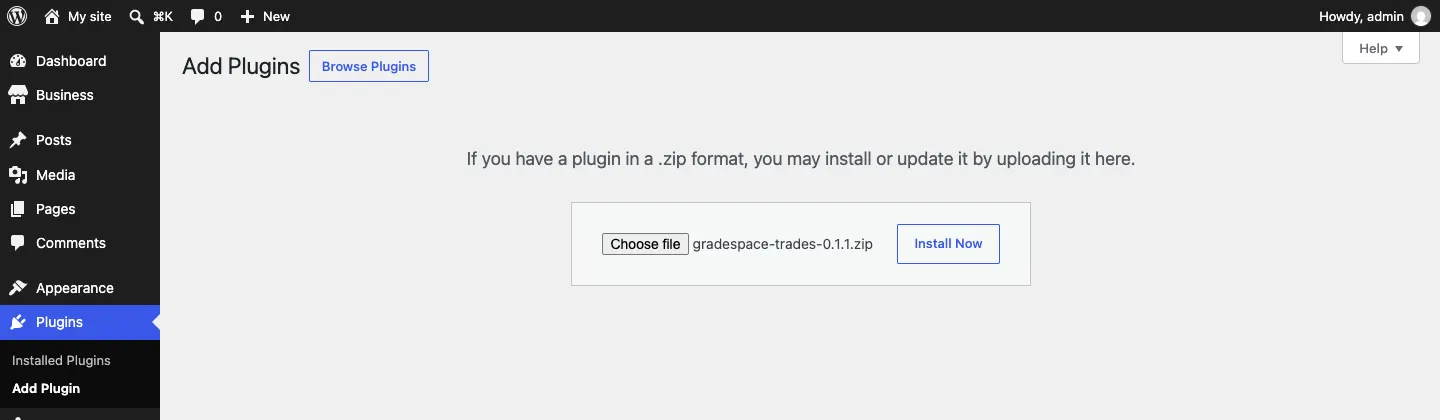
Click Choose file and pick gradespace-core-….zip from your computer.
-
Click Install Now.
-
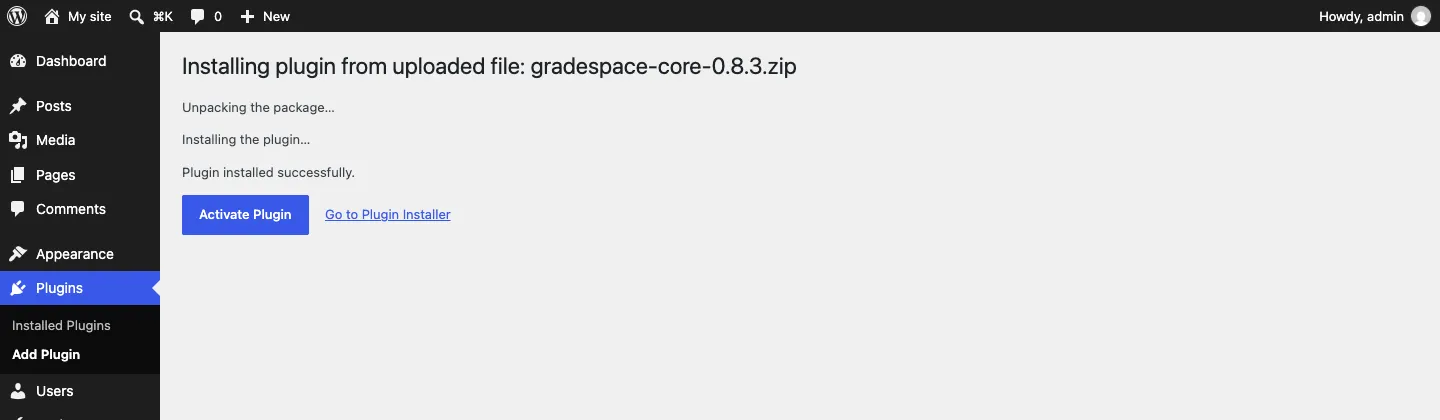
When WordPress says Plugin installed successfully, click Activate Plugin.
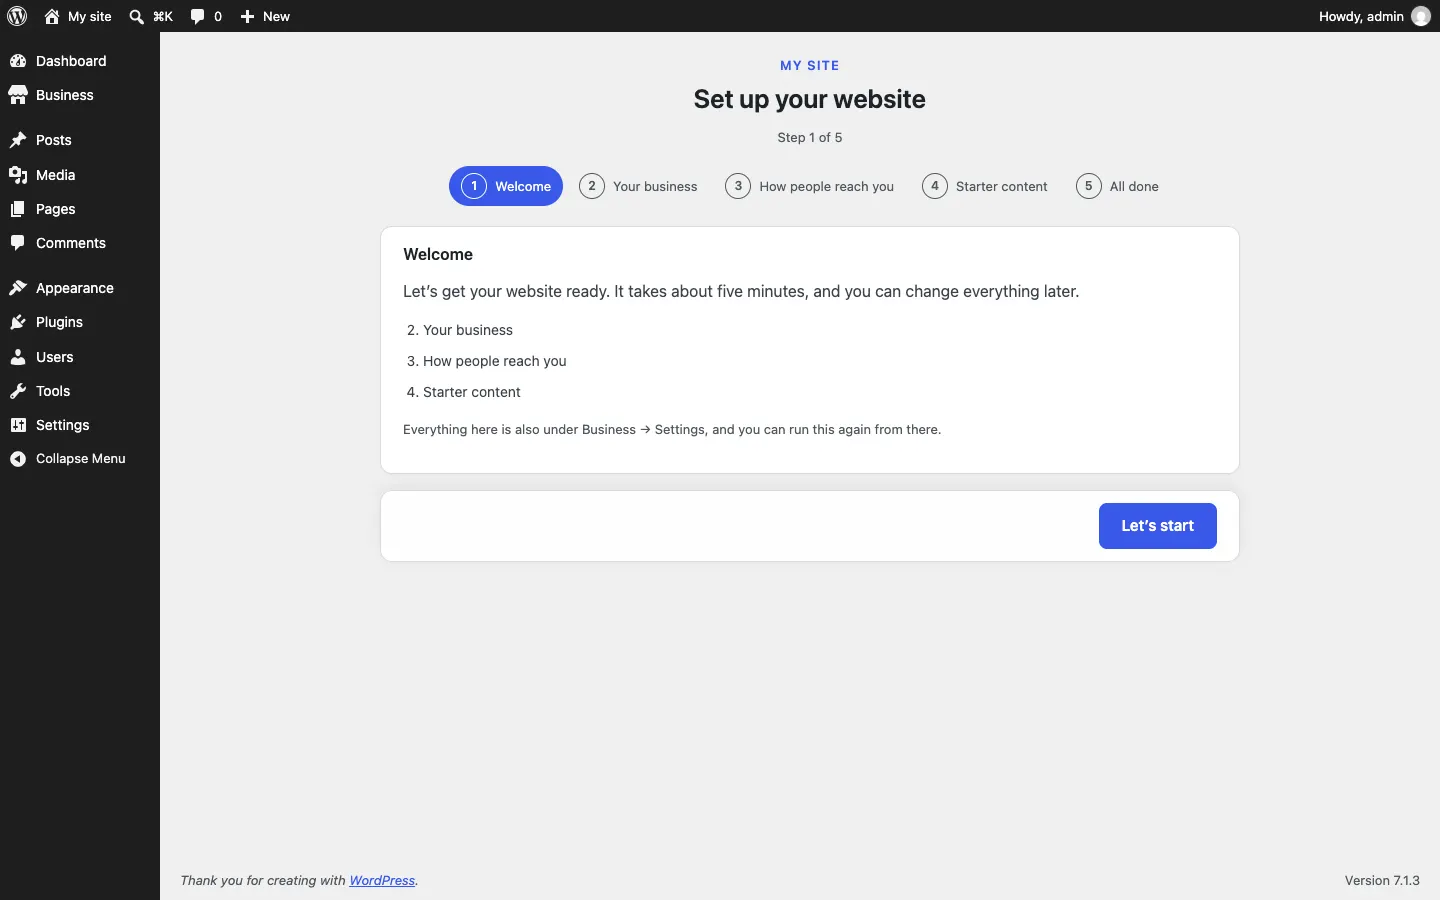
The setup wizard opens straight away. Leave it for now: it asks more useful questions once your kit is installed. Carry on with step 2. A new Business menu appears on the left; it takes your kit's name once the kit plugin is active.
Step 2: Install your kit's plugin
- Go to Plugins → Add Plugin again and click Upload Plugin.
- Click Choose file and pick your kit's plugin, gradespace-trades-….zip. Make sure it's the one without "theme" in its name.
- Click Install Now, then Activate Plugin.
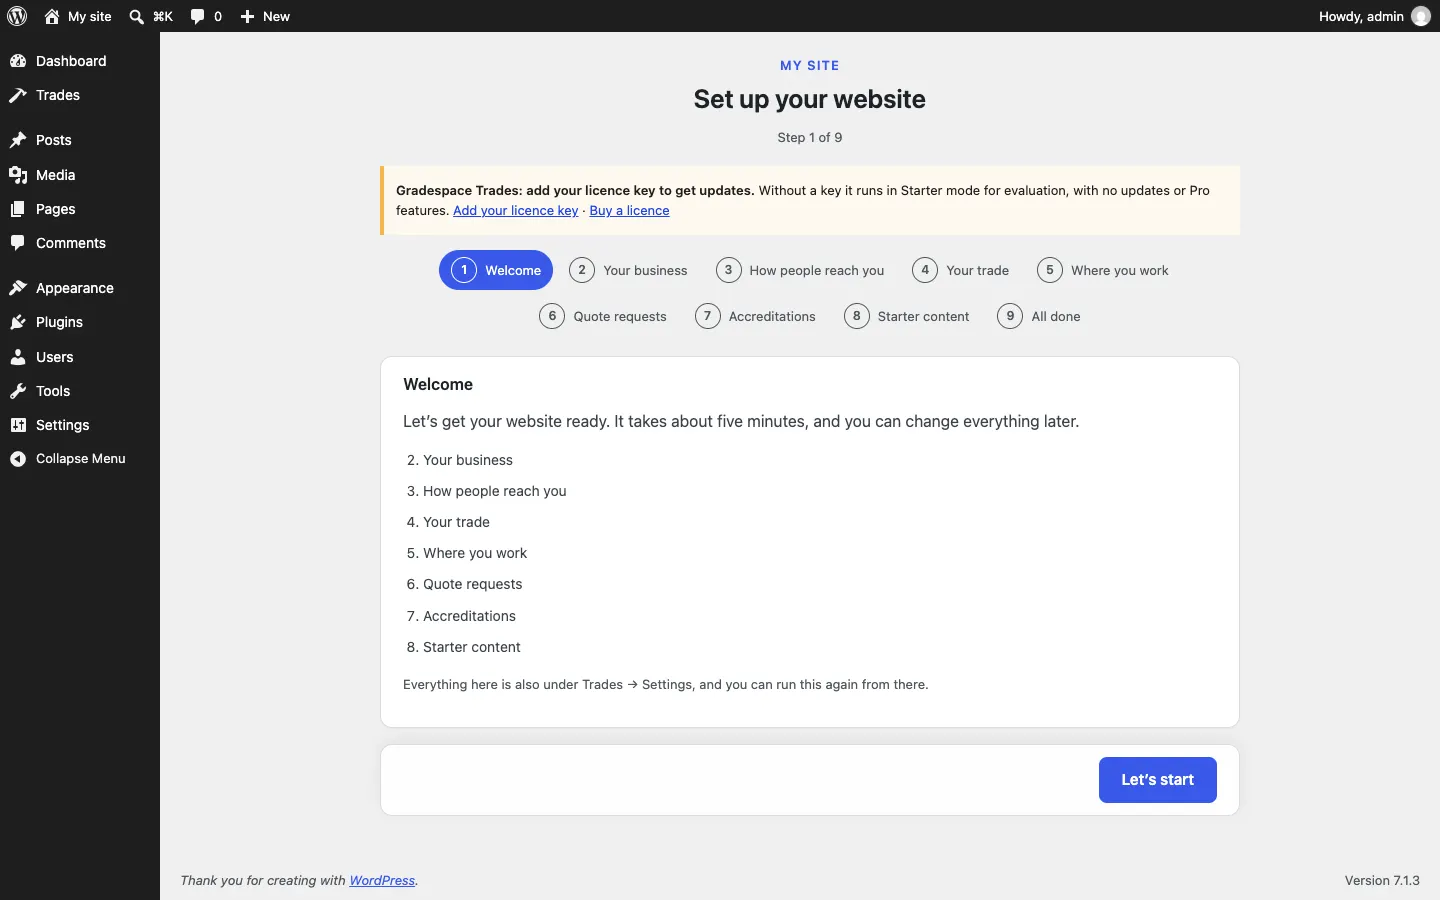
The setup wizard opens again, now with your kit's own steps (see your kit's setup wizard page). Again, leave it for now and install the theme first.
A yellow notice also appears at the top of every screen: "Gradespace Trades: add your licence key to get updates." That's expected. You'll add the key in step 5.
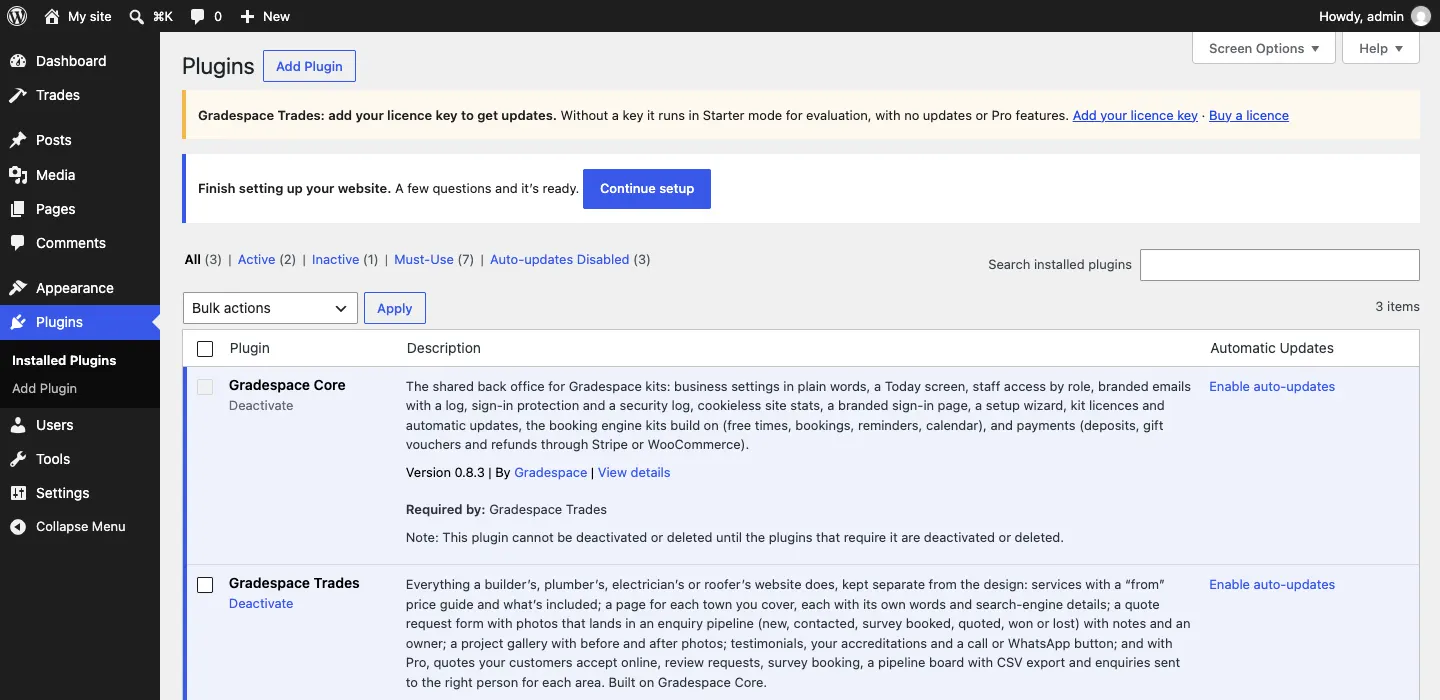
Your kit's menu now appears on the left, named after your kit: Clinic, Church, Music school, Salon, Group, Tutoring, Driving school, Trades, Venue or Charity.
In Plugins → Installed Plugins you'll see both plugins. Gradespace Core says Required by your kit, and can't be switched off while the kit is active. That's how it should be.
Step 3: Install your kit's theme
-
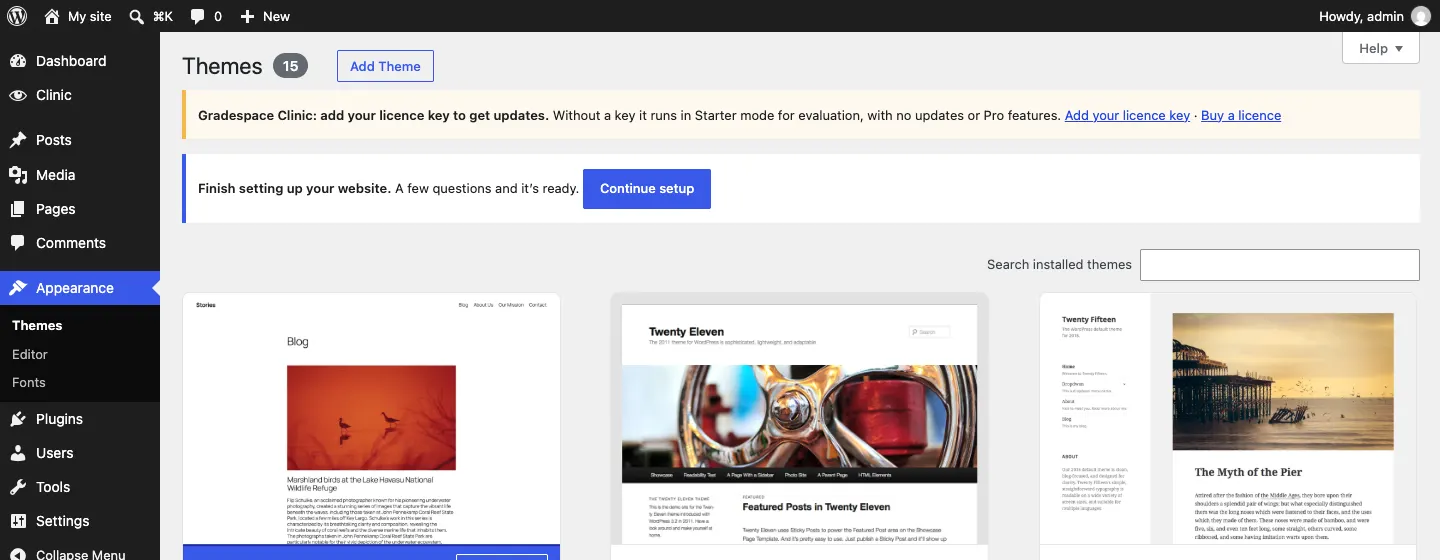
Go to Appearance → Themes.
-
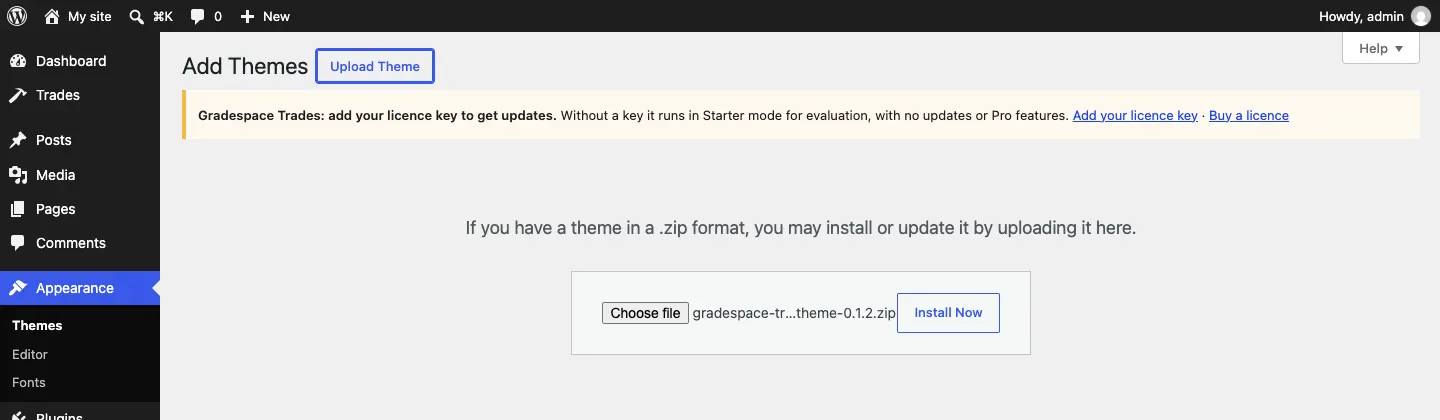
Click Add Theme at the top of the screen.
-
Click Upload Theme.
-
Click Choose file and pick your kit's theme, gradespace-trades-theme-….zip.
-
Click Install Now.
-
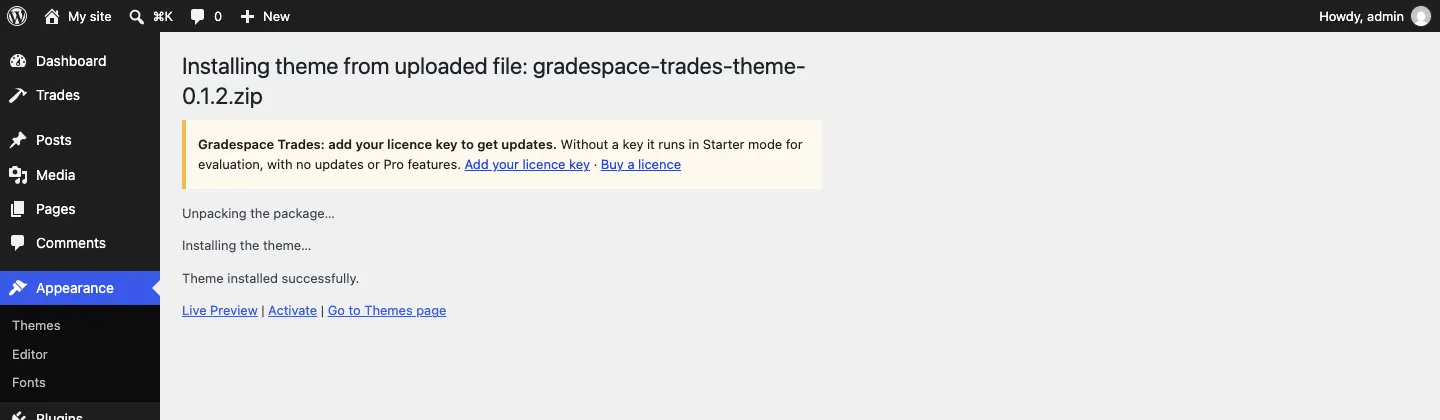
When WordPress says the theme installed successfully, click Activate.
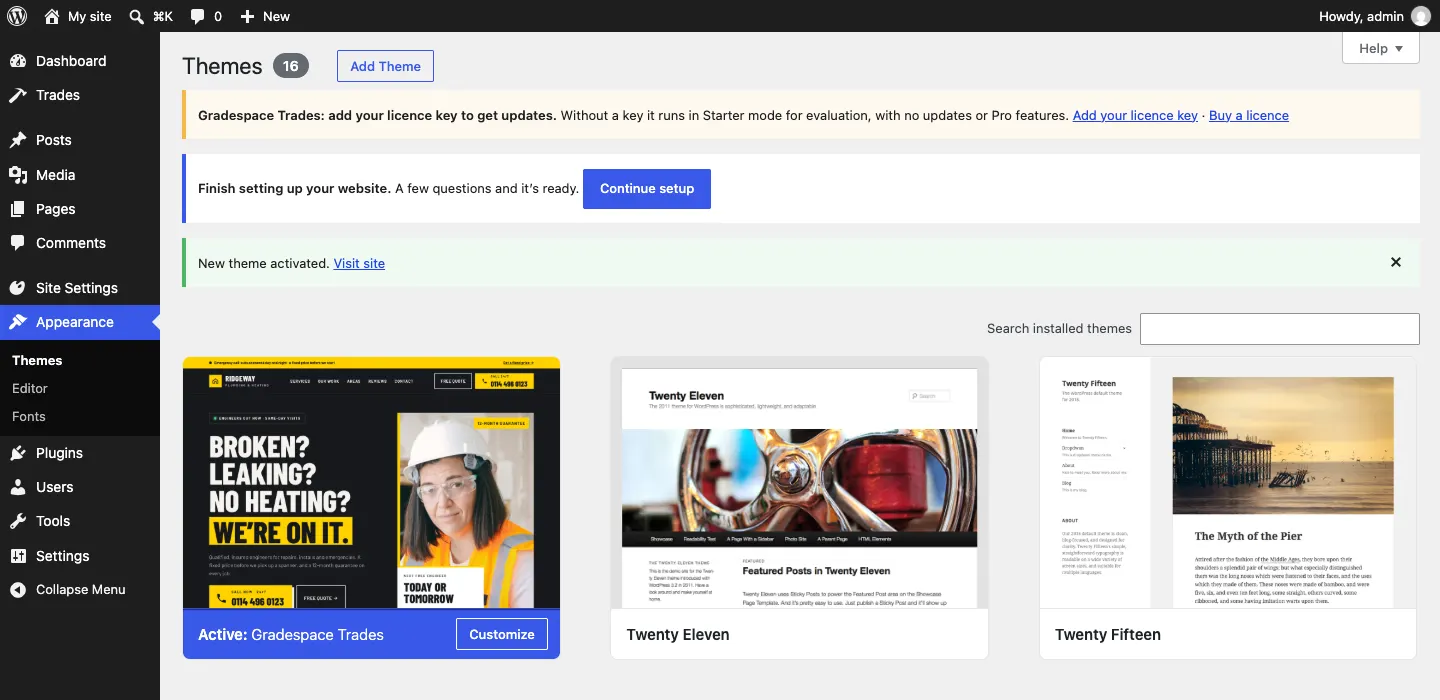
The Themes screen now shows your kit's theme as Active, and a new Site Settings menu appears on the left (that's where you choose your design and colours later). A blue notice says "Finish setting up your website. A few questions and it's ready." with a Continue setup button.
Step 4: Run the setup wizard
Click Continue setup. The wizard asks about your business and adds starter pages, a menu and, if you like, sample photos. It takes about five minutes.
The wizard has its own chapter: The setup wizard. Your kit's manual also has a page on your kit's wizard steps.
Step 5: Add your licence key
Until you add your key, your kit runs in Starter mode: everything in Starter works, but the website gets no updates and Pro features stay locked.
How to add your licence key
-
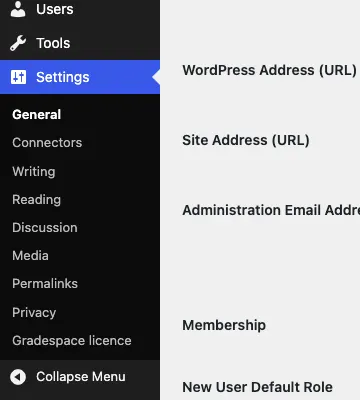
Go to Settings → Gradespace licence. (It's the same screen as Trades → Settings → Licence.)
-
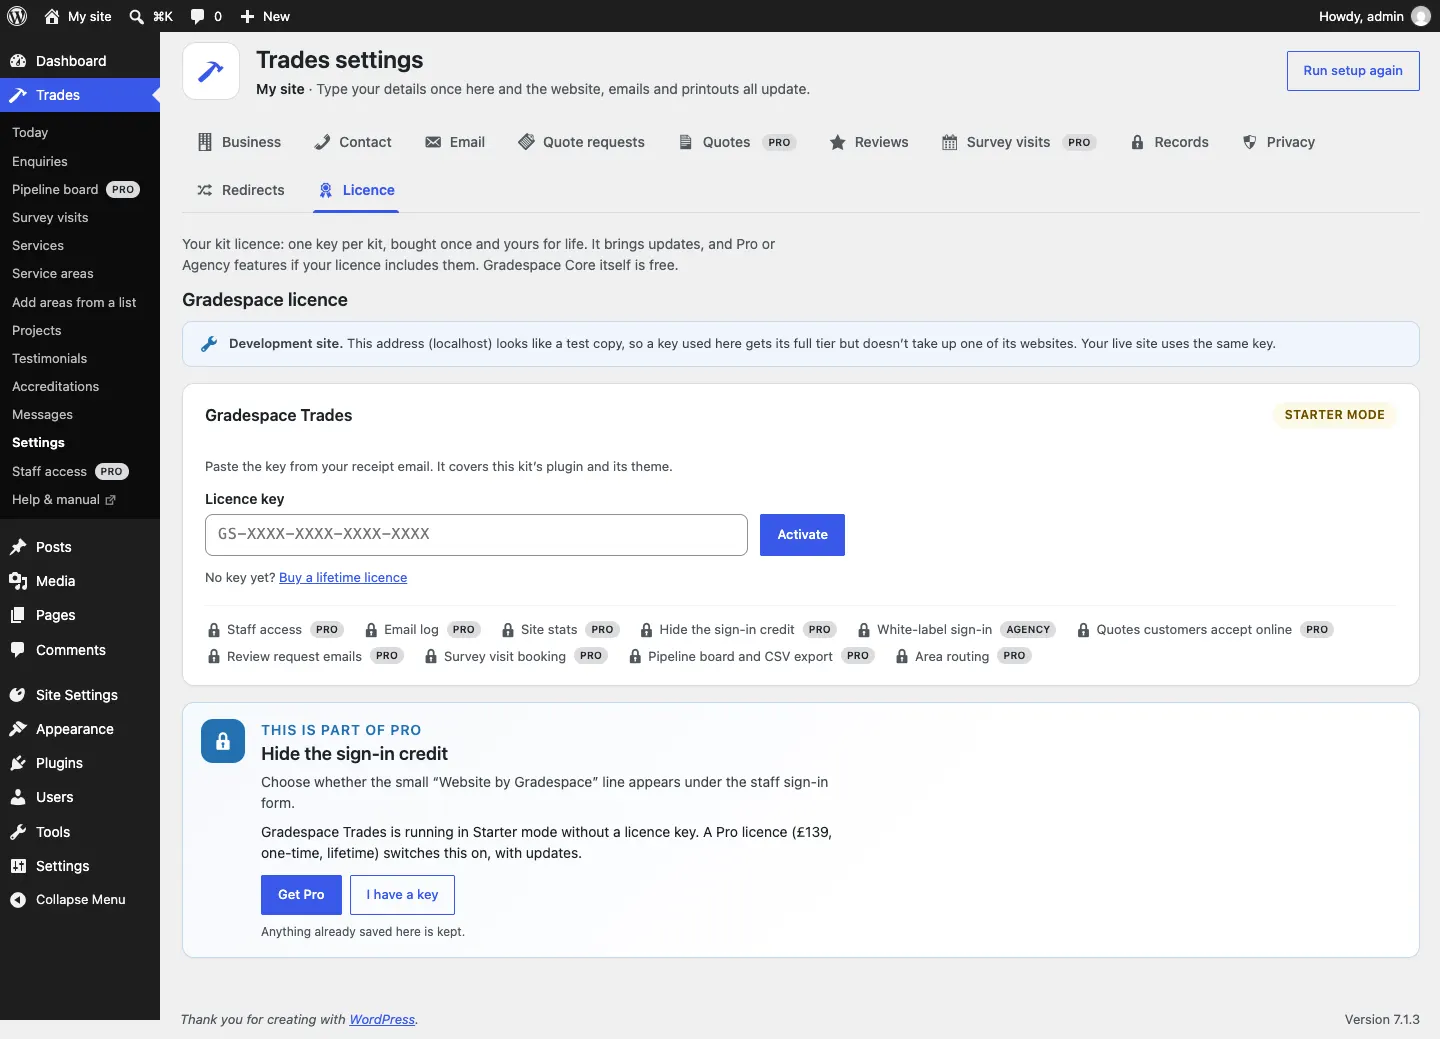
Find your kit's card. It says Starter mode in the corner.
-
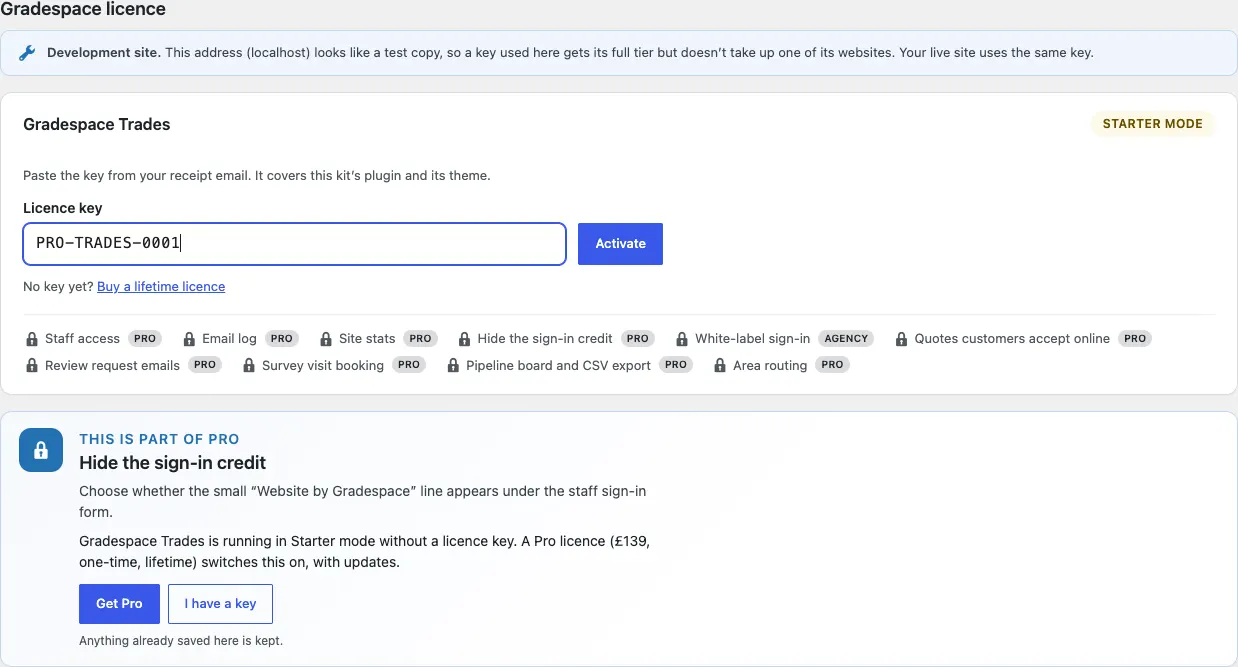
Copy the key from your receipt email and paste it into Licence key. A key looks like GS-XXXX-XXXX-XXXX-XXXX: letters, numbers and dashes.
-
Click Activate.
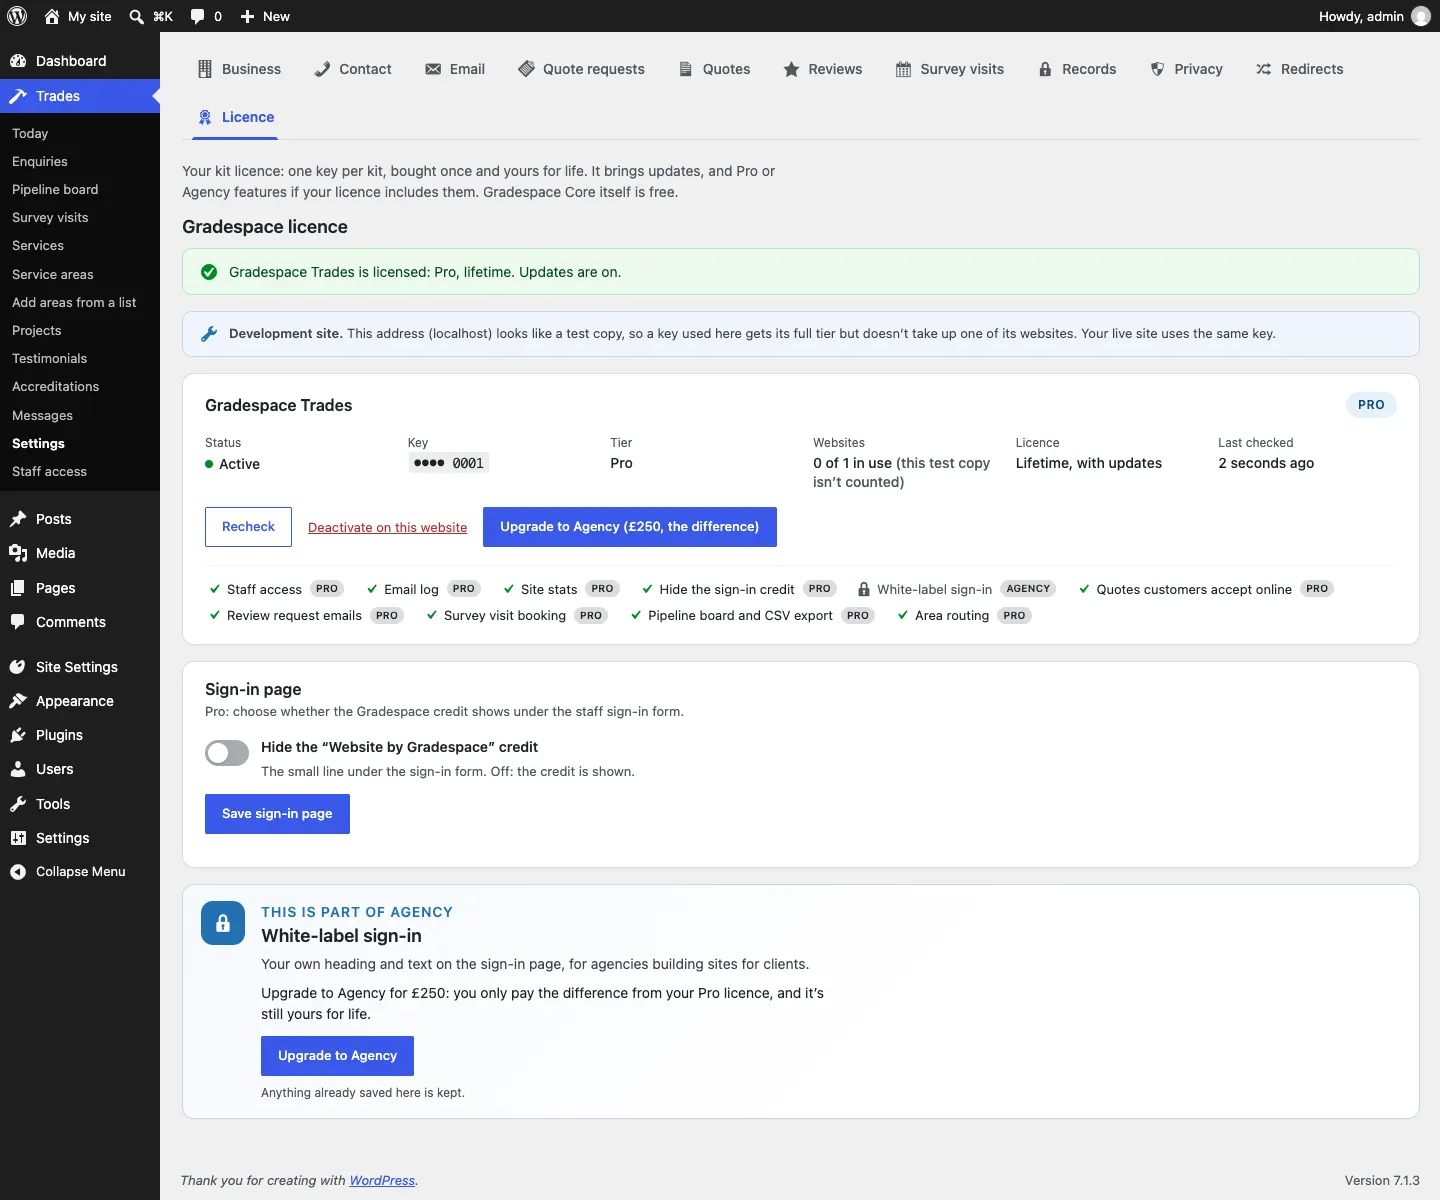
When it works, a green message says your kit is licensed with its tier, and the card shows:
- Status: Active
- Key: only the last four characters, for safety
- Tier: Starter, Pro or Agency
- Websites: how many of your licence's websites are in use
- Licence: Lifetime, with updates
- Last checked: when the website last checked the licence
The ticks along the bottom show which paid features your licence switches on.
If you see a message instead of the green one, see Licence problems.
Only administrators can see or change the licence. Other staff don't see this tab.
How updates arrive
Once your key is active, new versions of Gradespace Core, your kit's plugin and your kit's theme appear in Dashboard → Updates like any other plugin or theme. Updates are included for life. See Backups and updates for how to install them safely.
If you install on a website that already has another theme
That's fine. Activating your kit's theme replaces the old design, but your existing pages, posts and pictures stay where they are. The setup wizard leaves pages you already have alone. You may need to tidy some older pages so they look right in the new design: see Pages, posts and pictures.
Next steps
- The setup wizard, if you haven't run it yet.
- Your look: choose your design, colours and logo.
- Your kit's quick start, in your kit's manual.