Running your website
Sell in store and Stock (Pro)
Use the till to sell over the counter, take cash, card, transfer or split payments and print or send receipts; then keep stock right with Receive, Adjust, History and quick new products.
On this page
Features marked (Pro) need a Pro or Agency licence. Both screens in this chapter are Pro and need the WooCommerce shop plugin. Without Pro, they show an upgrade card and a Pro badge in the menu; past sales and receipts stay available.
- Clinic → Sell in store is the till: search or scan products, take payment and give a receipt. Stock goes down by itself.
- Clinic → Stock shows how many of everything you have, and lets you record deliveries and corrections.
Till sales and online orders share the same stock, so the online shop never sells something you've just sold over the counter.
How to make a sale (Pro)
- Go to Clinic → Sell in store.
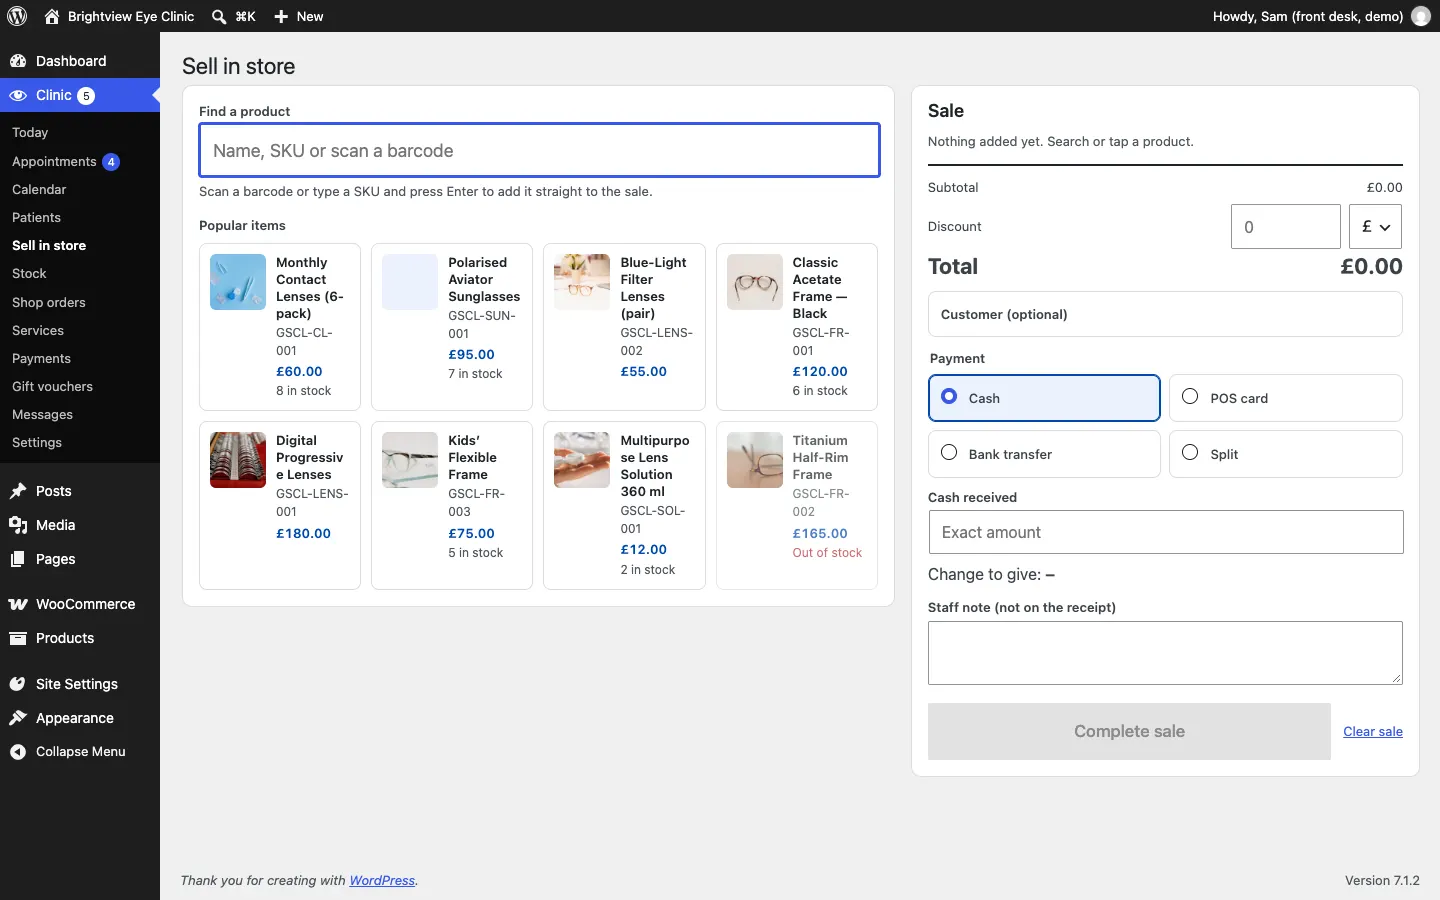
- Add products. Either:
- tap a product under Popular items; or
- type a name or code in Find a product; or
- scan the barcode with a barcode reader. A scanned or typed code followed by Enter adds it straight to the sale.
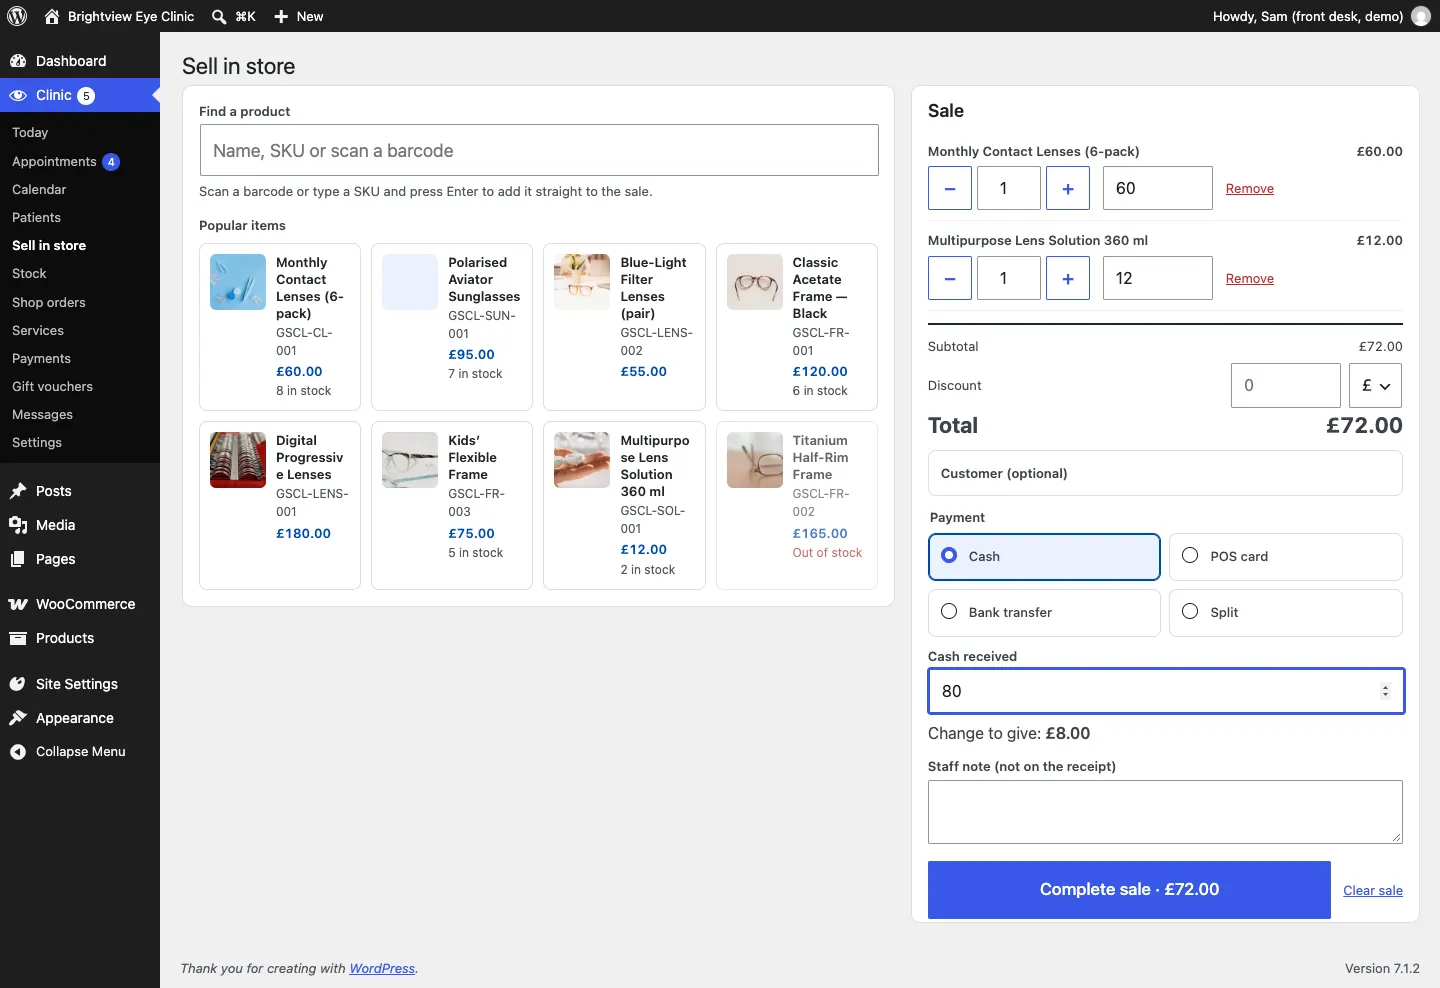
- In the Sale panel, change a quantity with − and +, change a line's price if you need to, or click Remove.
- For a discount, type it in Discount and choose £ or %.
- If you like, click Customer (optional) to Link to a patient, or add an email or phone for the receipt.
- Under Payment, choose how they paid:
- Cash: type the amount handed over in Cash received. Change to give shows the change.
- POS card: paid on your card machine.
- Bank transfer.
- Split: type the cash part (less than the total), then choose how The rest by was paid.
- Add a Staff note (not on the receipt) if needed.
- Click Complete sale · £….
Receipts (Pro)
When the sale is complete you see Sale complete with the receipt. Choose:
- Print (till, 80 mm) for a receipt printer, or Print (A4);
- Send on WhatsApp, if you added the customer's phone in Phone (for a WhatsApp receipt);
- Email receipt, if you added Email (for an emailed receipt).
Then click New sale. Clear sale empties the sale without saving it.
If you linked the sale to a patient, it appears under Purchases on their record.
The Stock screen (Pro)
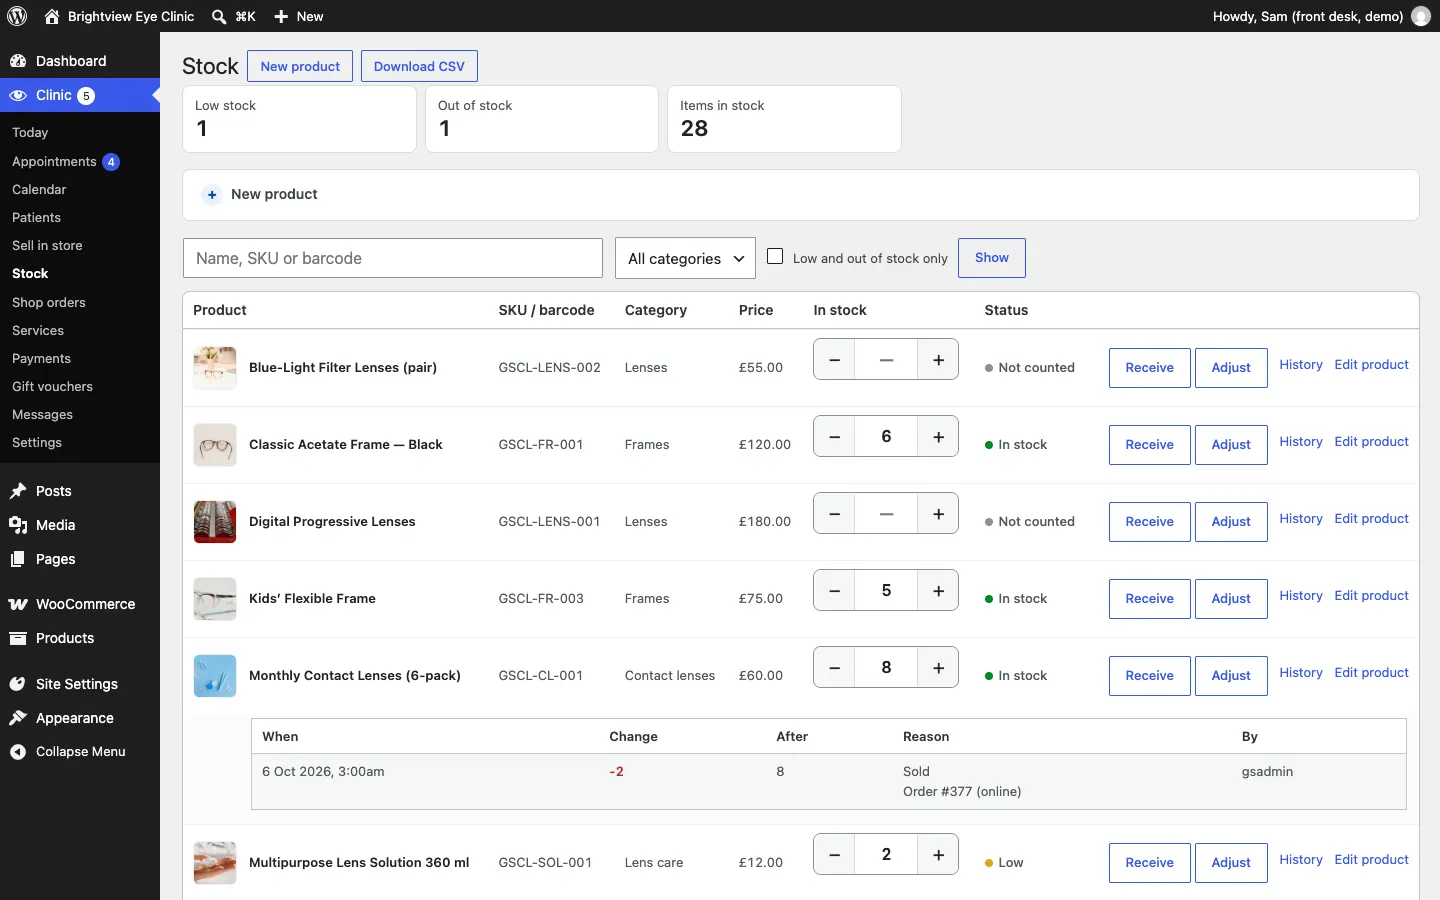
Go to Clinic → Stock. The cards at the top count Low stock, Out of stock and Items in stock. Each product shows its code (SKU / barcode), category, price, the number in stock and a status: In stock, Low, Out of stock or Not counted (stock isn't tracked for it).
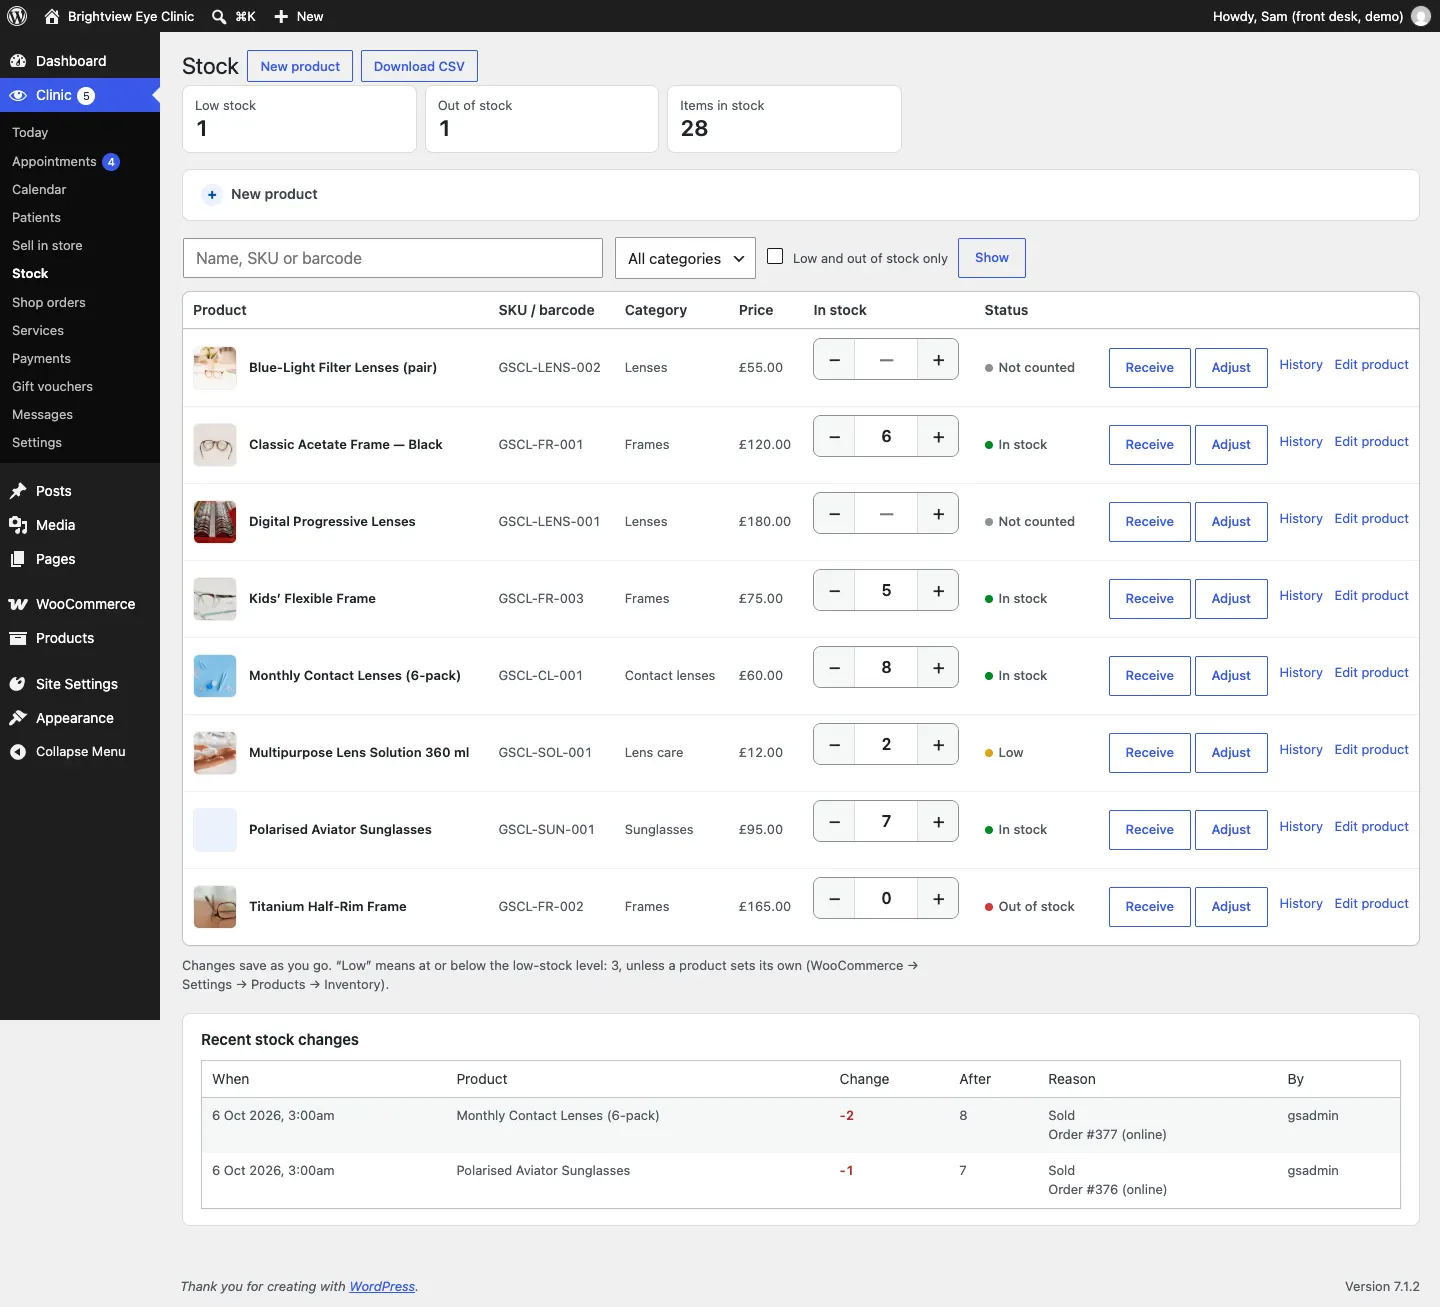
"Low" means at or below the low-stock level: 3, unless a product sets its own.
How to change a quantity
Click − or +, or type the number in the box. Changes save as you go.
How to record a delivery
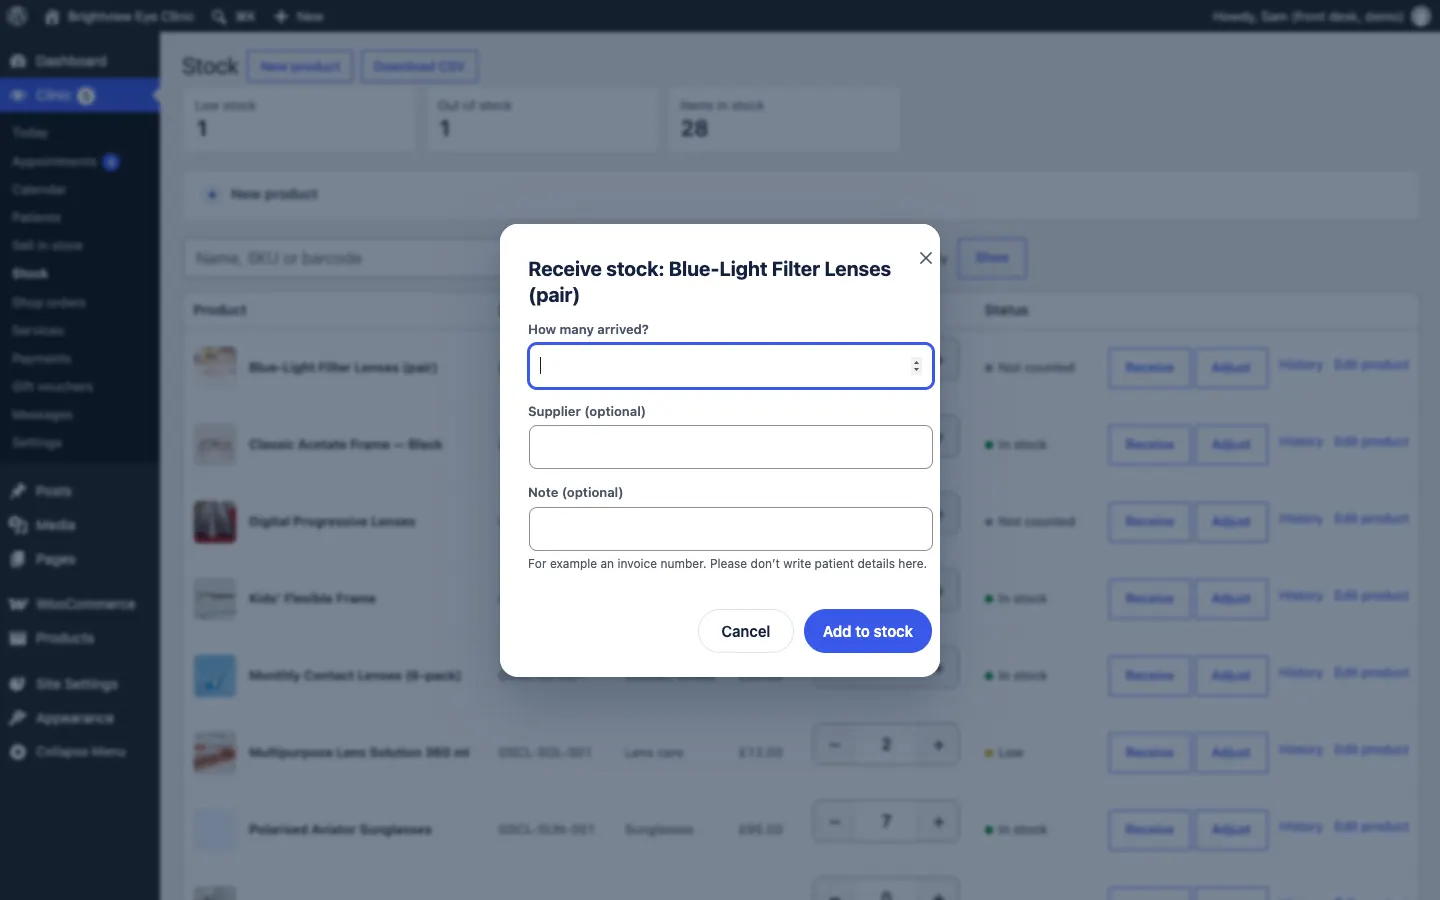
- Click Receive next to the product.
- Type How many arrived?
- Add the Supplier (optional) and a Note (optional), for example an invoice number. Please don't write patient details here.
- Click Add to stock.
How to correct stock
Use Adjust when something is damaged, lost or stolen, returned by a customer, or the count was wrong.
- Click Adjust.
- Choose Add to stock or Take away from stock, and enter how many.
- Choose the reason: Damaged, Lost or stolen, Returned by a customer or Count correction, and add a note if you like.
- Click Save adjustment.
How to see what changed
Click History under a product to see every change: when, how many, the number after, the reason (for example "Sold, Order #377 (online)") and who did it. Recent stock changes at the bottom of the screen shows the latest changes for all products.
How to find what to reorder
Tick Low and out of stock only and click Show. You can also search by name or code, or pick a category. Download CSV saves the list as a spreadsheet.
The Today screen also lists Stock to reorder.
How to add a product quickly
- Click New product at the top of the Stock screen.
- Type the Name, choose a Category, and type the Price (£).
- Type or scan the SKU or barcode, or leave it blank.
- Type the Number in stock now and click Choose a photo if you have one.
- Tick Needs a prescription (online customers upload or choose one when they buy it) for prescription lenses and contact lenses.
- Untick Show it in the online shop (untick for in-store only) for items you only sell in the clinic.
- Click Add product. You see "Product added. It's shown below."
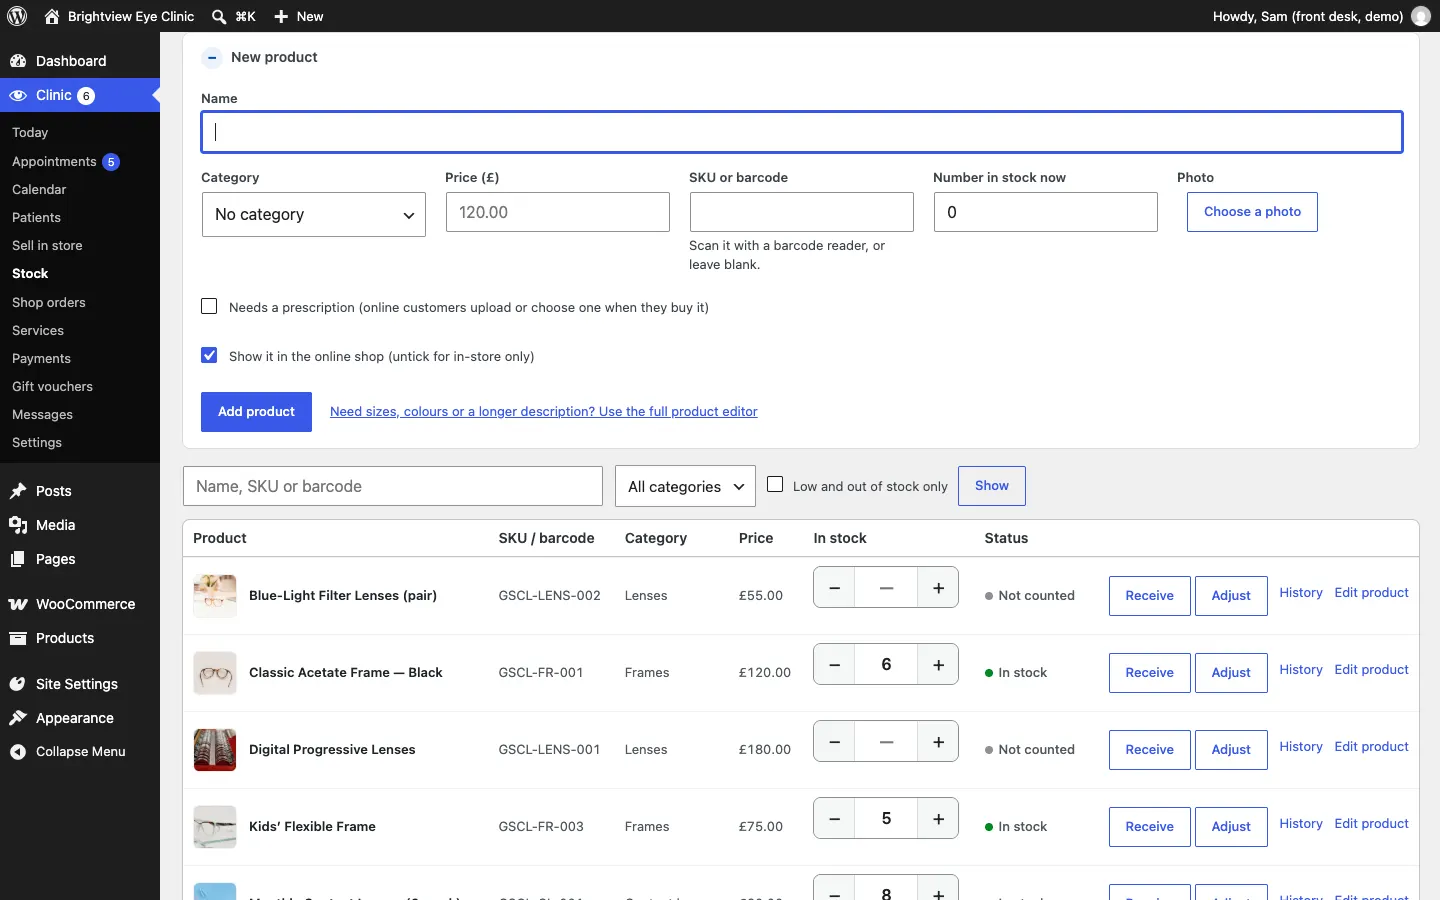
For sizes, colours or a longer description, click Need sizes, colours or a longer description? Use the full product editor. See The online shop.