Looking after your website · shared chapter
Staff accounts and signing in
Giving each member of staff their own account, the staff roles each kit comes with, choosing what each role can do (Pro), and the staff sign-in page.
On this page
Give everyone who works on the website their own account, with the role that fits their job. A role decides what someone can see and do. For example, front-desk staff can manage appointments but can't change the website's settings. Each kit comes with ready-made roles for its kind of business, so you don't have to set anything up.
Never share one account between several people. With their own accounts, people only see what their job needs, and you can remove one person's access without changing everyone's password.
Features marked (Pro) need a Pro or Agency licence.
The roles
Every website has the Administrator role: the owner, or whoever looks after the website. Administrators can do everything, including plugins, the licence, staff access and the email log. Keep administrator accounts to one or two people.
Your kit adds its own staff roles:
| Kit | Staff roles |
|---|---|
| Clinic | Optometrist, Front desk |
| Church | Pastor or church leader, Media team, Welcome team |
| Music | Tutor, Office |
| Salon | Stylist, Front desk |
| Group | Group admin, Business manager, Business staff |
| Tutor | Tutor, Office |
| Driving | Instructor, Office |
| Trades | Estimator, Office |
| Venue | Event coordinator, Events manager |
| Charity | Volunteer coordinator, Fundraiser |
Your kit's manual explains what each of its roles can do to start with.
WordPress's own roles are also there: Editor (can edit every page and post, and open Site Settings → Design & colours), Author, Contributor and Subscriber. Some kits also have a role for customers, such as Learner (Driving) or Client (Group), for people who sign in to their own account on the website. Don't give those roles to staff.
How to add a staff member
-
Go to Clinic → Staff access. Only administrators see this screen.
-
At the bottom, in the Staff card, choose the role in Role for the new staff member, then click Add staff member.

-
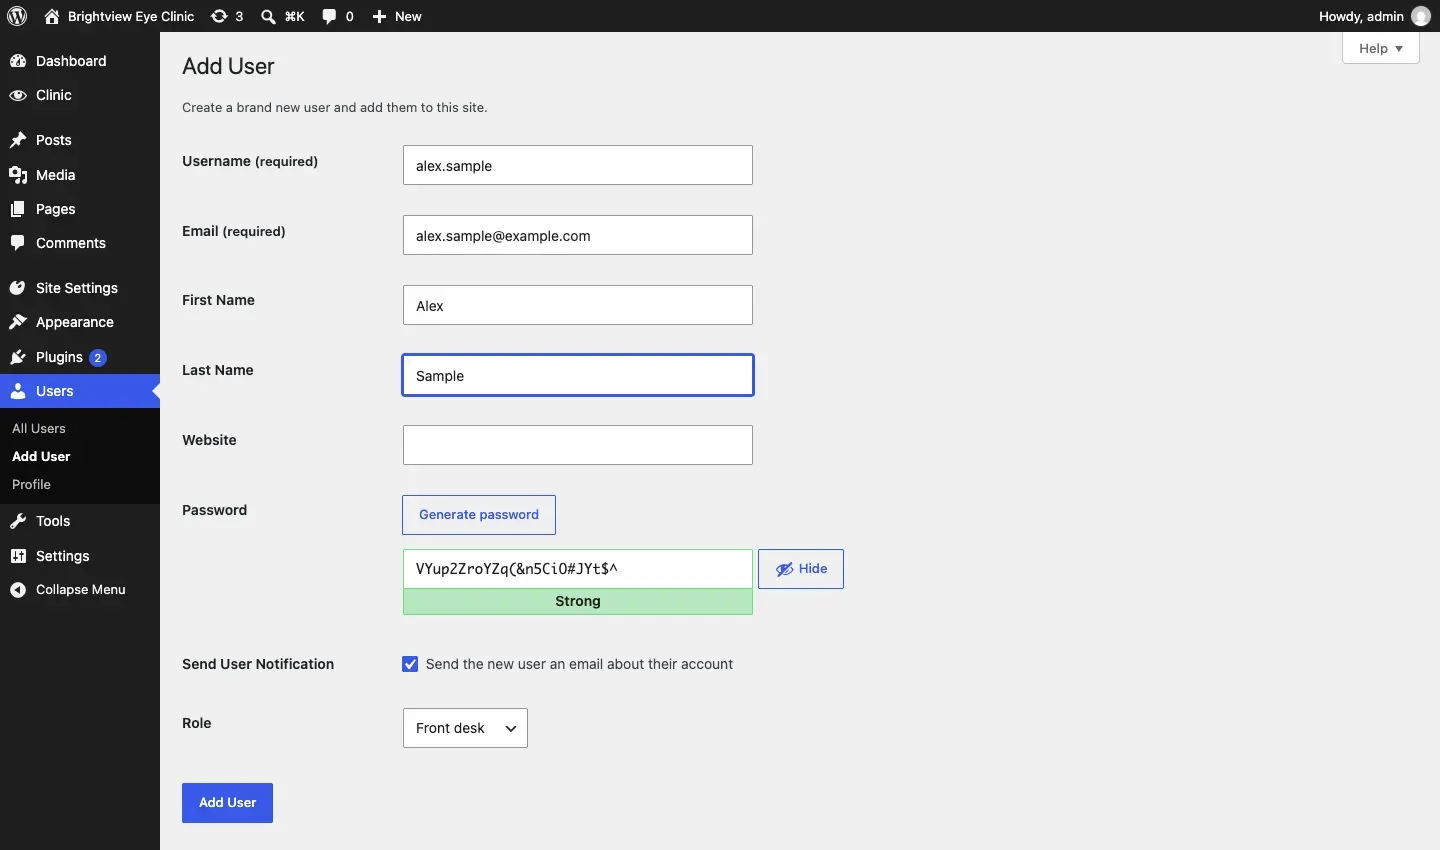
WordPress opens Add User with the role already chosen. Fill in:
- Username (required): what they type to sign in, for example alex.sample. It can't be changed later.
- Email (required): their own work email address.
- First Name and Last Name.
-
Leave Send User Notification ticked, so they get an email to set their own password.
-
Check the Role, then click Add User.
WordPress says New user created and lists them under Users.
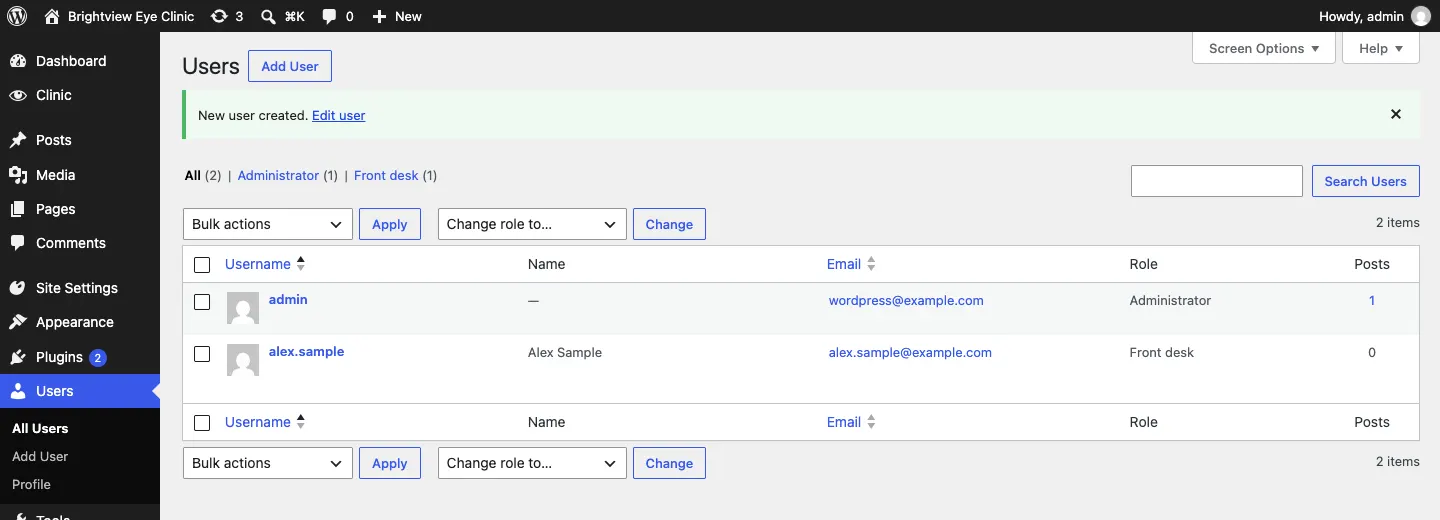
You can also add people from Users → Add User and choose the role yourself.
How to change someone's role
- Go to Clinic → Staff access and scroll to the Staff card.
- Next to the person, choose the new role and click Change role.
Or go to Users, tick the person, choose a role in Change role to… and click Change.
When someone leaves
Remove their access on their last day.
- Go to Users.
- Point at their name and click Delete.
- If they wrote pages or posts, WordPress asks who should own them. Choose Attribute all content to and pick another person, then click Confirm Deletion.
Choosing exactly what each role can do (Pro)
With a Pro or Agency licence, Staff access shows a grid. Each row is something staff can do; each column is a role. Tick or untick, then click Save staff access.
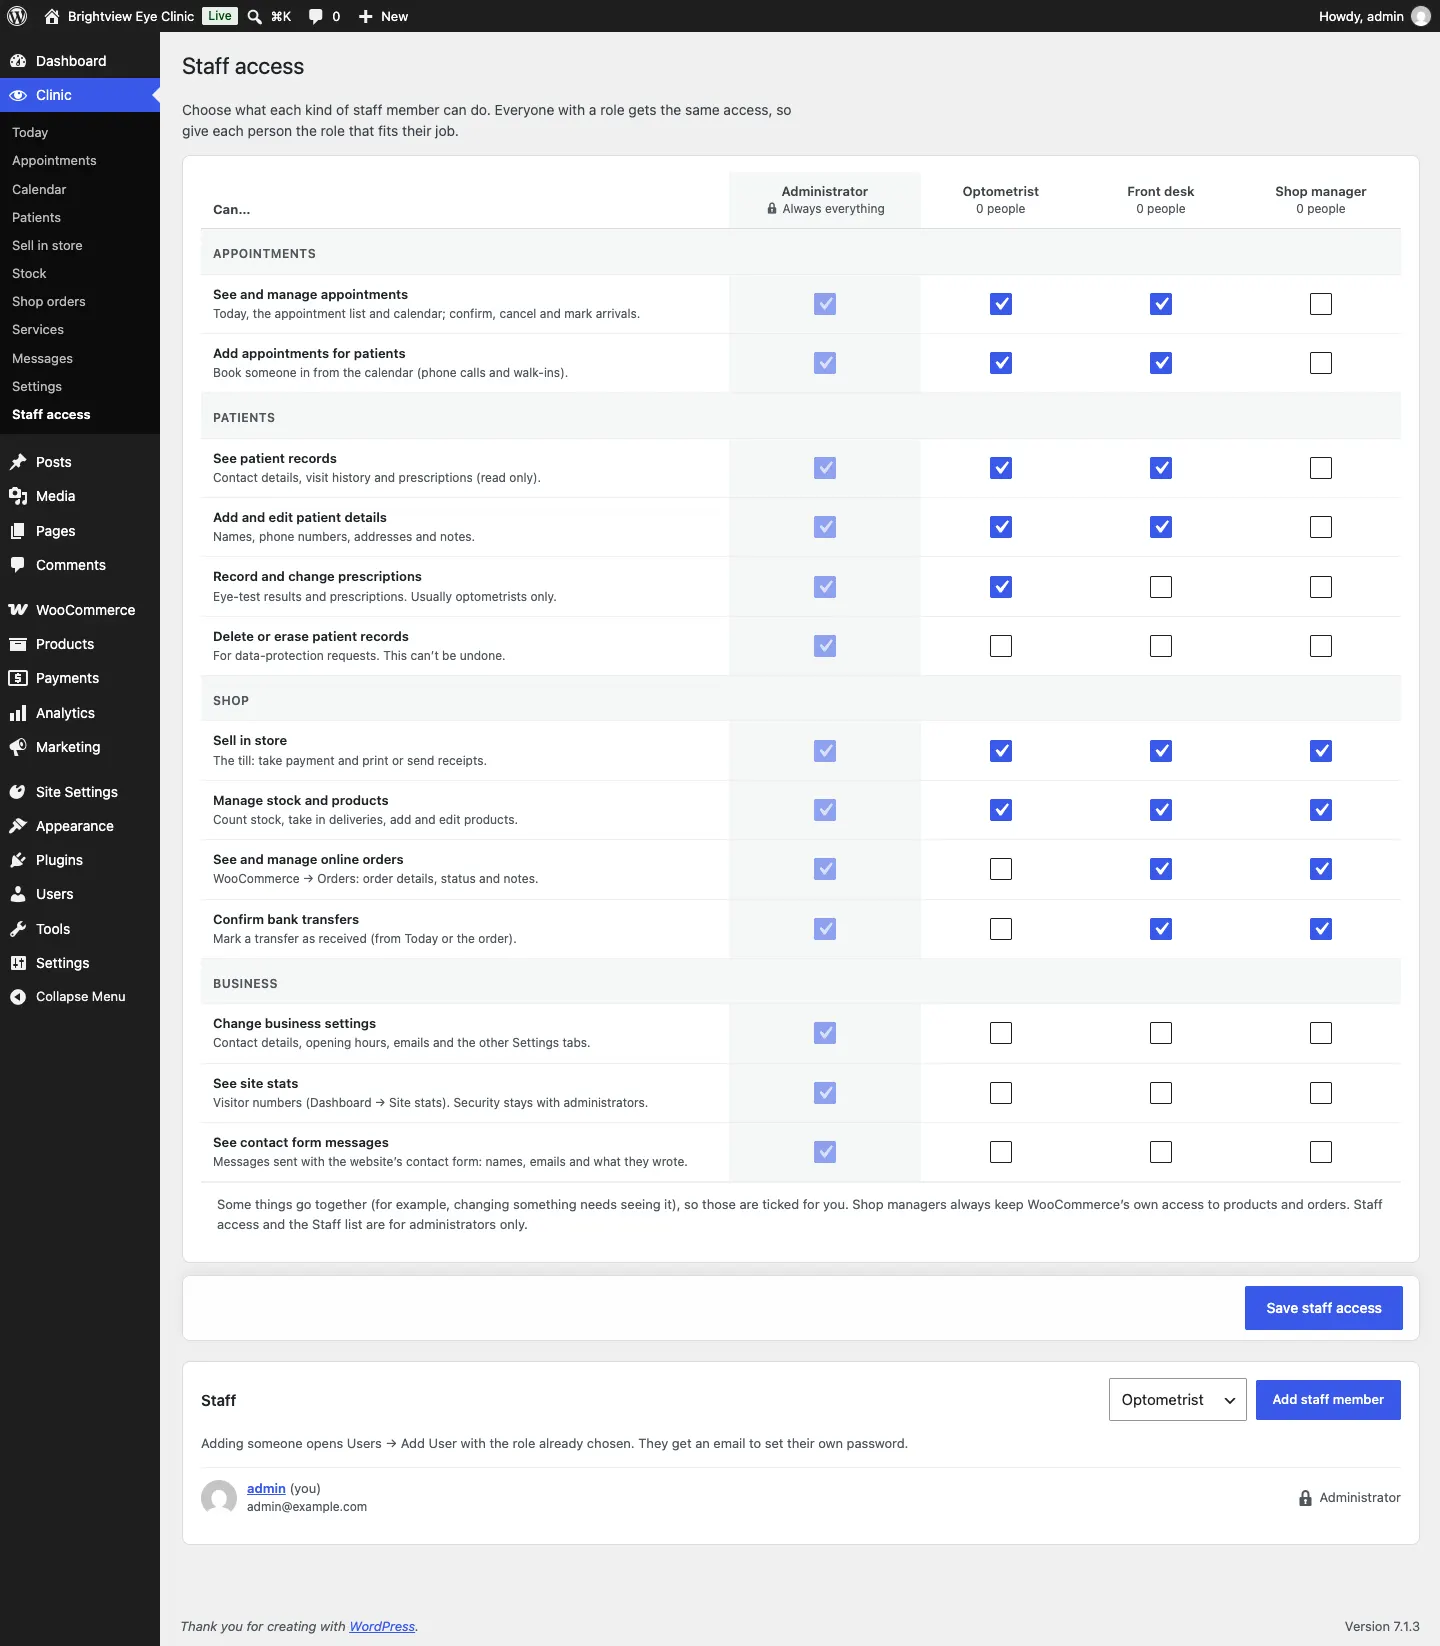
- The Administrator column is always everything and can't be changed.
- Everyone with a role gets the same access, so give each person the role that fits their job.
- Some things go together (for example, changing something needs seeing it), so those are ticked for you.
- Staff access and the Staff list are always for administrators only.
Without Pro, the roles keep their ready-made access, and the Staff access grid shows an upgrade card instead. If a website goes back from Pro to Starter, the access you chose keeps applying; you just can't change it until Pro is active again.
The staff sign-in page
Staff sign in at your website's address followed by /wp-admin (or /wp-login.php). There's also a Staff sign-in link in the footer of every page.
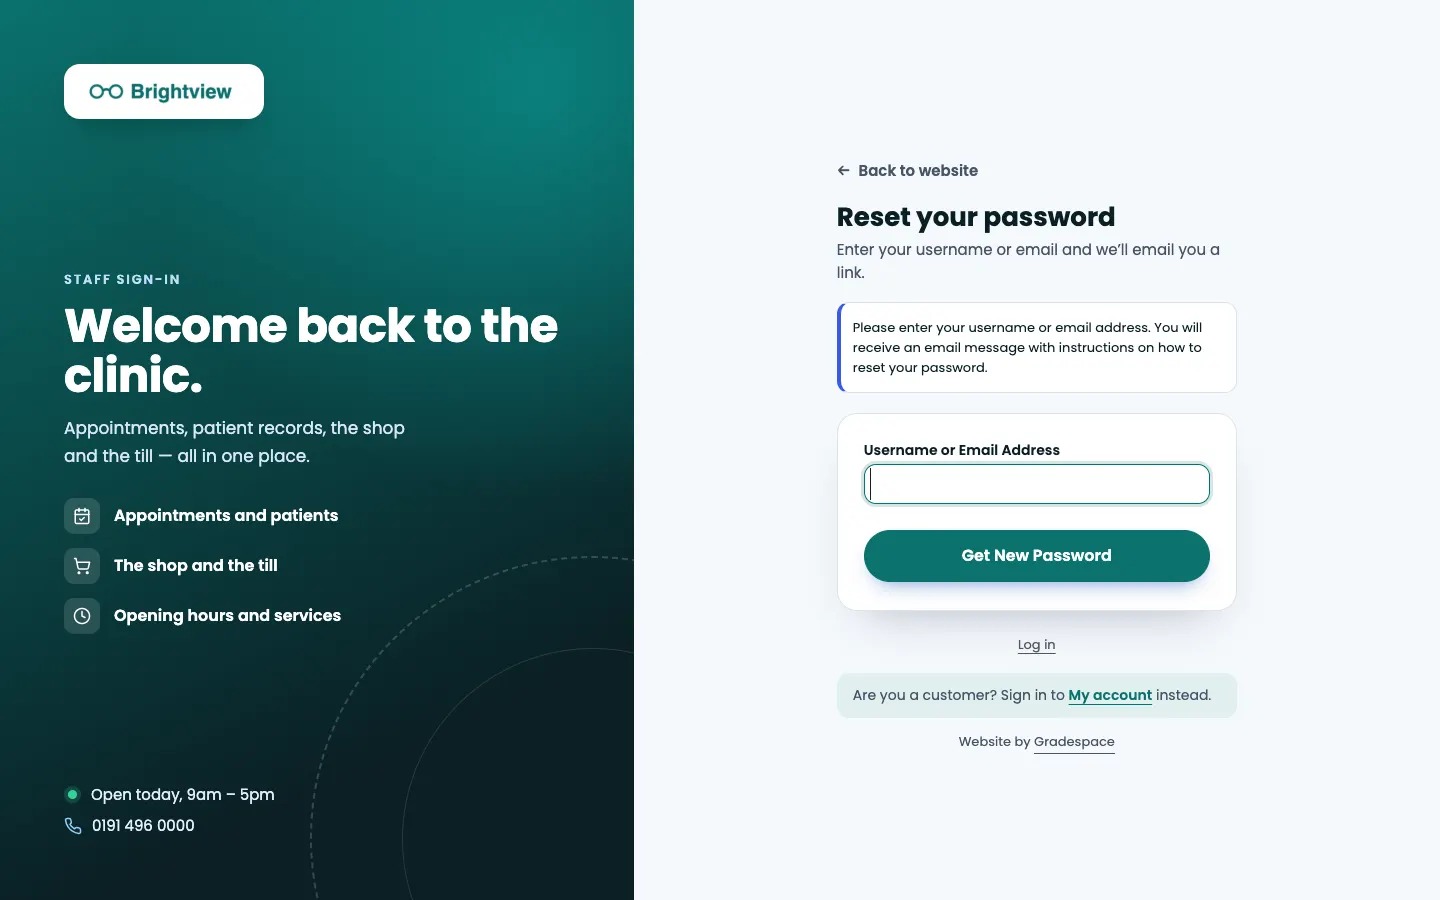
The sign-in page uses your logo and brand colour. The panel on the left lists what staff look after here, today's opening hours and your phone number (in kits that have them). Back to website takes visitors back to your home page.
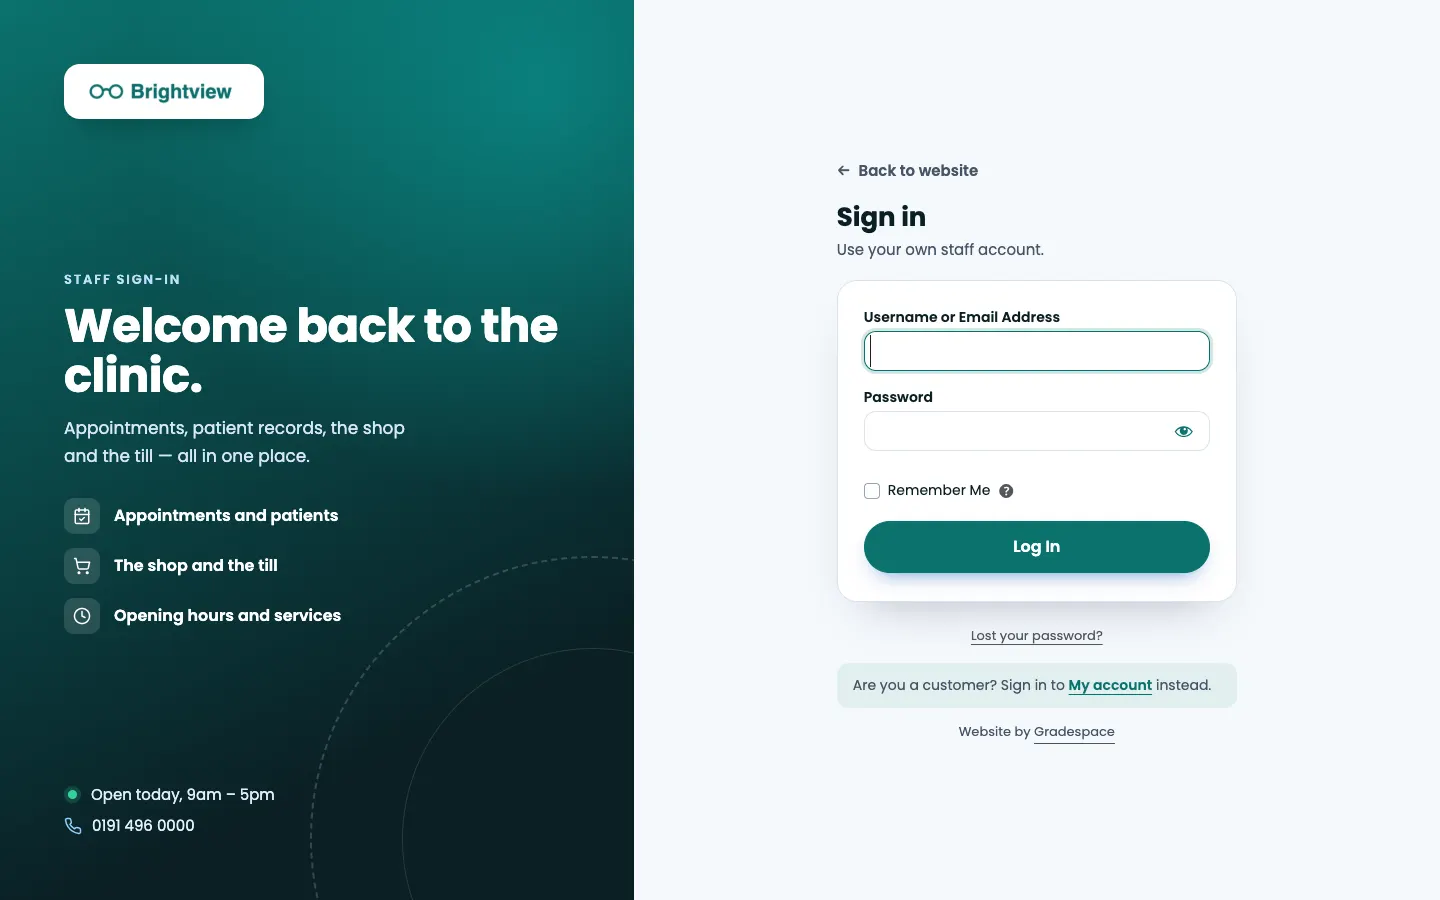
On a phone, the panel becomes a short banner above the form.
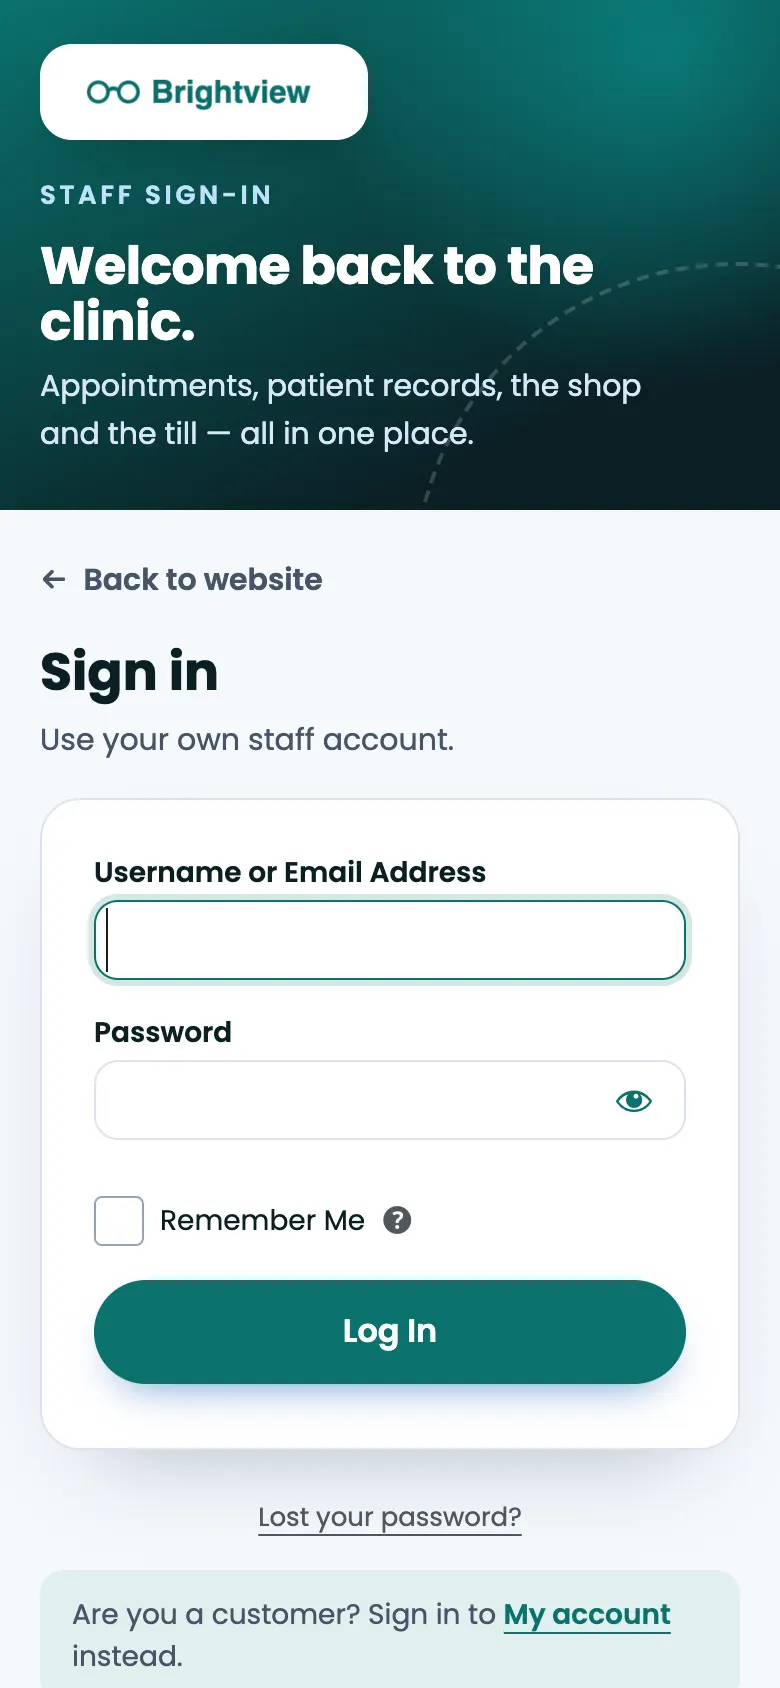
How to sign in
- Go to your website's address followed by /wp-admin.
- Type your Username or Email Address and Password.
- Tick Remember Me only on your own computer or phone.
- Click Log In.
If you've forgotten your password
- On the sign-in page, click Lost your password?
- Type your username or email address and click Get New Password.
- Open the email and follow the link to choose a new password. Use at least 12 characters; the strength meter helps.
Too many wrong passwords
To stop people guessing passwords, sign-in is locked for 15 minutes after 5 wrong tries from the same place. The page says "Too many failed sign-in attempts. Please try again in … minutes." Wait, then try again, or reset your password. The lockout gets longer for repeated attempts (up to a day).
Messages never say whether the username or the password was wrong; they just say "Incorrect username or password." That's on purpose.
Your own photo and words on the sign-in page
Go to Clinic → Settings → Business and find the Sign-in page card:
- Sign-in page photo (optional): a photo behind the panel, darkened with your brand colour so the words stay easy to read. Use a landscape or square photo at least 1200 pixels wide. With no photo, the panel uses your brand colour.
- Line at the bottom of the panel (optional): a small line such as your full name and area.
Click Save changes.
Hiding the "Website by Gradespace" line (Pro)
With a Pro or Agency licence you can hide the small "Website by Gradespace" line under the sign-in form.
- Go to Settings → Gradespace licence.
- In the Sign-in page card, switch on Hide the "Website by Gradespace" credit.
- Click Save sign-in page.

With an Agency licence, the same screen also lets you set your own Panel heading and Panel text for the sign-in page (white label), for agencies building websites for clients.
Related chapters
- Your kit's manual: what each of its roles can do, and its staff guide.
- Troubleshooting and support: sign-in problems.