Running your website
Payments and gift vouchers
How to connect Stripe or WooCommerce so learners can pay deposits and buy block hours online, the Payments screen, recording payments made in person, and gift vouchers.
On this page
You don't have to take money online: many schools are paid in the car or by bank transfer. But if you'd like learners to pay a deposit when they book, or buy block hours online, connect a payment provider. Customers always pay on the provider's own secure page; card details never touch your website.
Features marked (Pro) need a Pro or Agency licence. Deposits when booking and buying block hours online are (Pro).
How to connect a payment provider
Only an administrator can see this tab.
- Go to Driving school → Settings → Payments.
- Under How you take payments, choose Take payments through: Stripe directly (simplest), or your WooCommerce checkout if you already have a shop.
- Choose your Currency (for Stripe; WooCommerce uses the shop's currency).
- For Stripe, paste the Publishable key, the Secret key and the Webhook signing secret from your Stripe dashboard, as the screen explains. Use test keys until you've tried a payment.
- Click Save changes, then Check the connection. The Stripe connection card says Test mode: no real money moves or Live: real payments.
Deposits and paying before the lesson (Pro)
Once payments are set up, open each lesson type and use its Deposit panel to ask for nothing, a fixed deposit, a percentage or the full price. See Lesson types and prices.
While the learner pays, the time is held and the lesson shows as Waiting for payment. If they pay in person instead, open the lesson and click Paid in person: it's recorded as paid and the lesson is confirmed.
The Payments screen
Go to Driving school → Payments to see every payment.
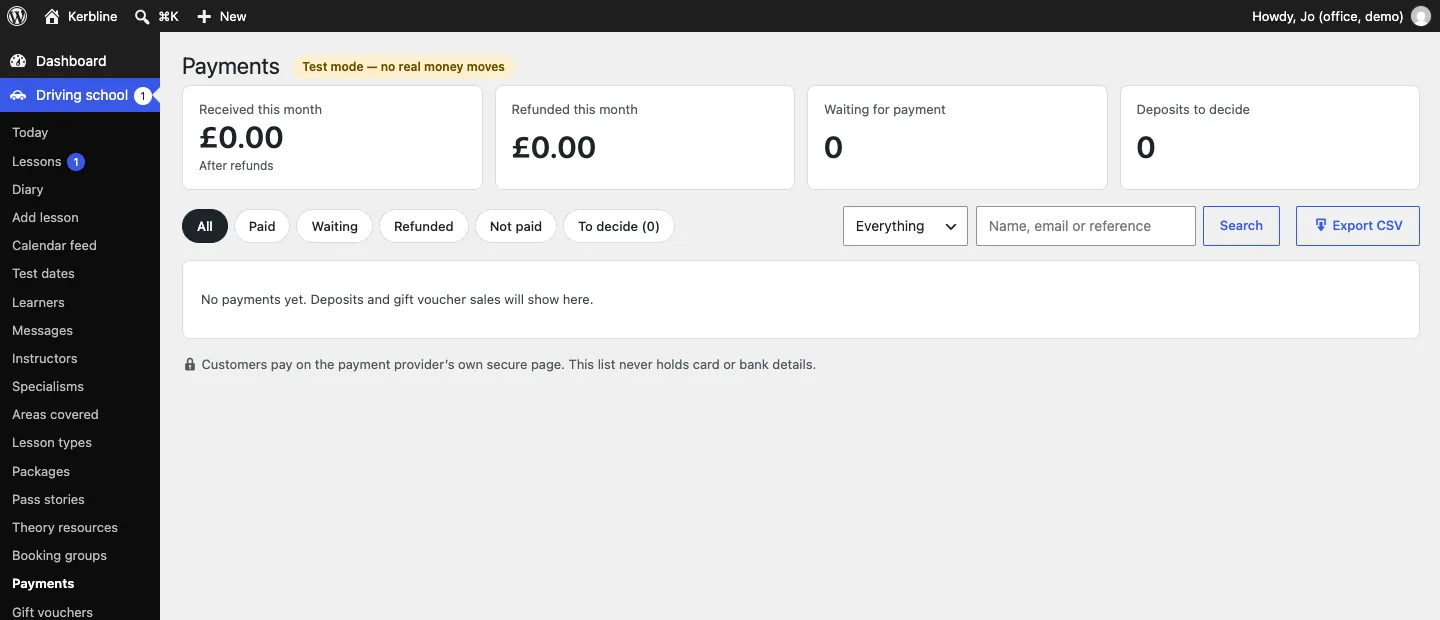
- The totals at the top show Received this month, Refunded this month, Waiting for payment and Deposits to decide.
- Filter by All, Paid, Waiting, Refunded, Not paid or To decide, and by what it was for (Bookings or Gift vouchers).
- Export CSV downloads the list for your accounts.
The list never holds card or bank details.
How to give a refund
- Click the payment in the list to open it.
- Type the amount to give back and click Refund, then confirm. Through Stripe, the money goes back to the customer and they get a "Refund sent" email. For a payment made in person, the refund is recorded and you hand the money back yourself.
Gift vouchers
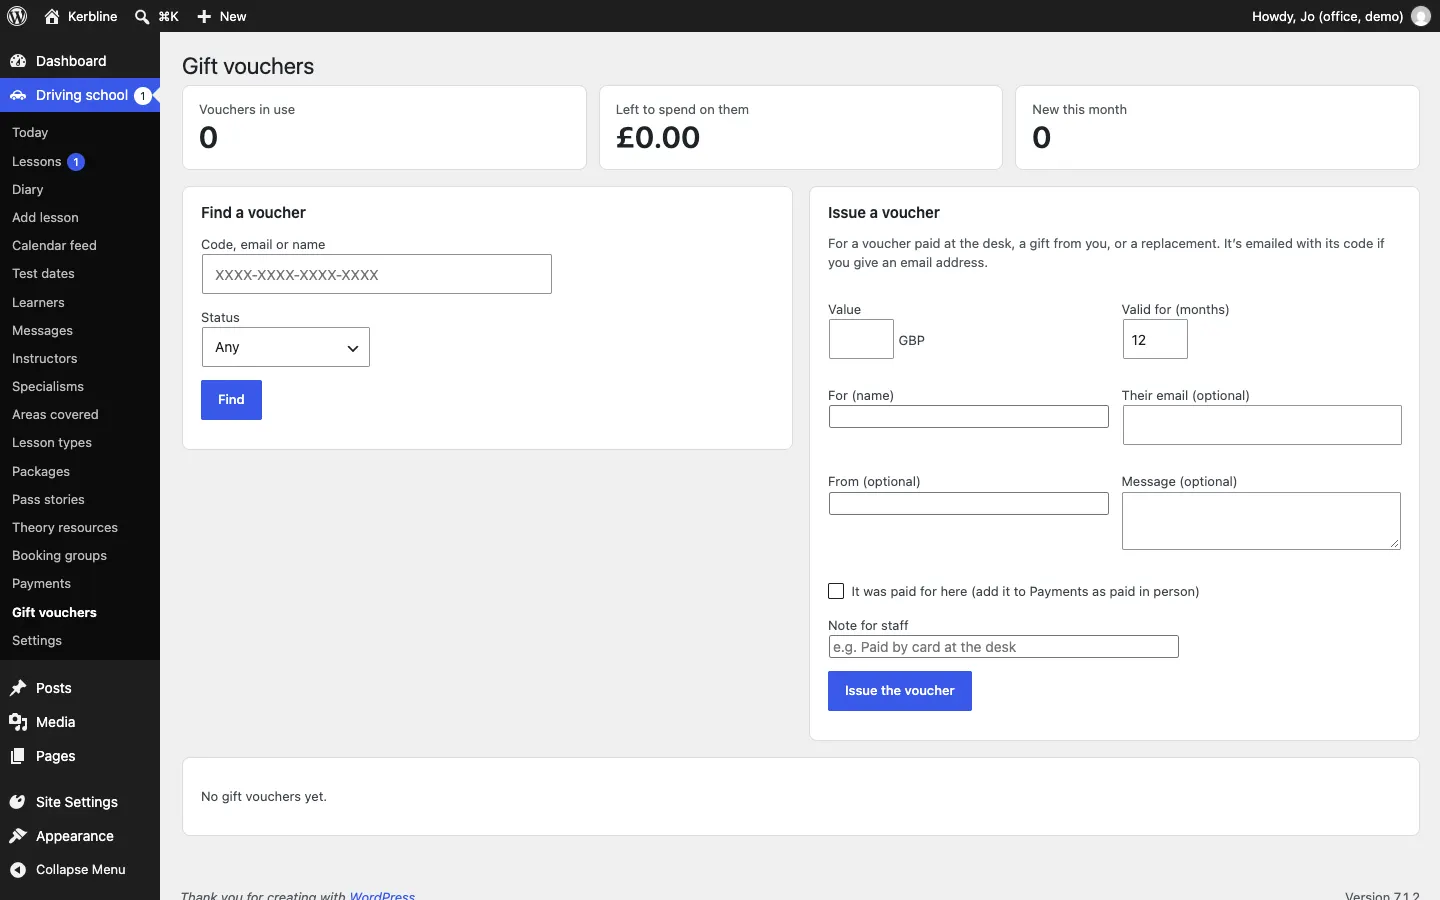
Gift vouchers make good presents for a 17th birthday. Go to Driving school → Gift vouchers.
How to issue a voucher at the desk
- Under Issue a voucher, type the Value and Valid for (months).
- Type who it's For (name) and, if you like, Their email, From and a Message. With an email address, the voucher is emailed with its code.
- Tick It was paid for here (add it to Payments as paid in person) if they paid you.
- Add a Note for staff if needed, and click Issue the voucher.
Use Find a voucher to look one up by code, email or name, and filter by status (Waiting for payment, Active, Used up, Expired, Cancelled). Buyers get a "Gift voucher receipt" email, and a reminder goes out before a voucher with money left on it expires.