Getting started
Quick start: from buying to your first booking
One checklist from buying the Salon kit to taking your first online booking, with a link to the chapter for each step.
On this page
Work down this list in order. Each step links to the chapter with the details. Most salons can be taking bookings in an afternoon.
Features marked (Pro) need a Pro or Agency licence.
1. Buy and download
- Buy the Salon kit (Starter, Pro or Agency) at thegradespace.com. See Buying and your licence.
- Find your licence key in your receipt email.
- Download the three zip files from My licences: Gradespace Core, the Gradespace Salon plugin (a plugin is an add-on for WordPress) and the Gradespace Salon theme (the design). Leave them as zip files.
2. Get your website ready
- Check your hosting meets the requirements (WordPress 6.8 or later, PHP 8.0 or later) and take a backup. See Before you install.
3. Install, in this order
- Gradespace Core: Plugins → Add New Plugin → Upload Plugin, then Install Now and Activate Plugin. If the setup wizard opens, leave it for now.
- The Gradespace Salon plugin: the same again.
- The Gradespace Salon theme: Appearance → Themes → Add New Theme → Upload Theme, then Install Now and Activate.
See Installing.
4. Run the setup wizard
The wizard opens by itself (or click Continue setup on the Dashboard). It asks about your salon, what you offer, your team, opening hours and online booking, and adds starter pages, a menu and, if you like, sample photos. See The Salon setup wizard.
5. Add your licence key
Go to Settings → Gradespace licence (also under Salon → Settings → Licence), paste your key and click Activate. This switches on updates and, with Pro, the Pro features. See Installing.
6. Make it look like your salon
- Choose a design (Blush, Barbershop, Studio or Luxe) and a colour palette under Site Settings → Design & colours. See Designs, colours and pages.
- Add your logo, name and tagline under Salon → Settings → Business. See Salon settings.
- Add your phone, email and address under Salon → Settings → Contact.
- Check the menu and footer. See Your look.
7. Set your opening hours
- Set each day's hours under Salon → Settings → Opening hours, and add closed days such as Christmas. See Salon settings.
8. Add your services and prices
- Under Salon → Services, check each sample service, change times and prices, and add your own. Delete the ones you don't offer. See Services and prices.
- Tick Needs a patch test on colour, tint and lash services, and choose your patch test service under Salon → Settings → Bookings. See Booking on the website.
9. Add your team
- Under Salon → Team, add each person with a photo, role, working hours, breaks and days off. See Your team.
- On each service, tick who does it under Who does it.
- Give each person their own sign-in (Stylist or Front desk). See Your team and Staff accounts and sign-in.
10. Decide your booking rules
Under Salon → Settings → Bookings (see Salon settings):
- Confirm online bookings straight away, or confirm each one yourself.
- Notice needed (hours), Book up to (weeks ahead) and Offer start times every (minutes).
- Clients can change or cancel online until (hours before) and your Cancellation policy.
- For barbers: Show "Walk-ins welcome".
11. Check your emails
- Under Salon → Settings → Email, set Send notifications to and a From email on your own domain. See Privacy and emails.
12. Deposits and gift vouchers (Pro)
- An administrator connects Stripe or WooCommerce under Salon → Settings → Payments.
- Set a deposit on long treatments in each service's Deposit panel.
- Check the Gift vouchers page.
See Deposits, payments and gift vouchers. For the loyalty card and packages, see Loyalty card and packages.
13. Replace the sample photos and words
- Swap the sample photos for your own on each service, team member and page, and add your work to the Lookbook.
- Check the FAQ, Offers & packages and legal pages. See Pages and content.
14. Make your first booking
- Sign out (or open a private browser window) and go to your Book page.
- Book a treatment for yourself with your own email address, as a client would. See Booking on the website.
- Check you receive the confirmation email with its calendar invite.
- Sign in and find it on Salon → Today and in the Diary. See Appointments and the diary.
- Cancel it from the link in your email to try that too.
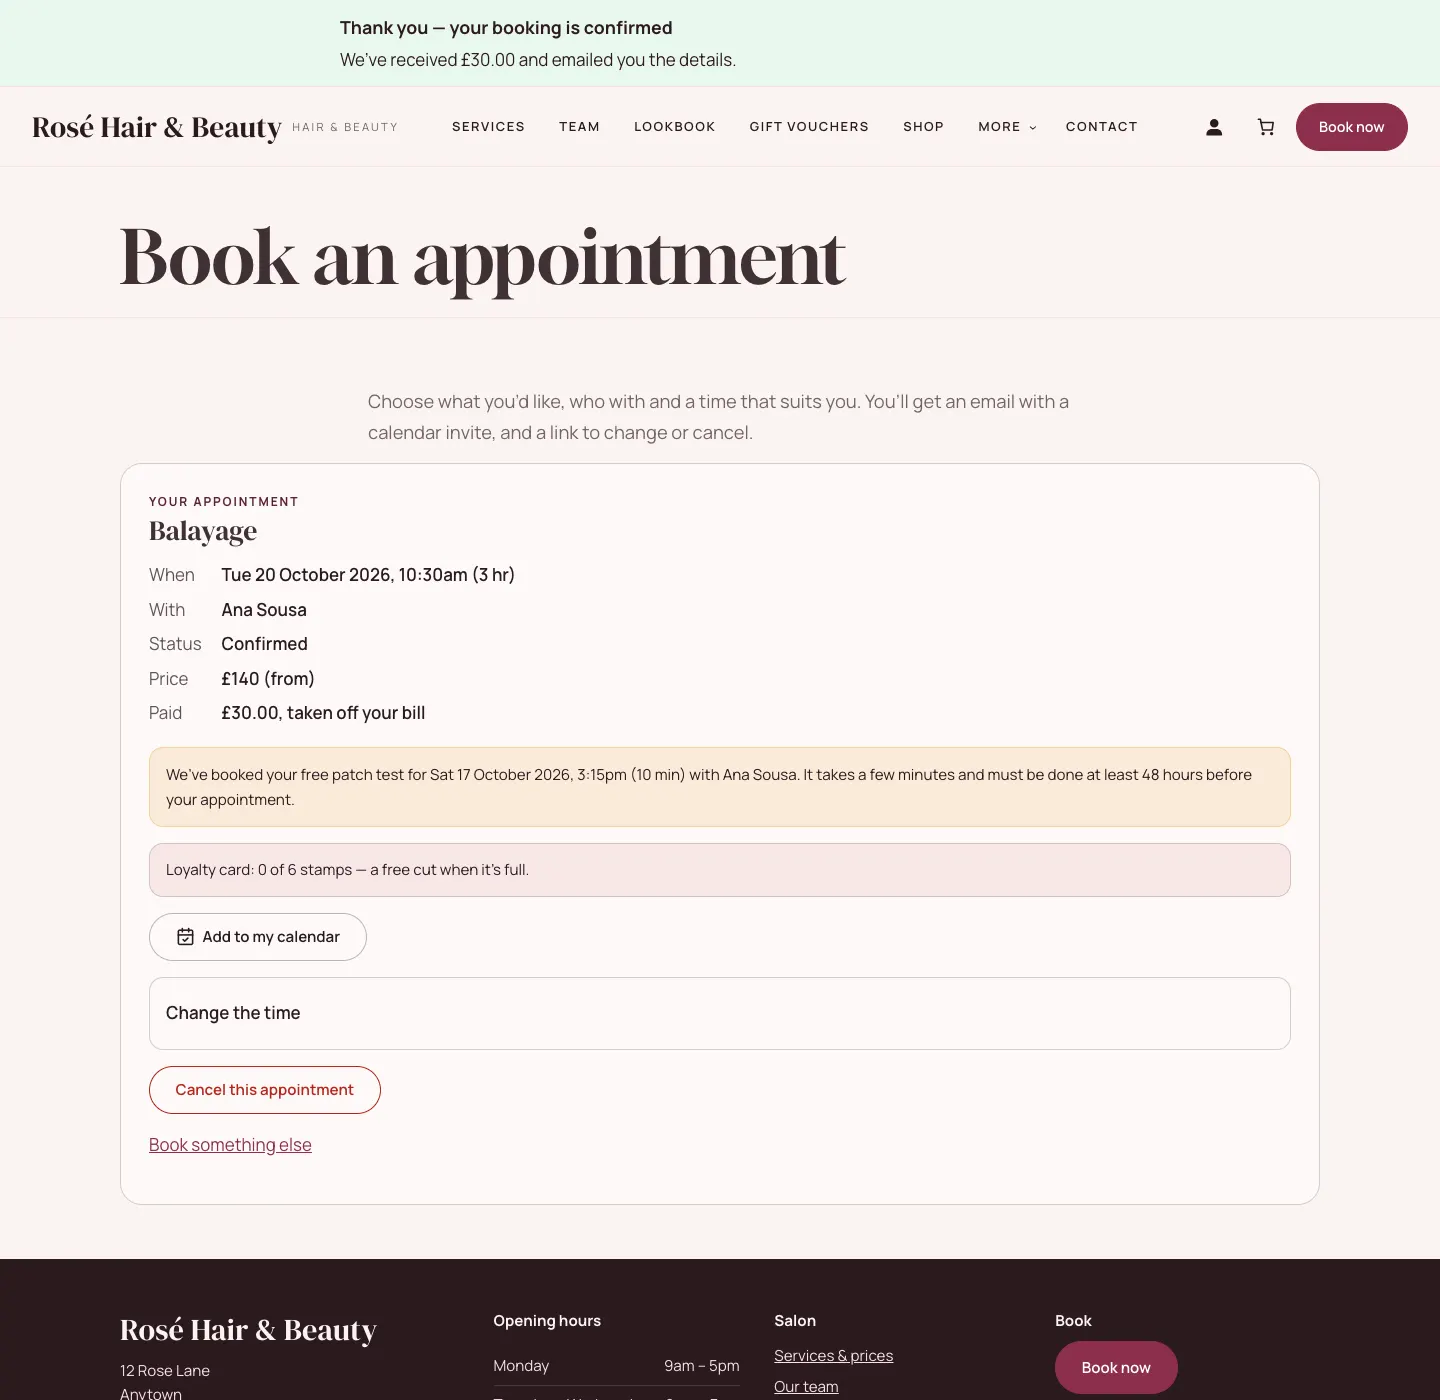
You're ready. From here, the daily routine is in Running the salon day to day.