Looking after your website · shared chapter
Privacy, cookies and emails
The cookie banner and cookie settings, your starter terms, privacy and cookie policies, requests for people's data, the website's branded emails, test emails and the email log (Pro).
On this page
Your kit comes with what a small business website needs to respect visitors' privacy: a cookie banner that asks before anything optional is loaded, starter legal pages filled in with your details, and visitor counts that don't use cookies. It also sends branded emails in your name, logo and colours, such as booking confirmations, and keeps a log of every email so you can answer "did my confirmation go out?" in seconds.
Features marked (Pro) need a Pro or Agency licence.
The cookie banner
The first time someone visits your website, a banner asks about cookies. Essential cookies (the ones that make the site work, such as signing in and remembering the visitor's choice) are always on. Anything optional, such as videos and maps from other companies, is only loaded if the visitor allows it.
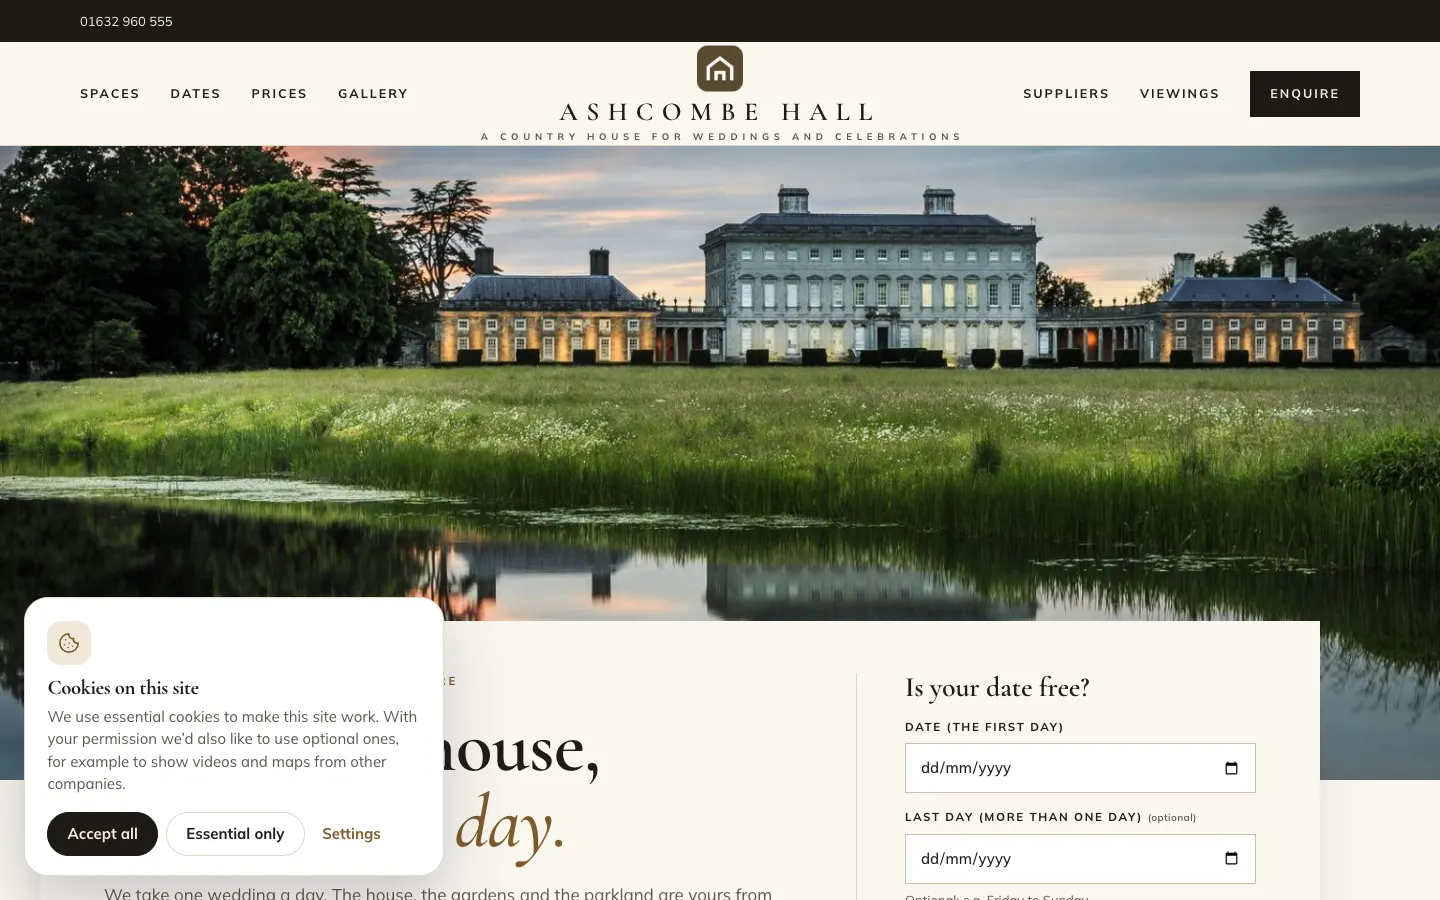
Visitors can choose:
- Accept all: allow every kind of cookie.
- Essential only: only what the site needs to work.
- Settings: choose kind by kind.
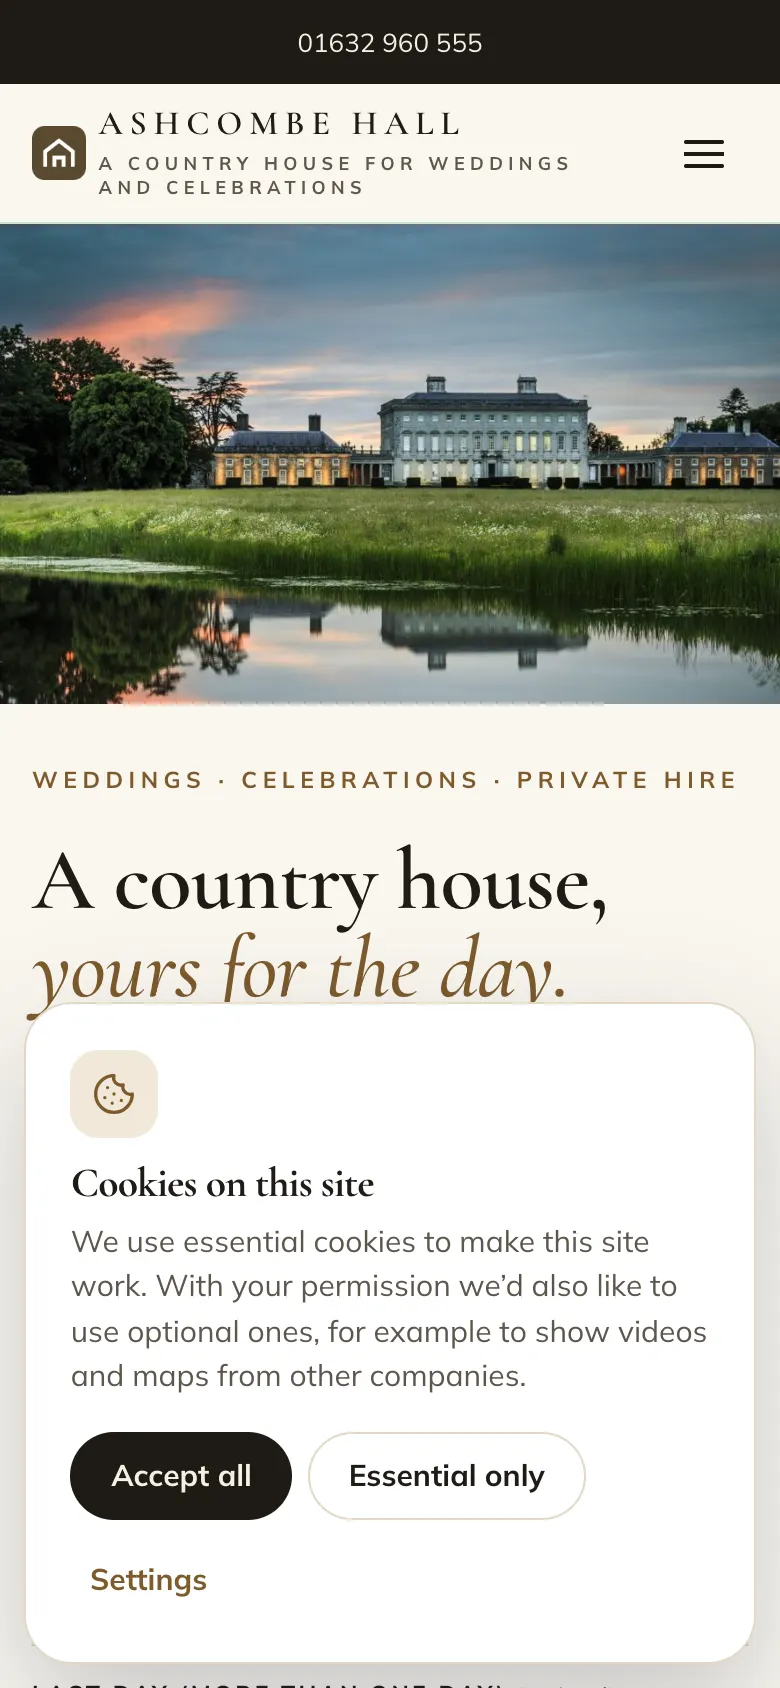
Settings opens Cookie settings, with four kinds of cookie:
- Essential: makes the site work. Always on.
- Preferences: remembers choices such as language or region.
- Analytics: helps you understand how the site is used. (Your website's own visitor counts don't use cookies and are always on.)
- Marketing and embedded content: videos, maps and social media from other companies, such as YouTube or Google Maps.
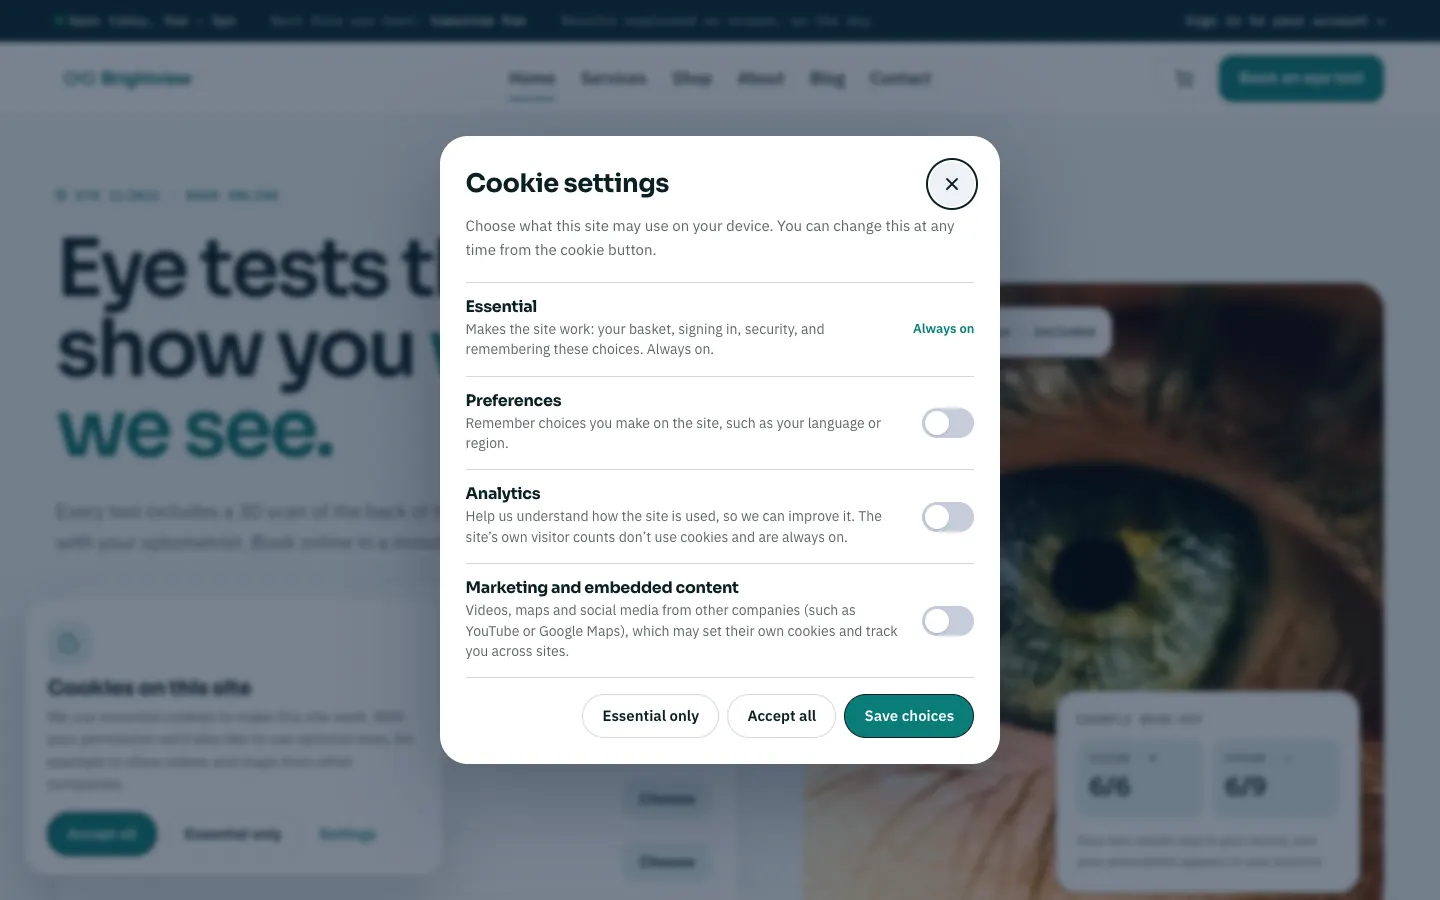
The visitor's choice is kept on their own device for 6 months. Nothing about them is logged on your website.
Changing your mind
After the visitor chooses, a small round cookie button stays at the bottom left of the page, so they can change their choice at any time. The Cookie settings link in your footer does the same.
Where the banner appears
The banner and the cookie button appear on your public pages: the home page, your services or events, your blog and so on. They don't appear on pages where people sign in or do something, which only use essential cookies:
- My account, the basket and the checkout (if you have a shop);
- the page a customer uses to manage or cancel their booking;
- your staff admin area.
The Cookie settings link in the footer still works everywhere.
How to change the banner
- Go to Venue → Settings → Privacy.
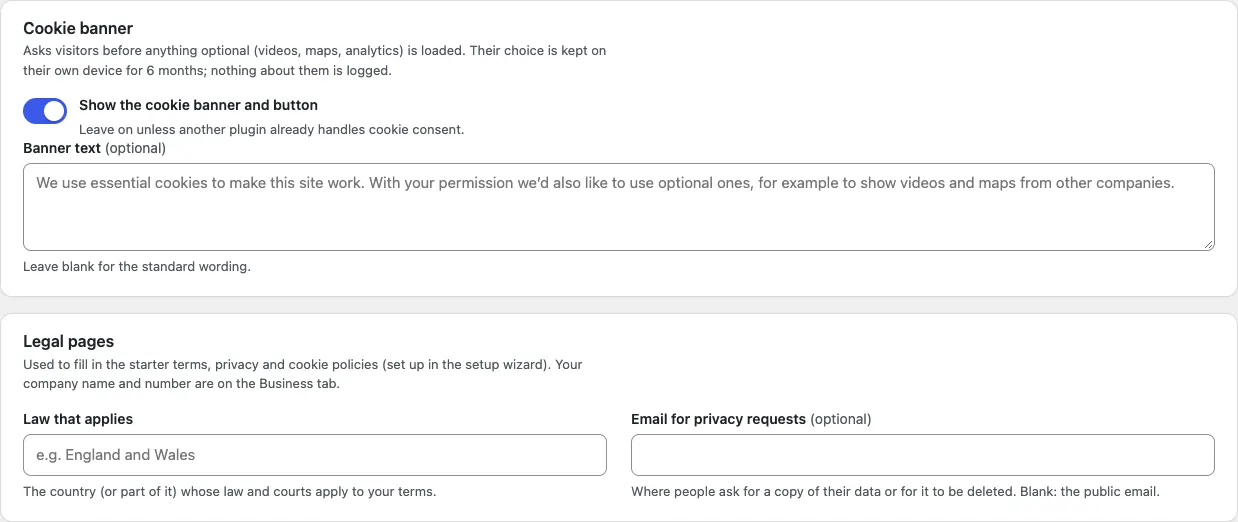
- In the Cookie banner card:
- Show the cookie banner and button: leave this on unless another plugin already handles cookie consent.
- Banner text (optional): your own wording. Leave it blank for the standard wording.
- Click Save changes.
Your legal pages
The setup wizard's Legal pages (drafts) item writes starter pages from your settings:
- Terms and conditions
- Privacy policy
- Cookie policy
- Returns and refunds (if you have a shop)
They're saved as drafts, so visitors don't see them until you publish them. Each one starts with a note: it's a starting point written from your settings, not legal advice. Words in [square brackets] need your details.
How to finish and publish your legal pages
- First, go to Venue → Settings → Privacy and fill in the Legal pages card:
- Law that applies: the country (or part of it) whose law and courts apply to your terms, for example "England and Wales".
- Email for privacy requests (optional): where people ask for a copy of their data or for it to be deleted. Blank: your public email.
- Check your Registered company name and Company number on the Business tab. The legal pages use them.
- Click Save changes.
- If the wizard drafted your legal pages before you filled these in, the pages show placeholders such as [the country whose law applies]. Running the wizard again won't rewrite pages that are already there, so type the details into the pages yourself in the next steps.
- Go to Pages. Open each page marked Draft: Terms and conditions, Privacy Policy and Cookie policy.
- Read it carefully. Change anything that doesn't fit your business, and fill in any [square brackets].
- Click Publish.
Once published, they appear in your footer as Terms, Privacy policy and Cookies.
WordPress's privacy policy page
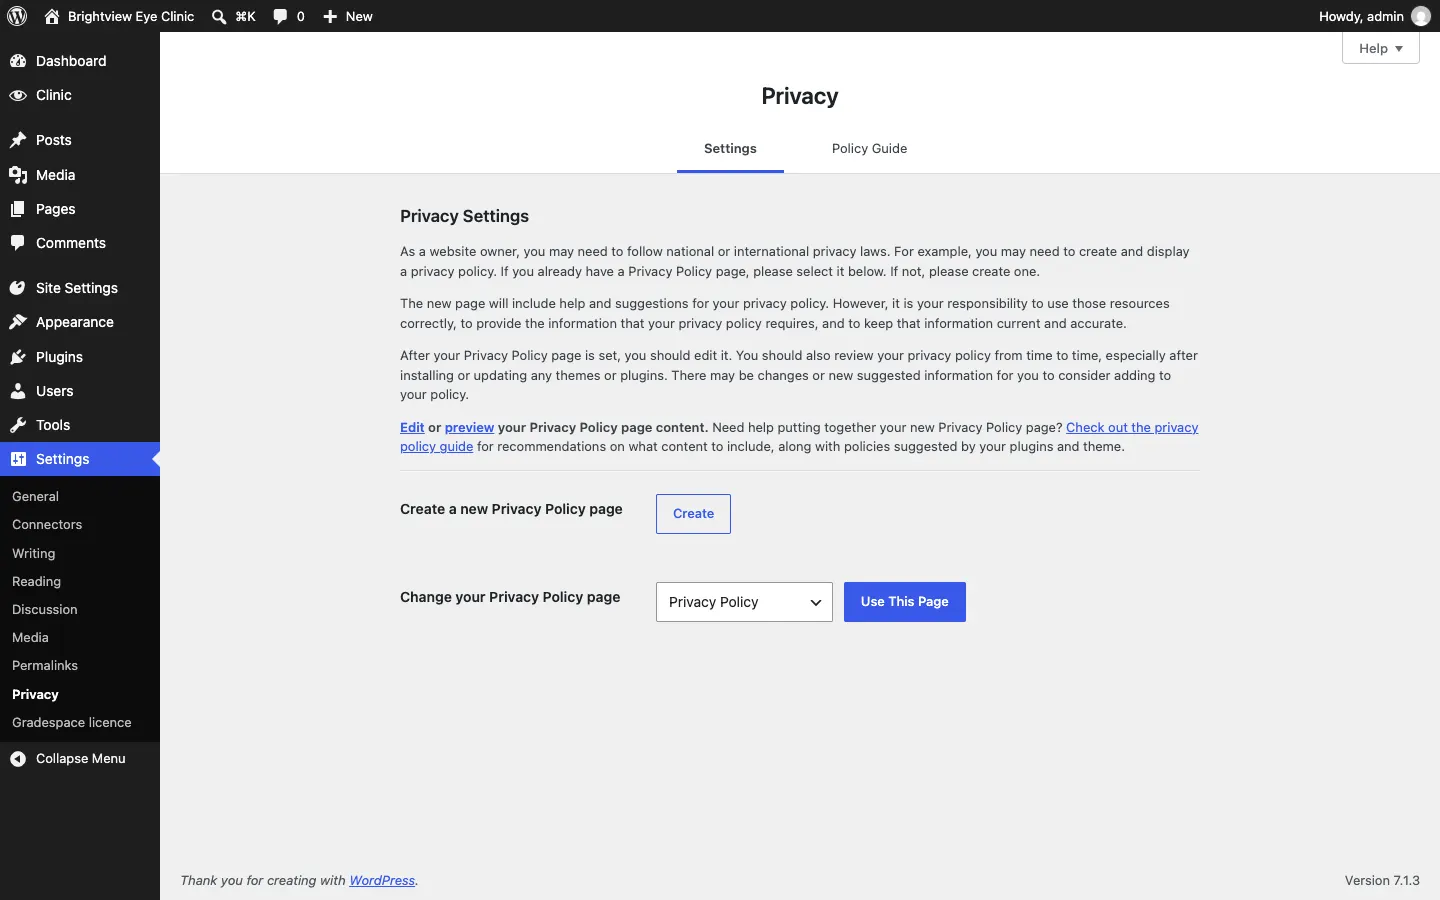
WordPress also keeps track of which page is your privacy policy (it links to it from the sign-in and comment forms). The setup wizard uses that page for your privacy policy. To check, go to Settings → Privacy. Under Change your Privacy Policy page, your privacy policy should be chosen. If not, choose it and click Use This Page.
When someone asks for their data
People can ask you for a copy of the information you hold about them, or ask you to delete it. WordPress has two tools for this, and your kit's records are included in them:
- Tools → Export Personal Data: type the person's email address. WordPress emails them to confirm the request; once they have, you can download or send them a copy of their data.
- Tools → Erase Personal Data: type their email address. Once they confirm, you can remove their personal details.
Some records, such as payments, keep the amounts and dates as financial records but have the name and email removed. Your kit's manual explains how its own records are reviewed and deleted.
The website's emails
Your kit sends emails for you, such as a booking received, a booking confirmed, a reminder the day before or a reply to a contact form message. They're branded with your name, logo and colours. You choose who gets them, who they come from, and which ones are sent.
Go to Venue → Settings → Email.
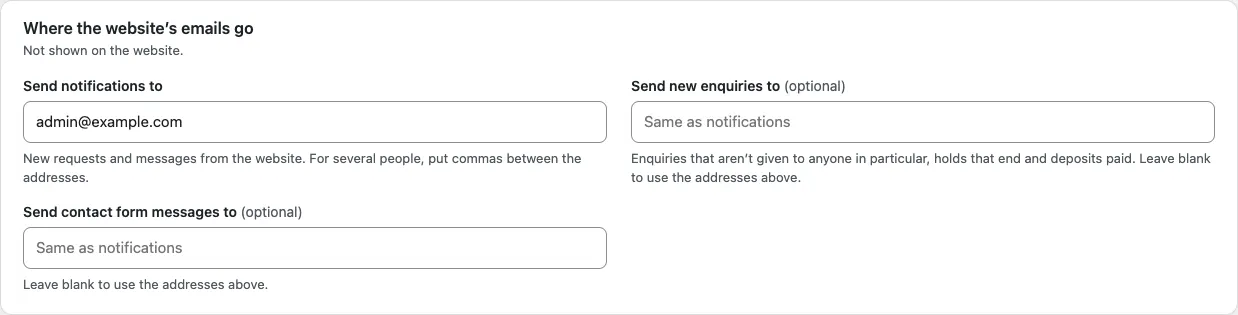
Where the website's emails go
Send notifications to is who on your team gets an email when something happens on the website, for example a new booking request. For several people, put commas between the addresses. This isn't shown on the website.
Next to it, your kit can have its own lists for particular kinds of message, so each one reaches the right people. For example:
- Church: Copy visit requests to and Send prayer requests to;
- Music: Send lesson requests to; Salon: Send new bookings to; Tutor and Driving: Send new bookings and enquiries to;
- Trades: Send new quote requests to; Venue: Send new enquiries to; Charity: Send volunteer sign-ups to;
- Clinic: Send shop orders and payment proofs to; Group: Send “Not sure” enquiries to (the group office) and Send the low-stock list to;
- every kit: Send contact form messages to.
Each list is (optional): leave it blank and those emails go to the Send notifications to addresses. Put commas between several addresses.
Who emails come from
- From name (optional): the name people see in their inbox. Leave it blank to use your trading name.
- From email (optional): use an address on your website's own domain (for example noreply@yourbusiness.co.uk), otherwise Gmail and others may put your emails in spam. It doesn't need to be a real mailbox.
- Replies go to (optional): where replies go when someone presses Reply. Leave it blank to use your public email.

Which emails are sent
Each email has its own switch. Switch one off if you don't want it sent. The list depends on your kit; your kit's manual describes each one.
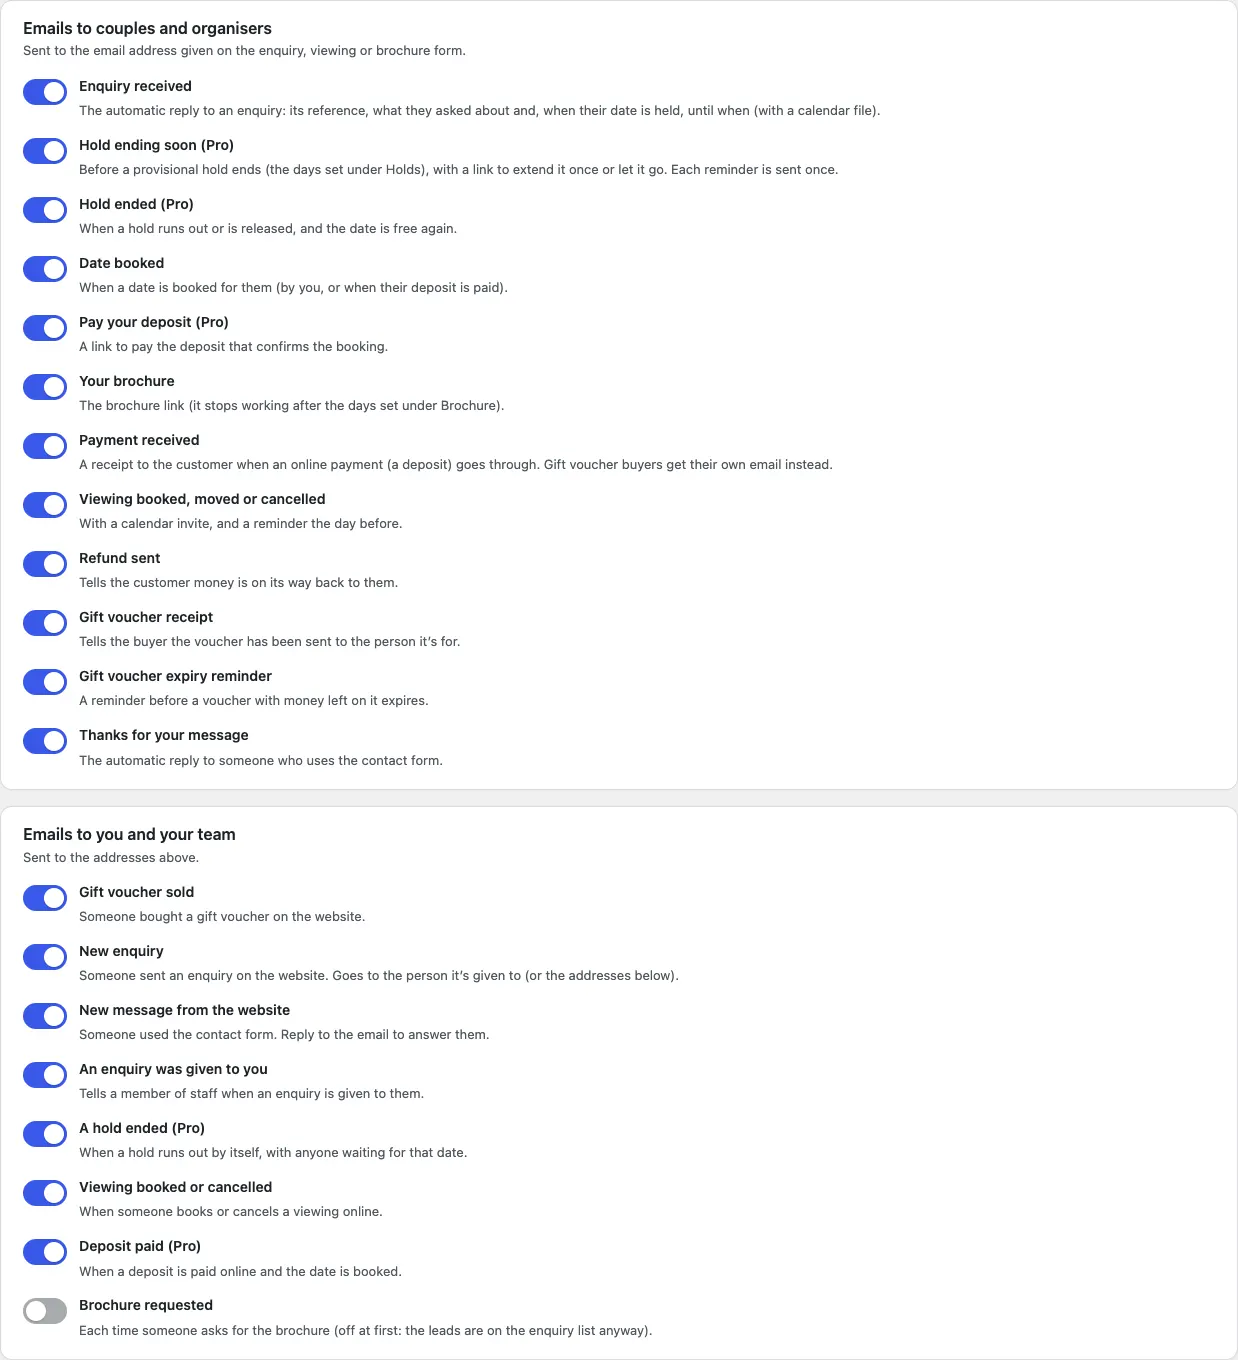
Click Save changes at the bottom when you've finished.
If emails aren't arriving: SMTP
Normally your web host sends the website's emails. If they don't arrive, you can send them through a real mailbox instead, for example one set up with your host or Gmail with an app password. Open Advanced: send through an email account (SMTP) and fill in the details your email provider gives you: Send through this email account, Outgoing mail server, Port, Encryption, Username and Password. Most businesses can leave this off.

See also Emails aren't arriving.
How to send a test email
- Go to Venue → Settings → Email and save any changes first: the test uses the saved settings.
- Scroll to Send a test email.
- In Send it to, type an address you can check, ideally a Gmail address.
- Click Send a test email.

The screen says "Test email sent to … If it hasn't arrived in a few minutes, check the spam folder." If it can't be sent, it says "The test email to … couldn't be sent." and shows what the mail system said.
The email log (Pro)
The Email log, at the bottom of Settings → Email, lists every email the website tried to send, newest first: when, what, who to, and whether it was sent. Only administrators can see it, because it shows people's email addresses. Entries are deleted after 90 days.
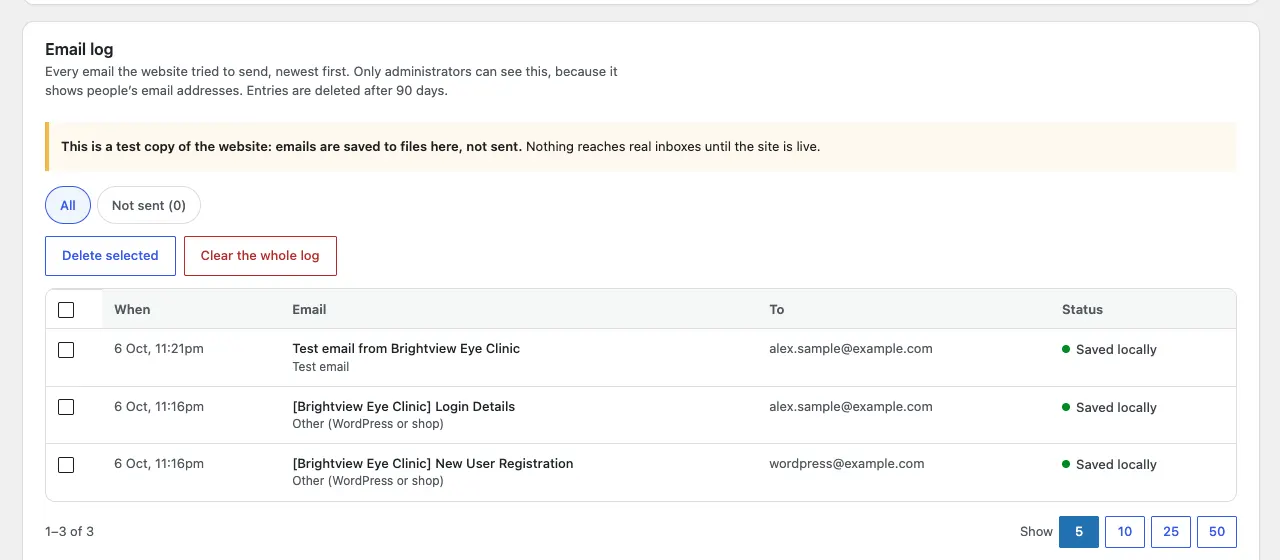
- Sent means the email left the website. It can still land in a spam folder. If someone says they didn't get one, ask them to check there.
- Not sent means it couldn't be sent. Click Not sent to see only those.
- Saved locally appears on a test copy of your website, where emails are saved instead of sent.
- To tidy the log, tick emails and click Delete selected, or click Clear the whole log.
When emails fail, a panel on your Today screen says "Some emails couldn't be sent — check Settings → Email.", with an Open email settings button. That warning shows on every tier.
Without Pro, emails are still logged in the background, and the log appears as soon as a Pro licence is active.
Related chapters
- Staff accounts and signing in: who can see what.
- Your kit's manual: its own emails and how its records are reviewed.