Getting started
Quick start
One checklist from buying the Venue kit to your first booked date, with a link to the chapter that explains each step.
On this page
This page is a checklist. Work down it in order. Each step links to the chapter with the full instructions, so you can come back here and tick it off.
Features marked (Pro) need a Pro or Agency licence.
1. Buy and get ready
- Buy the kit and keep the receipt email: it holds your licence key. See Buying and your licence.
- Check your hosting, and make a backup if the website already has content. See Before you install.
2. Install the three parts
- Install Gradespace Core first, then the Gradespace Venue plugin (a plugin is an add-on for WordPress), then the Gradespace Venue theme. Leave the files as .zip files. See Installing.
- Add your licence key under Settings → Gradespace licence and click Activate. That switches on updates and, with a Pro licence, the Pro features.
3. Run the setup wizard
- The wizard opens by itself after installing. It asks about your venue and its spaces, enquiries and holds, and viewings.
- Tick Starter pages and menu to get Home, Spaces, Dates, Prices, Gallery, Suppliers, Viewings, Brochure, Enquire and Contact pages and the main menu.
- Tick Sample photos if you'd like to start with the theme's photos while you gather your own.
See The Venue setup wizard. You can run it again later from Venue → Settings → Run setup again; it never adds anything twice.
4. Make it look like your venue
- Choose a design (Estate, Loft or Garden) and a colour palette under Site Settings → Design & colours. See Designs, pages and menus.
- Add your logo, name, address, phone and email under Venue → Settings → Business and Contact. See Your look.
5. Tell the website about your venue
- Venue → Settings → Your venue: the kinds of event you take, whether one event takes the whole venue, how many dates one enquiry may cover, your parts of the day and the days you're closed. See Availability and the diary.
- Venue → Spaces: open each space, check its capacities and add photos. See Spaces.
- Venue → Price guide and Venue → Packages: your prices, so people see an estimate as they enquire. See Packages, the price guide and estimates.
- Venue → Settings → Viewings: your viewing hours. Until you set them, the Viewings page says there are no times free. See Viewings and open days.
- Venue → Settings → Brochure: upload your brochure PDF. See Gallery, suppliers and the brochure.
6. Set up enquiries, holds and payments
- Venue → Settings → Enquiries: your reference letters (such as WH-), budget bands and who gets new enquiries. See Enquiries.
- Venue → Settings → Holds (Pro): how long a hold lasts and when reminders go. See Holds.
- Venue → Settings → Deposits (Pro), after payments are set up: take deposits online. See Deposits and payments.
- Venue → Settings → Email: where the website's emails go. Send yourself a test email. See Privacy and emails.
7. Add your team
Give each person their own account, with the role that fits their job: Events manager sees every enquiry and the diary, Event coordinator sees only the enquiries given to them. See Staff and signing in.
8. Take your first booking
-
Try it yourself as a customer: on the Enquire page, choose a date, fill in the four steps and send it. See Enquiries.
-
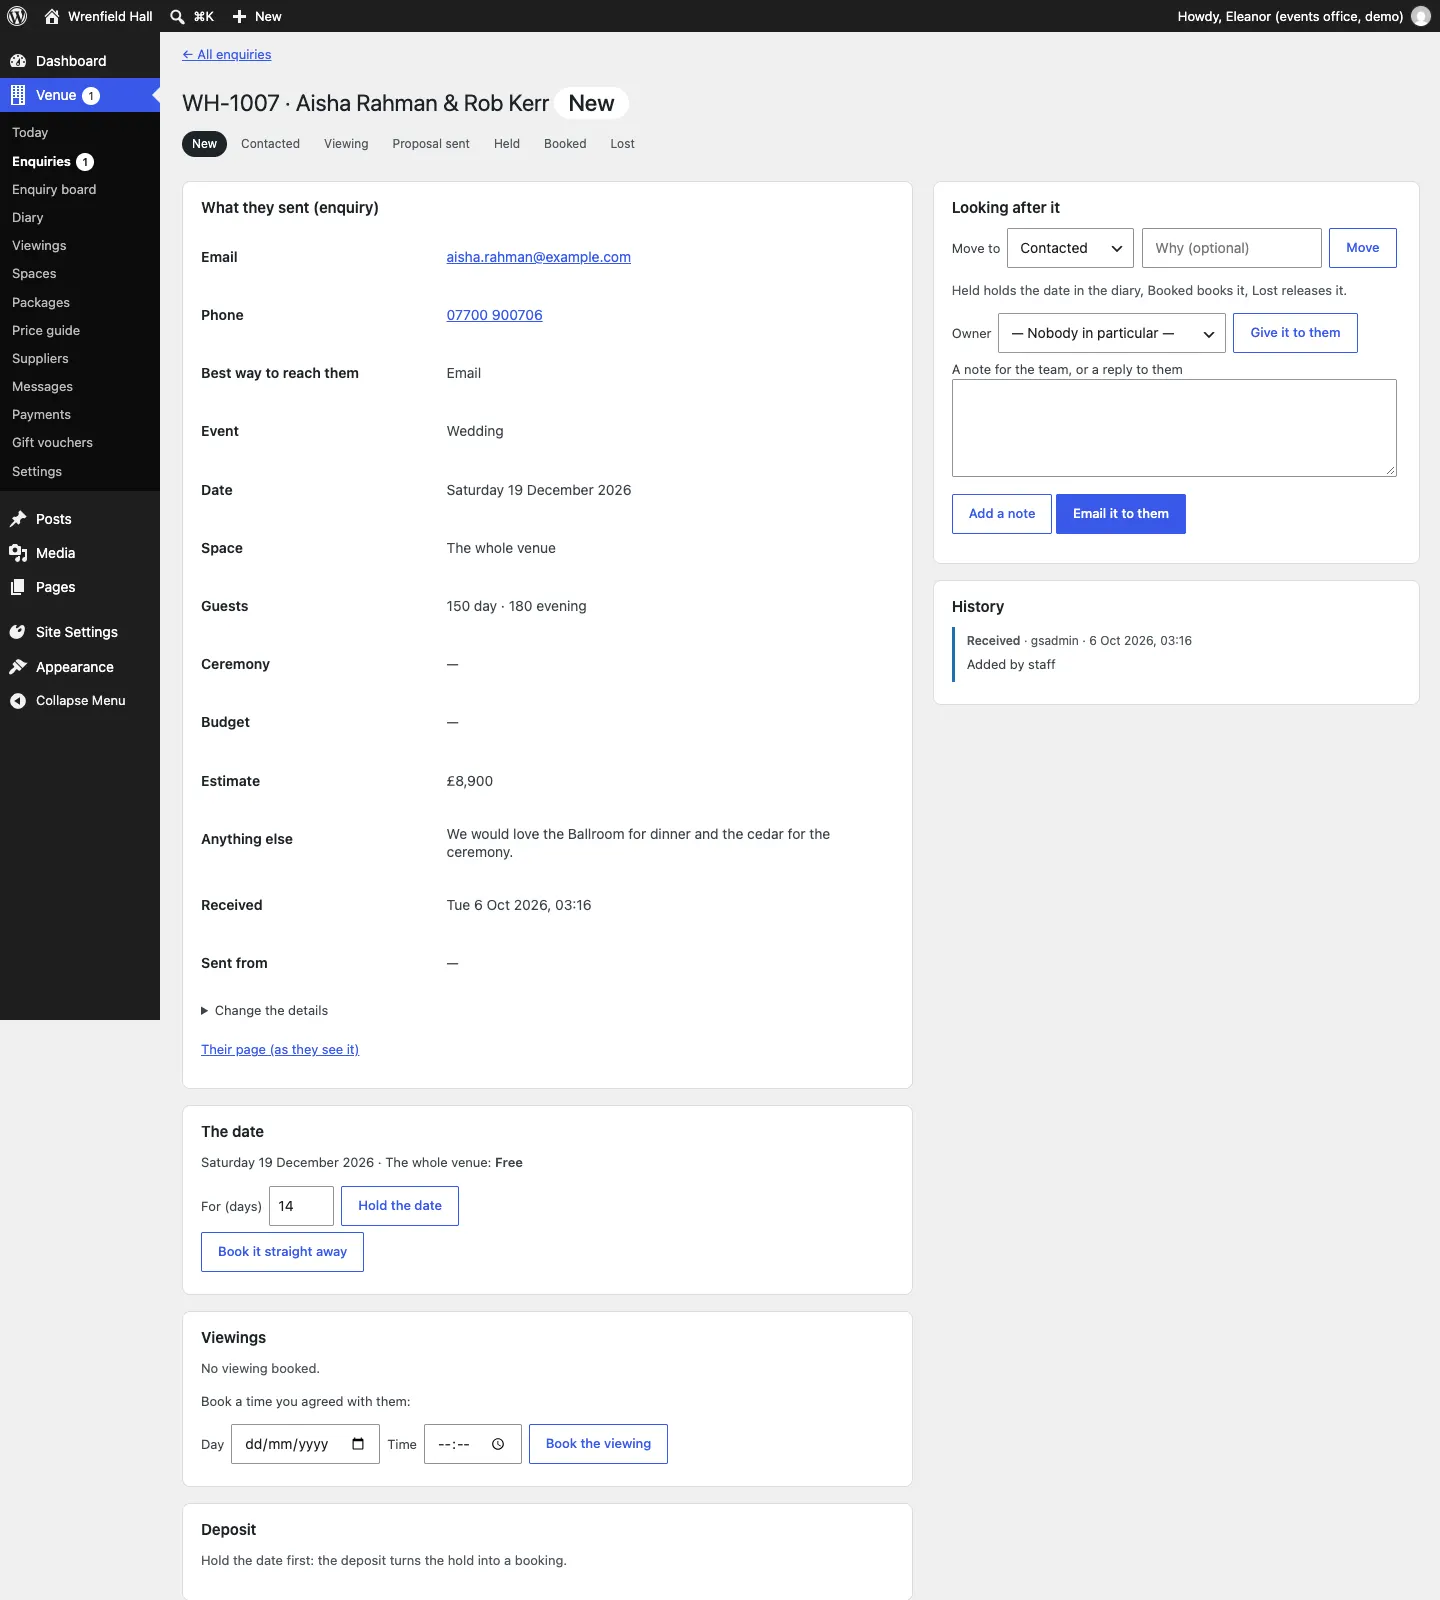
Sign in and open Venue → Today. Your enquiry is under New enquiries.
-
Open it. In The date, click Hold the date while they decide, or Book it straight away. See Bookings.
-
When they've signed and paid, click Book the date (or let the deposit book it for you (Pro)). The date turns to Booked on the website.
-
Delete or mark your test enquiry as Lost so the date comes free again.
9. Every day after that
Start each day on Venue → Today. See Daily running and settings.